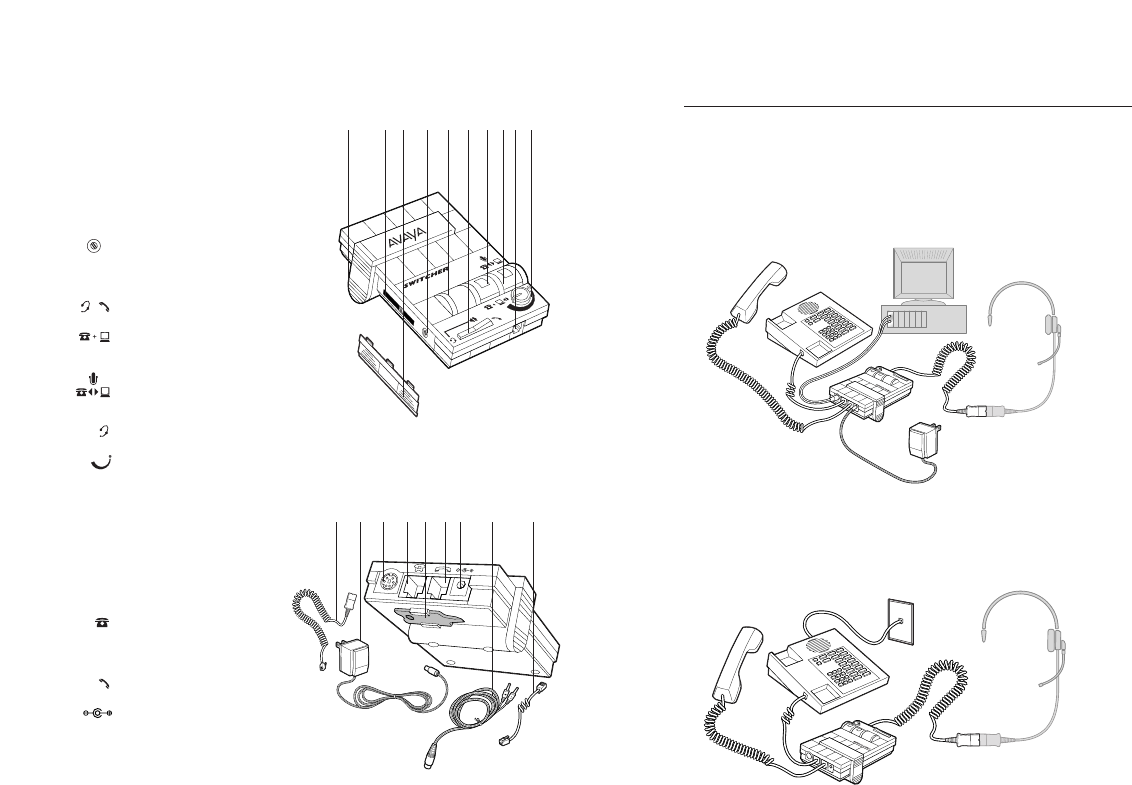
1 Amplifier to QD Coil Cable
2 AC Power Supply
3 External Audio Device Jack
(Mini-DIN)
4 Telephone Line Jack
5 Screwdriver
6 Handset Jack
7 AC Power Supply Jack
8 Audio Device Cable
9 Amplifier to Telephone Coil Cable
iv englishiv v
Connect the Switcher Multimedia Amplifier to your telephone and
computer or audio device as shown. Follow the five easy steps on
the following pages for complete installation details.
If you are not using the Switcher Multimedia Amplifier with a
computer or other external audio device, connect the Switcher
amplifier to your telephone as shown. Follow the first four easy
steps on the following pages for complete installation details.
english
1 2
4
567
8
9
Headset Switcher
™
Amplifier
1 Battery Access Door
2 Telephone/Amplifier
Compatibility Slide Switch
3 Telephone/Amplifier
Compatibility Slide Switch Cover
4 Outgoing Volume Control
5 Incoming Volume Thumbwheel
6 Headset/Handset Selector
7 Telephone/Computer Audio
(controls direction of incoming sound)
8 Microphone Selection
(controls direction of microphone)
9 Headset Jack
10 External Audio Device Incoming
Volume Control
installation
overview
+
_
1
2
1
2
3
1
6
5
4
3
2
–
+
6
5
4
3
1
2
3456
7
8 910


