®
Self Help Guide
TSG-UK-1-001 | www.belkin.com | Page 1 of 1
®
Self Help Guide
Pro 2 KVM Firmware Update Instructions
TSG-UK-2-001 | www.belkin.com | Page 2 of 4
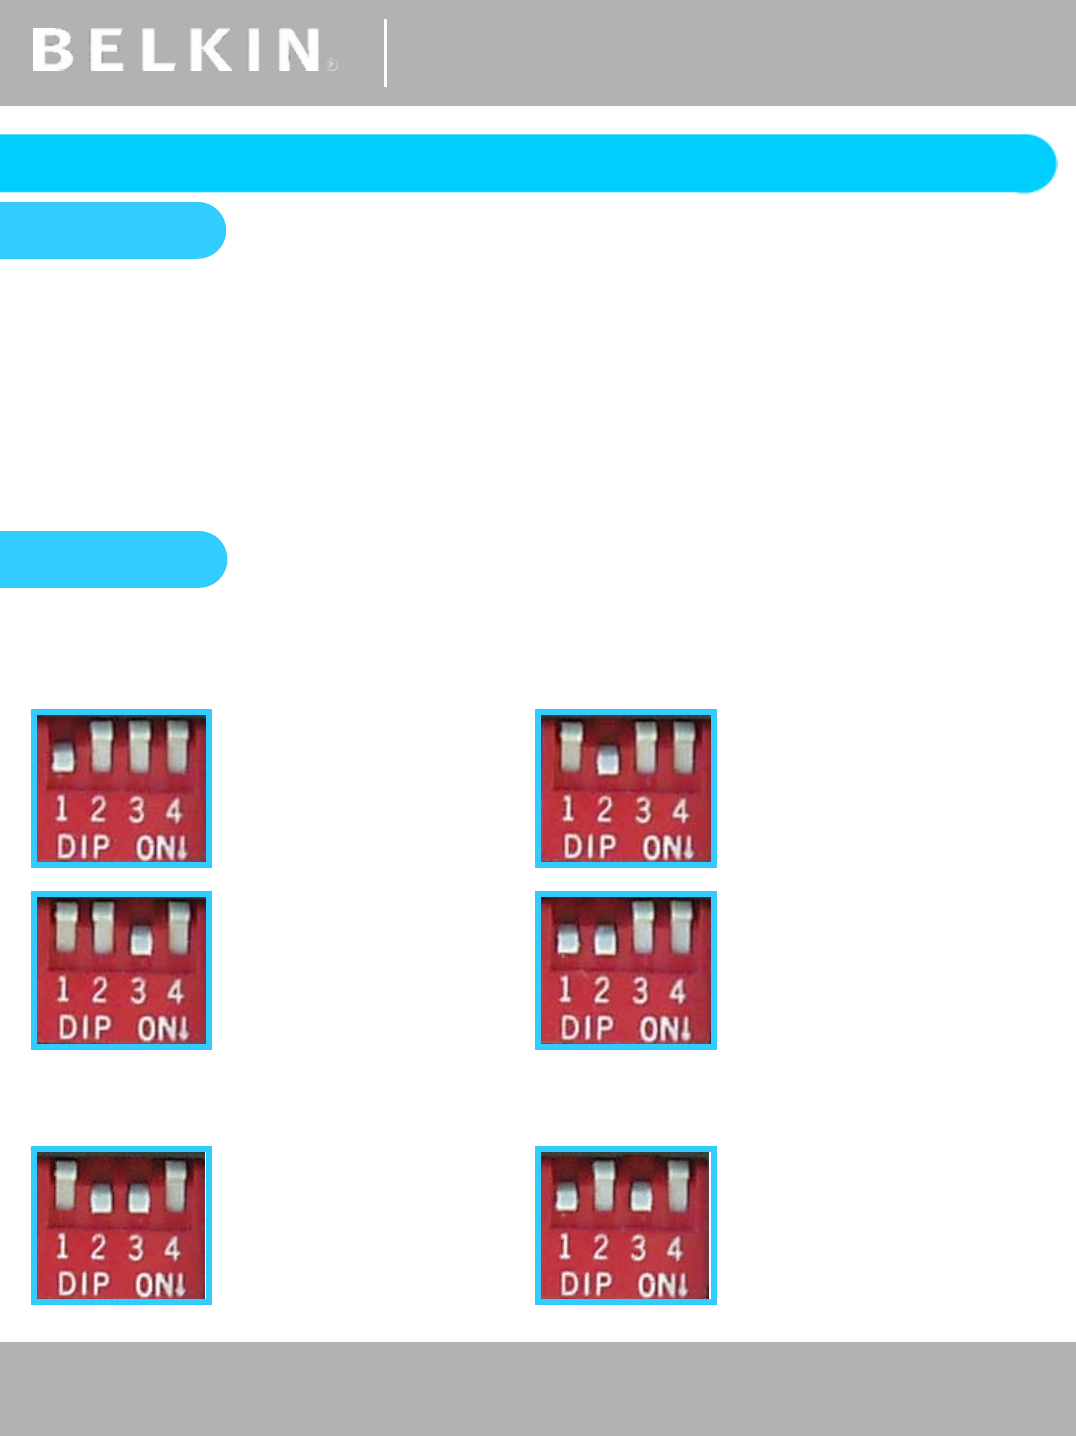
OSD |
For firmware specifically
designed to resolve On-
Screen Display Issues.
KEYBOARD | #1
For firmware specifically
designed to resolve
Keyboard related Issues.
MOUSE | #1
For firmware specifically
designed to resolve
Mouse related Issues.
MAIN |
For firmware specifically
designed to resolve On-
Screen Display Issues.
KEYBOARD | #2
For firmware specifically
designed to resolve
Keyboard related Issues.
F1DA116T Only
MOUSE | #2
For firmware specifically
designed to resolve
Mouse related Issues.
F1DA116T Only
Step 1
Before proceeding with the Firmware Update you will need to ensure that the Computer
being used for the update process is ready. If you are running Windows 2000 or XP you
will need to install an NT Direct Port Access Update prior to running the Flash Update.
The NTPDA.exe file Update Utility can be downloaded from the same location as the
Firmware Update files. Once downloaded, the file should be unzipped and the
‘Setup.exe’ file run in order to install. You will be prompted to reboot your system to
complete the process.
Step 2
Disconnect any Computers from the KVM then power it on. Set the Dip Switches
according to the Firmware about to be used. The Pro 2 KVM has four flash Dip
Switches. Listed below are the appropriate dipswitch settings for each Firmware type.
16-Port Pro 2 KVMs have two sets of Mouse and Keyboard Firmware and each needs to
be flashed separately. The same Firmware is flashed twice in effect.


