


6
INSTALLATION
6
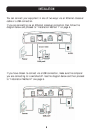
Installation Method 1 - Ethernet
1. Make sure that the computer that you are connecting to is powered off.
2. Connect one end of the Ethernet crossover cable to your Modem’s Ethernet
port; connect the other end to your computer’s Ethernet port.
3. Connect the RJ11 phone line provided for ADSL into the line socket in
the Modem.
4. Connect the power cord to the Modem and power on the Modem; wait 20
seconds for the Modem to initialise, then boot up your computer.
5. Open your web browser and type in the default IP address of the Modem to
the address bar—IP address: 10.0.0.2 (see image on the top of next page).
6. Proceed to “Modem Configuration” on page 7.
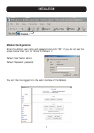
Installation Method 2 – USB
1. Make sure that the computer that you are connecting to is powered off.
2. Insert the rectangular end of a USB cable into a USB port on your PC.
3. Insert the square end of the USB cable into the USB port of the Modem.
4. Connect the RJ11 phone line provided for ADSL into the line socket in
the Modem.
5. Connect the power cord to the Modem and power on the Modem; wait 20
seconds for the Modem to initialise, then boot up your computer.
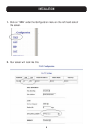
6. Your PC will automatically detect this Modem as “USB Net Card”.
7. Insert the bundled USB driver CD into the CD-ROM drive and follow the
on-screen instructions to install the USB Modem drivers.
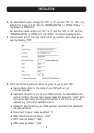
8. After installation, the Modem will be installed as “USB Network Adapter”
within the Device Manager of Windows. You will be required to reboot your PC
before continuing.
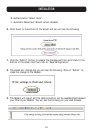
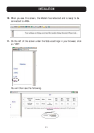
9. Open your web browser and type in the default IP address of the Modem to
the address bar—IP address: 10.0.0.2 (see image on the top of the
next page).