


If for some reason your first installation attempt is unsuccessful, we
suggest you try the following procedure:
1. Unplug the Belkin USB Parallel Printer Adapter from
your PC.
2. Click on the Start menu located at the bottom left comer of your
screen then settings to, Control Panel. Double click on
add/remove programs.
3. Look for, “Belkin USB Parallel Printer Adapter software.
4. Click on the Adapter and then click on Remove., then done.
Overview
Installation of the Belkin USB Parallel Printer Adapter
involves 10 easy steps to connect the adapter to your
computer. Each step is explained in detail in the following
section entitled “New Installation". If the Belkin USB Parallel
Printer Adapter has never been installed on the PC before,
then go to the following NEW INSTALLATION section. If
an installation has been completed or attempted previously,
then follow the instructions in the OVERWRITE PREVIOUS
INSTALL section followed by the instructions in the NEW
INSTALLATION section.
NEW INSTALLATION
1.
First install your printer on the parallel port like a
normal printer installation.(LPT1)
2. When you turn on your computer. Make sure the Belkin USB
Parallel Printer Adapter is NOT plugged into your PC.
3. Turn on your PC and wait until your system has completely
booted.
4. Locate the USB Parallel Printer Adapter installation Disk and
insert it into the floppy drive.
5. Turn on your printer and plug the Belkin USB
Parallel Printer Adapter
into your printer.
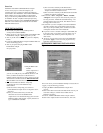
6. Plug the Belkin USB
Parallel
Printer Adapter into a
free USB port on
your PC, or a USB port on your USB hub. Windows" will
inform you that it has detected new hardware and is
installing software support for it. It may prompt you for the
Windows® 95 or Windows® 98 CD. DO NOT insert this
CD. The Belkin disk will work to complete the installation.
7. The "Add New Hardware Wizard" will prompt
you through the next several installation steps
outlined below:
a) The first window will prompt you to search for
the Parallel Printer Adapter drivers. To begin the search,
click Next.
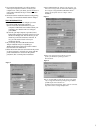
b) Next, you will be asked where you would like
Windows® to search for the Parallel Printer
Adapter drivers. The default is the floppy drive and CD-
ROM drive. Put a check mark on, “Specify location and
type,
a:\win98 or a:\win95
c
) The next window will tell you that Windows® is
now ready to install the best drivers for the Parallel Printer
Adapter. Click Next to install the drivers.
d) The next window will tell you that Windows® has finished
installing the software. Click Finish.
8. Then click on, “Start”, “Programs”, “Belkin”, “F5U002”,
“Changebi”. In the drop down menu choose the printer you
are using and select, “Disable Bi-directional Printing”. The
computer will then ask you to reboot, click Yes and remove
the floppy disk from the drive.
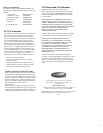
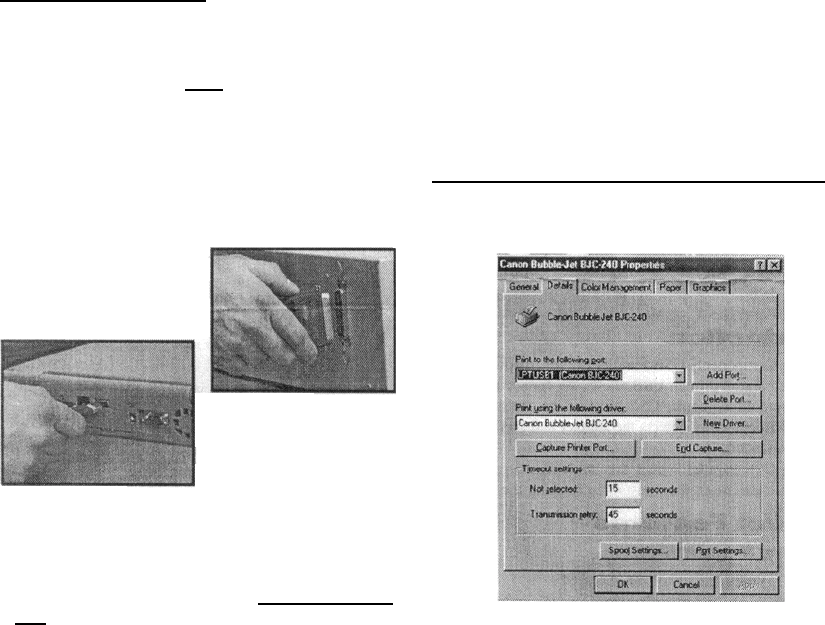
9. To determine if you have completed a successful installation,
open My Computer, then open the Printer folder and right
click on your newly installed printer. Scroll down and click
on Properties and then click on the Details tab.
10. If you have a screen consistent with Figure 1 (LPTUSB1) but
it shows the name of your printer next to the printer icon, (it
will sometimes state, unknown printer if the printer is an
older model)
11. If not use your drop down menu to choose the (LPTUSB1)
port and then Apply. You are now ready to print from any
application within Windows® 98.
OVERWRITE PREVIOUS INSTALLATION
Figure 1
2