


9
HARDWARE INSTALLATION
8
HARDWARE INSTALLATION
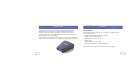
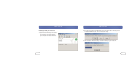
Installing the USB Printer
Please do not connect any devices other than a USB printer directly to the USB port of
the Adapter.
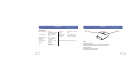
1. With the printer powered off, connect one end of a standard USB cable to the USB
B-type connector of your USB printer and connect the other end to the USB type A
printer connector on the Adapter.
Note: You must have the printer driver installed in each computer you wish to print from
prior to use. Go to the Control Panel in Windows and open the “Printers” folder. Select
“Add a Printer” and choose a “Local Printer” (not network printer or USB printer). Then
select the “Bluetooth Port” as its’ port.
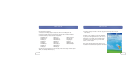
2. Connect the included power adapter into an available power outlet. Attach the barrel
plug into the power jack of the Adapter. You should see the Bluetooth and USB LED
blink rapidly for three seconds and then the USB (Amber) LED will remain blinking.
3. Power on the connected USB printer.
Your Bluetooth Wireless USB Printer Adapter is now installed and ready for use.
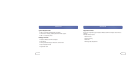
Connecting Via Serial Port Profile
The method of connecting to the printer described below is for use of the Serial Port
Profile. For example, using the Bluetooth PC Card (part number F8T002), or the
Bluetooth USB Adapter (part number F8T001 or F8T003) from Belkin on Windows or
devices that use WIDCOMM BTW software.
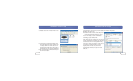
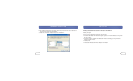
1. Double-click on the Bluetooth icon on
your desktop.
2. Choose Bluetooth from the menu bar.
Click “Search for devices”. The “Belkin
USB Printer” icon should appear.
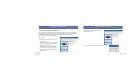
3. Double-click on the icon. You should
see “Discovering Services”. Icons will
appear symbolizing the services your
device offers.