6 How to install your monitor hardware
How to install your monitor hardware
If the computer is turned on you must turn it off before continuing.
Do not plug-in or turn-on the power to the monitor until instructed to do so.
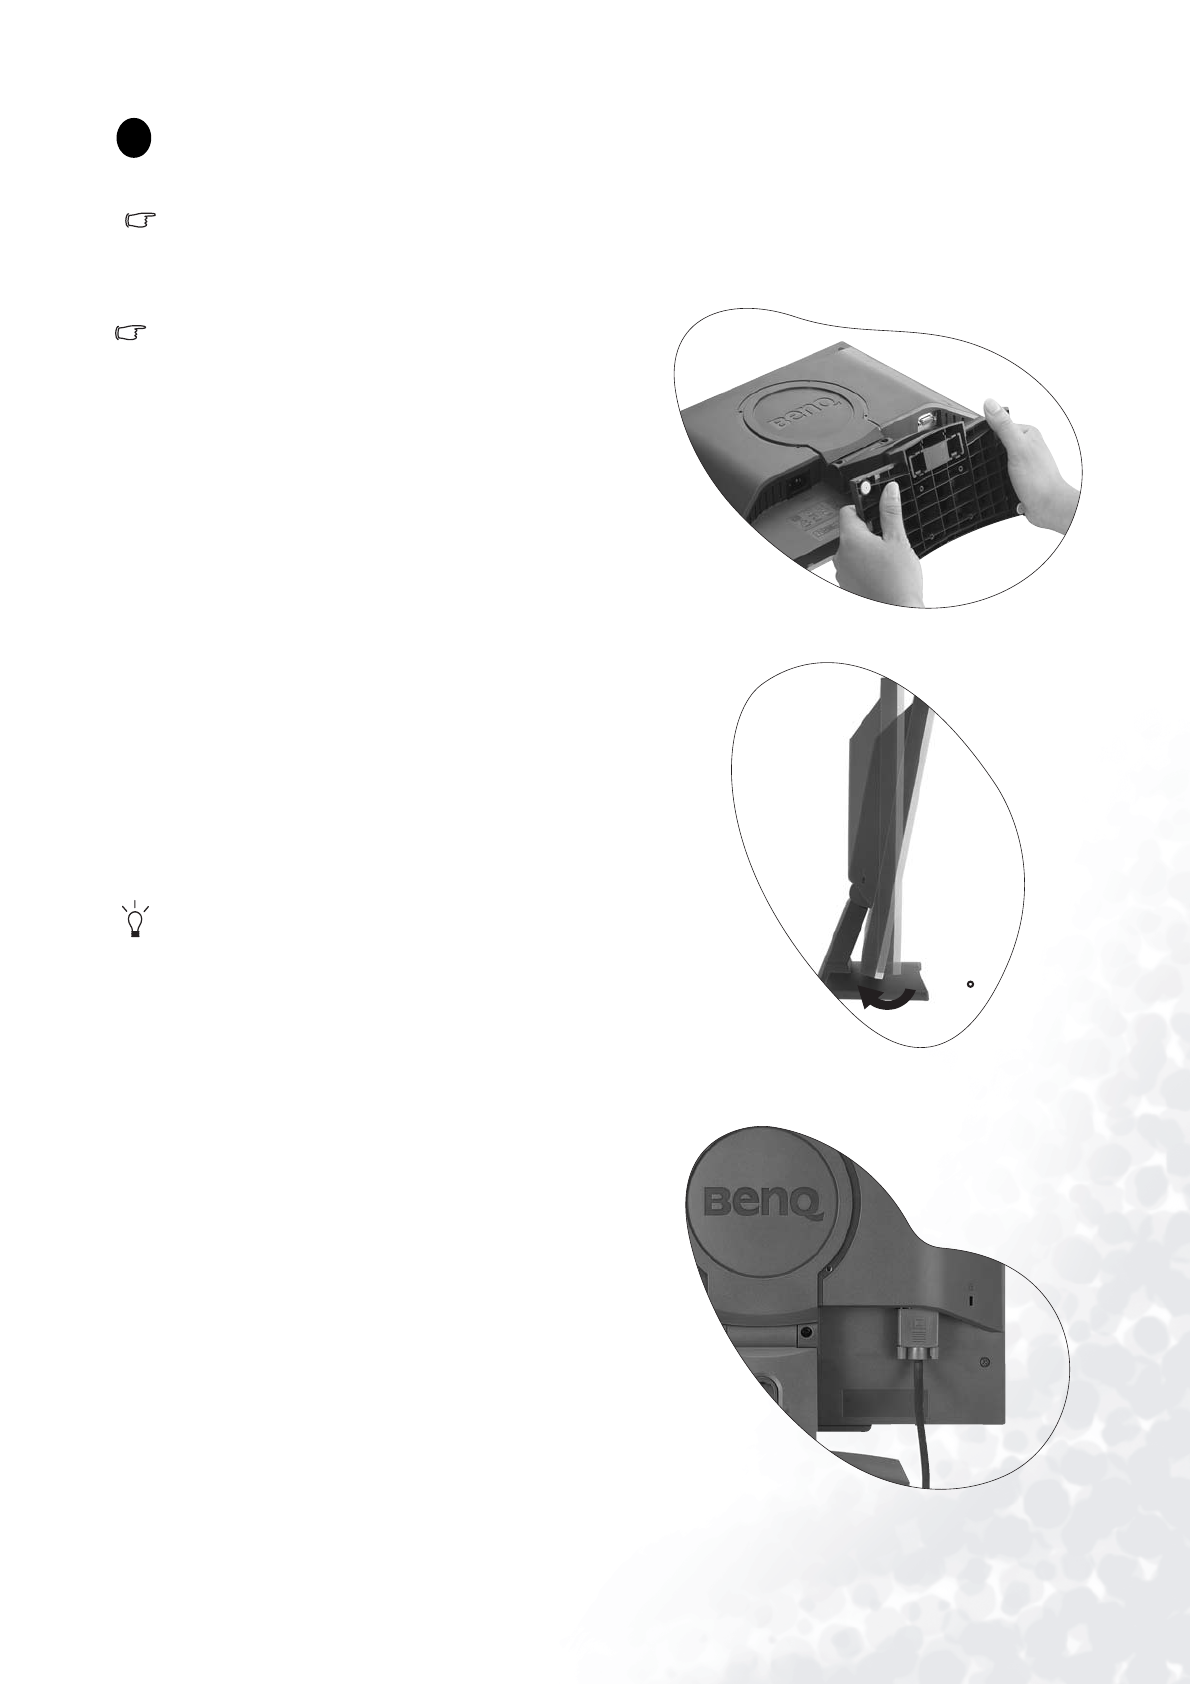
1. Attach the monitor base.
Please be careful to prevent damage to the monitor.
Placing the screen surface on an object like a stapler
or a mouse will crack the glass or damage the LCD
substrate voiding your warranty. Sliding or scraping
the monitor around on your desk will scratch or
damage the monitor surround and controls.
Protect the monitor and screen by clearing a flat open area
on your desk and placing a soft item like the monitor
packaging bag on the desk for padding.
Lay the screen face down on a flat clean padded surface.
Whilst holding the monitor firmly against the desk, pull
the monitor stand arm upwards clear of the monitor.
Orient and align the stand base socket with the end of the
stand arm, then push them together until they click and
lock into place.
Gently attempt to pull them back apart to check that they
have properly engaged.
Carefully lift the monitor, turn it over and place it upright
on its stand on a flat even surface.
You should position the monitor and angle the screen
to minimize unwanted reflections from other light
sources.
2. Connect the video cable.
Connect the plug of the D-Sub cable (at the end without
the ferrite filter) to the monitor D-Sub socket. Connect the
other plug of the D-Sub cable (at the end with the ferrite
filter) to the computer video D-Sub socket.
Tighten all finger screws to prevent the plugs from acci-
dently falling out during use.
1
1
1
3
-5


