


9
CHAPTER 1: Quick Start Guide
1. Quick Start Guide
When you configure the ServSwitch™ Brand CAT5 KVM Micro Extender, you only
need to answer two questions:
• How far will the CAT5 cabling run between the Extender’s Local and Remote
Units? If it will be 25 m (80 ft.) or less, you don’t need to set anything. If it will
be 25 to 50 m (80 to 160 ft.), move DIP-switch position 1 on the bottom of the
Remote Unit to the DOWN (ON) setting.
• ACU3001A or ACU3009A: Do you need [Scroll Lock] for anything?
ACU3022A: Do you need right-[Ctrl] for anything?
If not, you can use this key to command the Extender, and you don’t need
to set anything. If you need this key to control your hardware or software, or if
your keyboard doesn’t have this key, move DIP-switch position 2 on the bottom
of the Remote Unit to the DOWN (ON) setting.
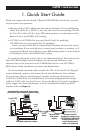
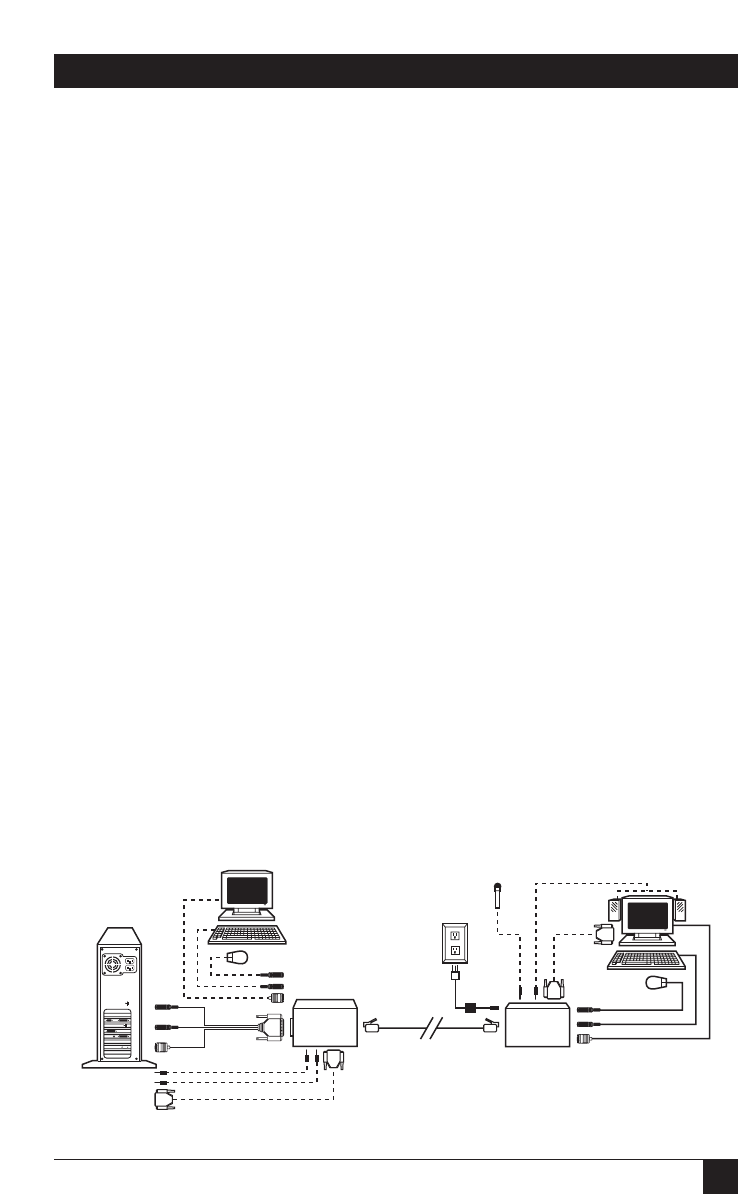
To install your Extender system, refer to the illustration below. The elements of a
basic ACU3001A Single-Access installation are shown with solid lines; extra
elements that can be present in an ACU3009A Dual-Access or an ACU3022A
KVM/Serial/Audio installation are shown with dashed lines.
Use the included extension cable to attach the CPU to the Local Unit. Plug the
remote keyboard, monitor, and mouse directly into the Remote Unit. In Dual-
Access systems, plug the local keyboard, monitor, and mouse directly into the
Local Unit. Connect the Local and Remote Units with straight-pinned four-pair
solid-core CAT5 cable (not Level 6, etc.). Power the Remote Unit with its included
power supply. For more information, or if your installation includes any KVM
switches, refer to Chapter 6.
Remote monitor,
keyboard, mouse, and
(ACU3022A KVM/Serial/
Audio systems only)
serial touchscreen,
mike, and speakers
Local monitor, keyboard, and mouse
(ACU3009A Dual-Access systems only)
Local CPU
Local
Unit
CAT5
cable
Included extension cables
Remote Unit
and power
supply