


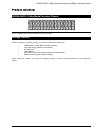


16-Bay Media Converter Chassis
10 User’s Manual
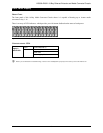
Deciding How to Install the System
We strongly suggest that you install the chassis first, as this is more convenient for you to install media converters
into the chassis with ease. The accessories supplied in the product package includes: rackmount screws, rackmount
brackets, and bracket screws.
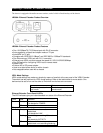
This well-built chassis can be installed in the following ways:
MOUNTED TO 19-INCH STANDARD RACK
Use the rackmount brackets and screws to install the chassis into any EIA 19” standard rack.
Step 1: Attach the brackets to each side of the chassis. Apply screws to each side and secure them tightly.
Step 2: Carefully position the chassis into the rack. Align the brackets to the side holes on the rack and use rack screws to secure
the chassis with the rack.
Step 3: Proceed to the “Connecting to Power” section.
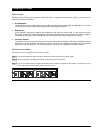
DESKTOP OR ANY FLAT SURFACE
The chassis can sit on desktop or any flat surface with adequate space and ventilation. If you want to place it onto a
shelf, make sure the shelf can withstand a minimum weight of 10kg.
Step 1: Simply put the chassis on the desired place.
Step 2: Ensure the chassis receives good ventilation.
Step 3: Proceed to the “Connecting to Power” section.