


3
Installation S19-220DCPT
Bradley Corporation • 215-1255 Rev. D; EN 06-532G 4/30/07
Installation Instructions
NOTE: Flush the water supply line
before beginning installation.
Supplies Required:
• (3) 3/8" wall fasteners and bolts
• Pipe sealant
• Piping to 1/2" IPS water supply inlet
on unit
• Sign-mounting hardware
Step 1: Install inlet drain fittings
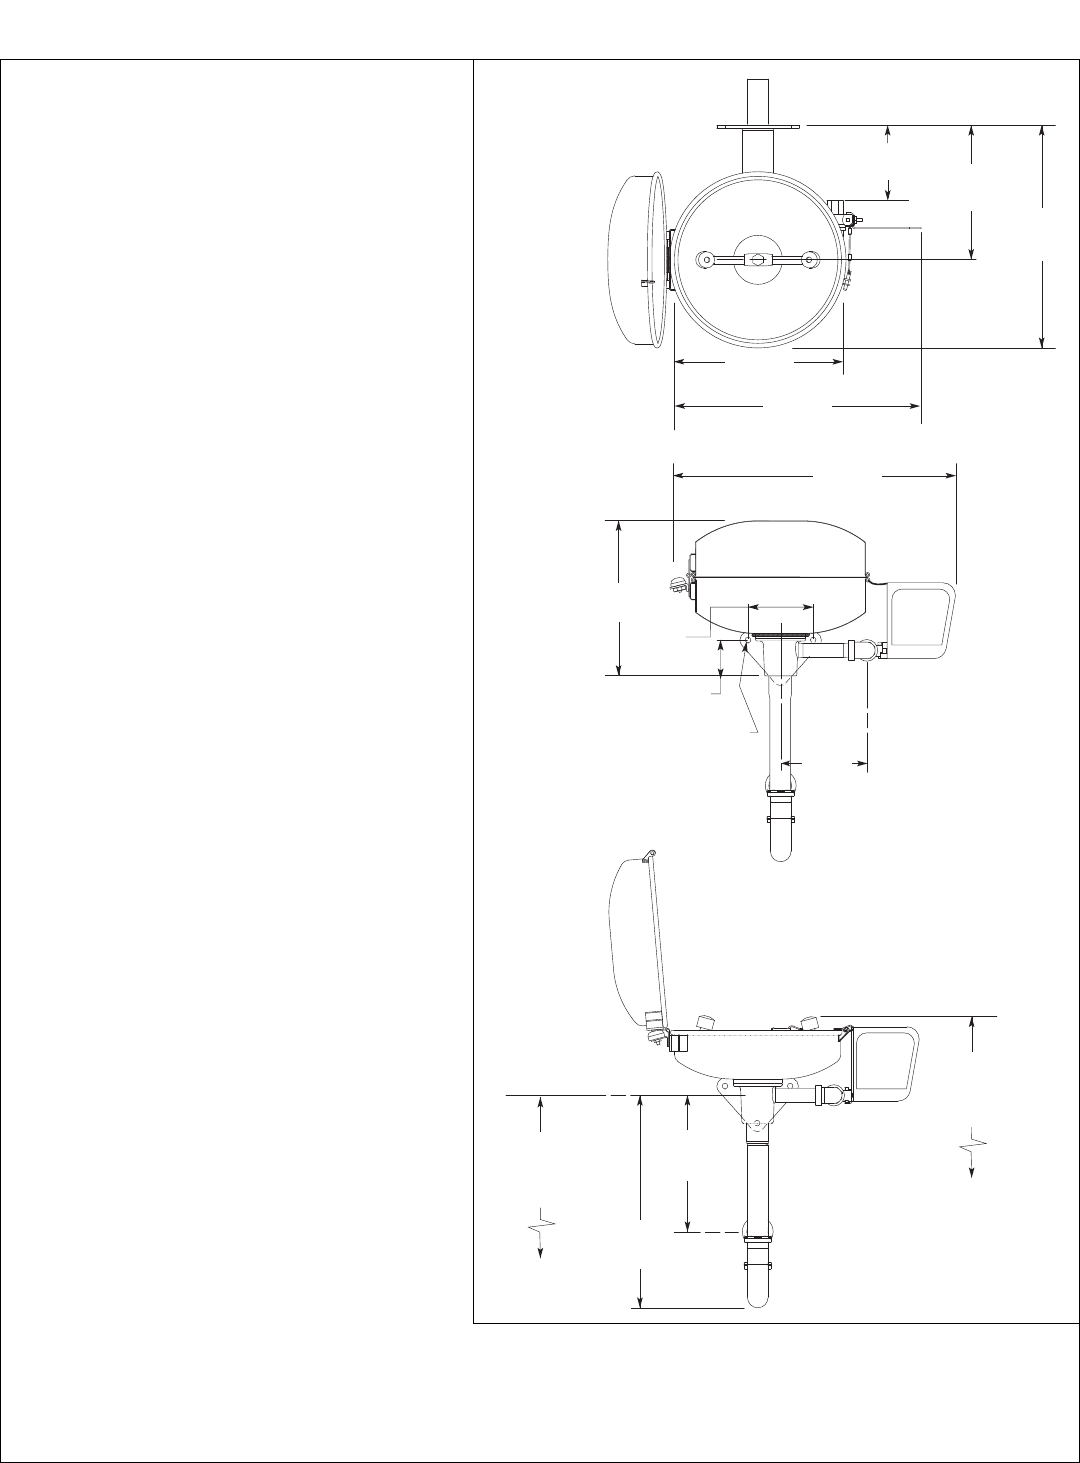
NOTE: Top of eyewash heads should be
33"-45" (838mm-1142mm) from floor.
1. Position the inlet drain fitting over
the 1-1/4" drain outlet pipe from
wall.
2. Using the inlet drain fitting as a
template, mark the bolt hole
locations on wall OR install three
suitable fasteners (supplied by
installer) for 3/8" bolts in the wall
at the marked hole locations (see
Figure 1).
3. Bolt the inlet drain fitting to the
wall or wall fasteners using 3/8"
bolts (supplied by installer).
Step 2: Assemble eyewash
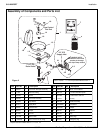
1. Assemble eyewash components as
shown in Figure 2 on page 4.
• Apply pipe sealant (supplied by
installer) to all male-threaded
pipe joints.
• Use a strap wrench around pipes
when tightening to prevent
marring.
Step 3: Connect water supply
1. Connect the water supply piping
(supplied by installer) to the 1/2"
IPS inlet on the eyewash.
2. Connect the P-trap and tailpiece to
the 1-1/4 IPS drain outlet on the
eyewash.
3. Mount the safety sign to a wall or
pipe using sign-mounting hardware (supplied by installer).
4. Open the water supply lines. Test for leaks and adequate water flow.
17-1/4"
(438mm)
8-3/4"
(222mm)
5-1/4"
133mm)
13-5/8"
(346mm)
8-1/4"
(210mm)
8-3/4"
(222mm)
14"
(357mm)
2-1/4"
(57mm)
5/16"
(8mm)
MTG.
HOLE
4"
(102mm)
36" (914mm)
Suggested
Height
To Floor
30-1/2" (775mm)
Suggested
Height
To Floor
4-5/8"
(119mm)
Ø10-3/4"
(273mm)
21-1/2"
(546mm)
Figure 1