


Power
Alarm
Secure
Print
Reprint Back Set
Data
HL
-
2600CN
Job
Cancel
Ready
Go
NETWORK READYNETWORK READY
KCMY
8
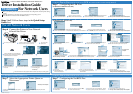
Click the Finish button.
The setup is now
complete.
*
1
*
1 Please follow the steps below when the printer is not set as the default printer.
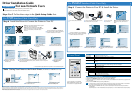
Step 6 Connect the Printer to Your PC & Install the Driver
Step 6 Install the Driver & Connect the Printer to Your PC
Steps 1 to 5 Follow these steps in the Quick Setup Guide first.
Note: Setting Your Printer as the Default Printer (For Windows
®
2000/XP users only)
For Parallel Interface Cable Users Only
Note: When the "Add New Hardware Wizard" appears
on your PC, click the Cancel button.
Note: Make sure the USB interface cable is NOT
connected to the printer, and then begin installing the
driver. If you have already connected the cable,
remove it.
1
Click Start,
Settings and Printers.
2
Select the Brother HL-2600CN series or
HL-3450CN series icon.
3
From the File menu, select
Set as Default printer.
7
When this screen appears, make sure the printer power button is on.
Connect the USB interface cable to your PC, and then connect it to the printer.
Click the Next button.
For USB Interface Cable Users Only
3
Click "Printer Driver."
2
Click the Install Software
icon on the Menu screen.
4
Click the Next button.
Follow the instructions on
the screen.
1
Insert the CD-ROM into your CD-ROM drive.
The opening screen will appear automatically.
Follow the instructions on the screen.
5
Select "Standard Installation,"
and then click the Next button.
6
Select "Local Printer with
USB cable
," and then click
the Next button.
1
Turn off the printer power button.
2
Connect the parallel interface cable to your PC,
and then connect it to your printer.
3
Turn on the printer
power button.
4
Insert the CD-ROM into your CD-ROM drive.
The opening screen will appear automatically.
Follow the instructions on the screen.
5
Click the Install Software icon on
the Menu screen.
Note:
If the "Add New Hardware Wizard"
appears on your PC, click the Cancel
button.
8
Select "Standard Installation," and
then click the Next button.
7
Click the Next button.
6
Click "Printer Driver."
9
Select "Local Printer," and
then click the Next button.
10
Select the port where your printer is
connected, and then click the Next
button.
11
Click the Finish button.
The setup is now complete.
Follow the instructions in this guide for your interface cable.
Some illustrations are based on the HL-2600CN series.
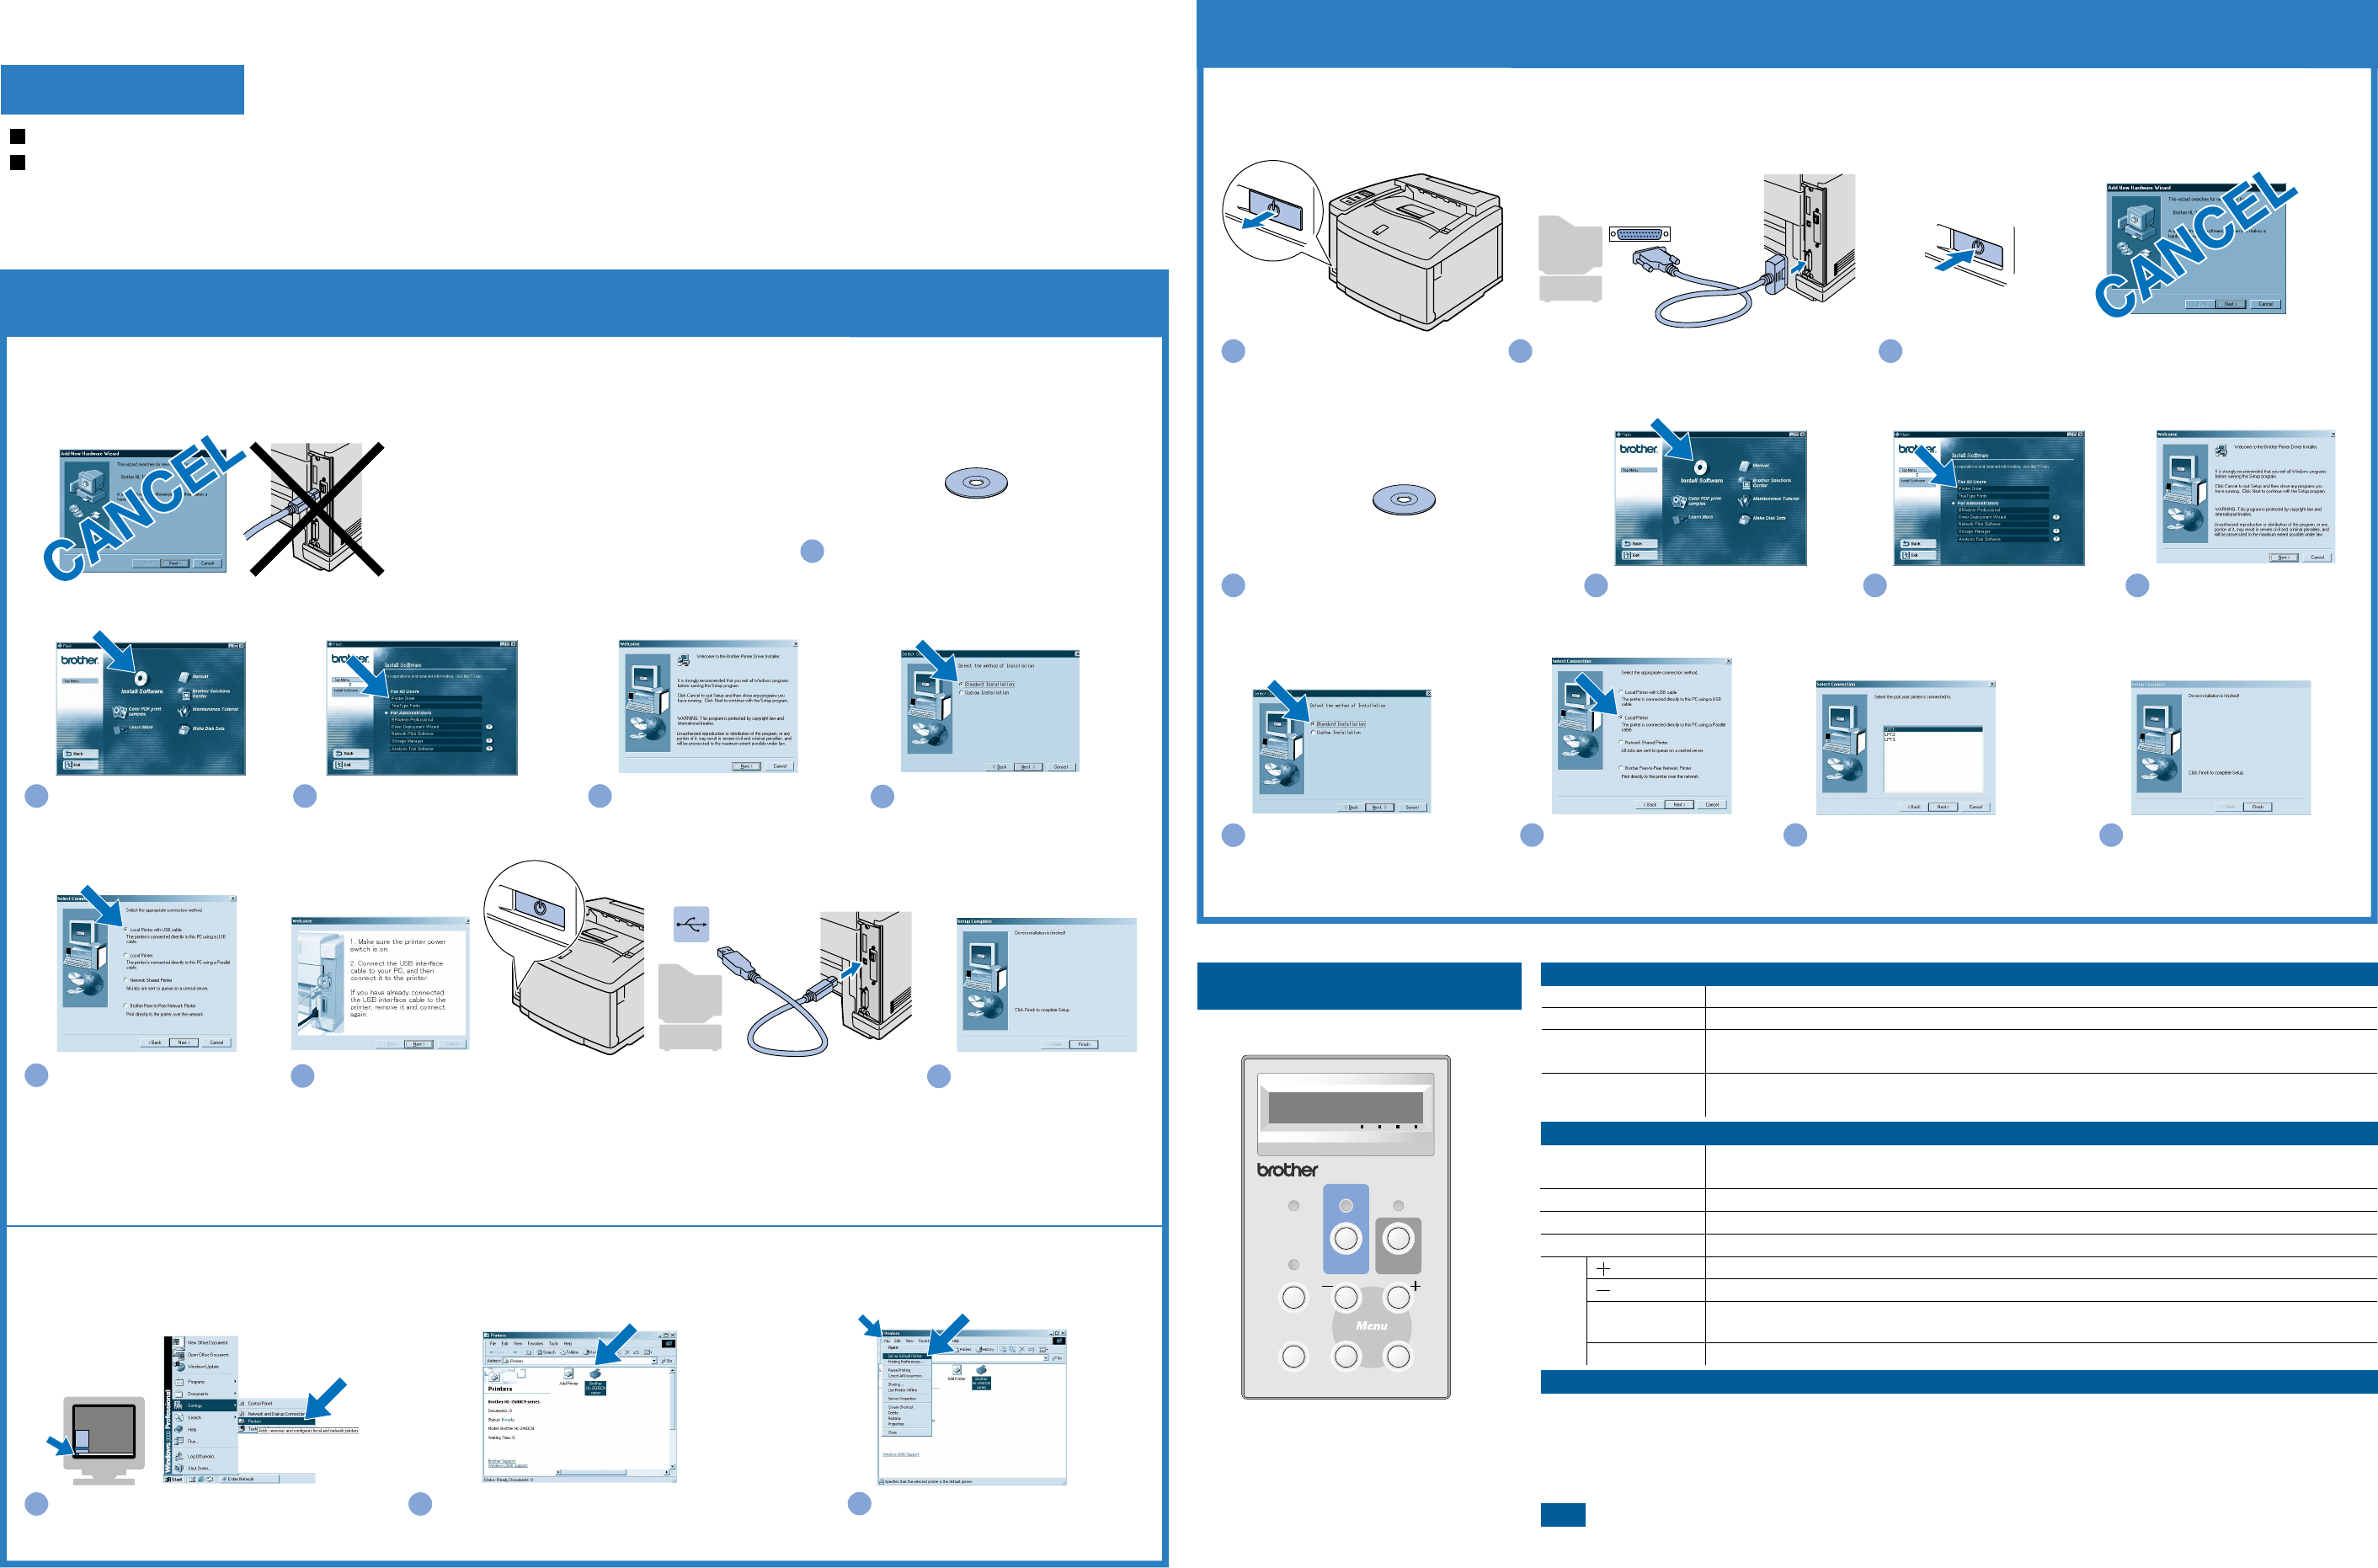
Lights when the printer power is on.
Lights when the printer is ready to print or is printing.
Lights when data remains in the printer buffer.
Blinks when the printer is receiving or processing the data.
Lights when the printer has a problem (Operator Call, Error, Service Error) and suspends
printing.
Exit from the control panel menu, Reprint settings or clear error messages.
Pause / Continue printing.
Stop and cancel the printer operation in progress.
Print secure documents.
Select the Reprint menu.
Move forward through menus.
Move backward through menus.
Select the control panel menu.
Set the selected menus and settings.
Go back one level in the menu structure.
1. Select the SETUP mode by pressing the
+ button, and then press the Set button.
2. Check that the LANGUAGE message appears, and then press the Set button.
3. Choose your language by pressing the
+ or - button, and then press the Set button. An asterisk mark (
*
) appears at the
end of the display.
(You can return to the READY status by pressing the Go button.)
Note 1. A real-time clock is built into this printer. Set the time referring to Chapter 4 of the User's Guide on the CD-ROM.
You need to set the time before you can use the log management and Reprint functions.
2. Please enhance the RAMDISK size when you want to use the Reprint functions without the optional HDD or
CompactFlash.
See RAM expansion. In the HL-2600CN User's Guide (Chapter 5) or in the HL-3450CN User's Guide (Chapter 6).
©2001 Brother Industries, Ltd. ©1998-2001 TROY XCD Inc. ©1983-1998 PACIFIC SOFTWORKS INC. ALL RIGHTS RESERVED
Windows and Windows NT are registered trademarks of Microsoft Corporation in the U.S. and other countries. HP, HP/UX, JetDirect and JetAdmin are trademarks of Hewllet-Packard Company. UNIX is a trademark of
UNIX Systems Laboratories. PostScript is trademark of Adobe Systems Incorporated. Netware is a trademark of Novell, Inc. Apple Macintosh, iMac, LaserWriter, and AppleTalk are trademarks of Apple Computer, Inc.
BRAdmin Professional is a trademark of Brother Industries, Ltd.
All other brand and product names mentioned in this Quick Setup Guide and User's Guide are registered trademarks or trademarks of their respective companies.
Power (Green)
Ready (Green)
Data (Orange)
Alarm (Red)
Driver Installation Guide
Windows
®
For non-Network Users
LEDs
Buttons
Control Panel
Language Setting (Default is English)
Set
Back
Go
Job Cancel
Secure Print
Reprint
Menu
For more information, see "CONTROL
PANEL OPERATION" in Chapter 4 of the
User's Guide on the supplied CD-ROM.