


Top Cover
Control Panel
Cover
PUSH
PUSH
PUSHPUSH
Colored Ink
Cartridge Covers
White Shipping Cover
Opening
Peel in the direction
away from you!
600 DPI
1200 DPI
}
}
Do NOT select
9
Check Color Block Quality and Alignment
The FAX starts printing the PRINT QUALITY
CHECK SHEET (only during initial ink cartridge
installation).
Check the sheet to see if the quality and
alignment are OK by following STEPs A and B.
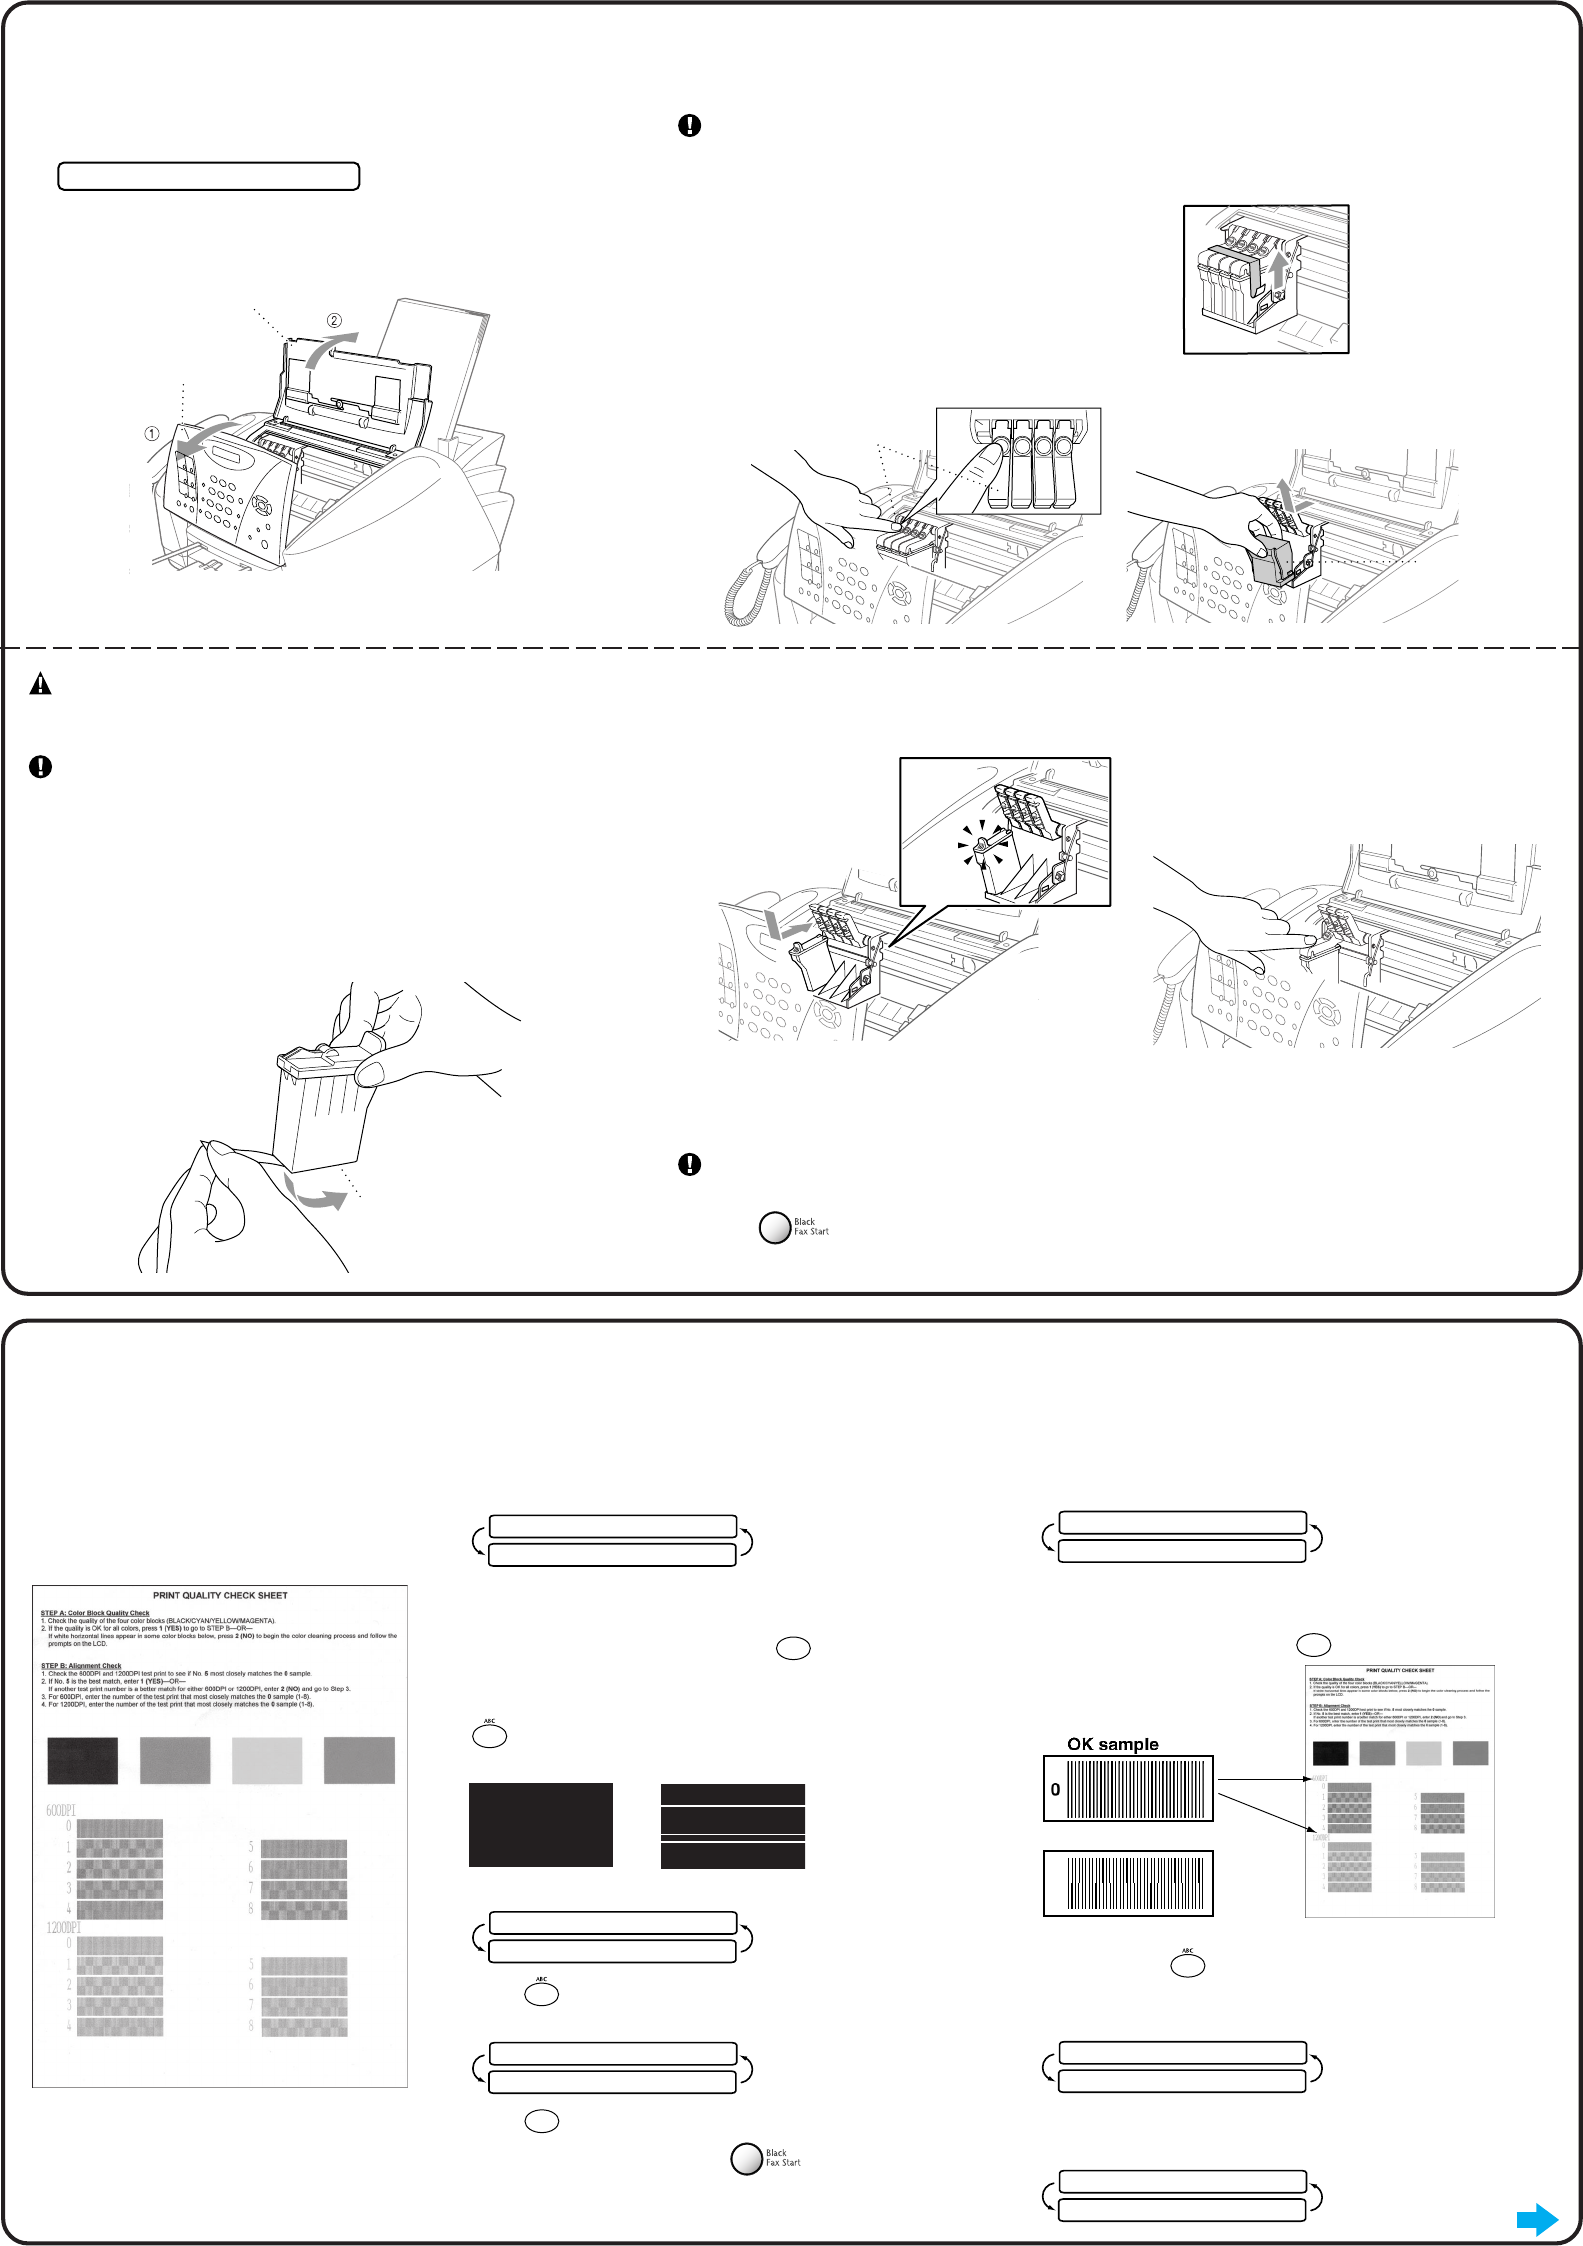
STEP A: Color Block Quality Check
The LCD shows:
IS STEP “A” OK?
1.YES 2.NO
Check the quality of the four color blocks printed on the sheet.
(BLACK/CYAN/YELLOW/MAGENTA).
If the quality is OK for all colors, press
1
(YES) to go to STEP B
–OR–
If white horizontal lines appear in some color blocks below, press
2
(NO).
OK Poor
STEP B: Alignment Check
The LCD shows:
IS STEP “B” OK?
1.YES 2.NO
Check the 600DPI and 1200DPI test print to see if No.5 most
closely matches the OK sample ( 0 ).
If No.5 is the best match, enter
1
(YES)–OR–
The LCD asks you if the print quality is OK for each color.
BLACK OK?
1.YES 2.NO
Press
2
(NO) for any color with a problem.
The LCD shows:
START CLEANING?
1.YES 2.NO
Press
1
(YES), then FAX starts cleaning the colors.
After cleaning is finished, press
Black Fax Start. The
FAX starts printing PRINT QUALITY CHECK SHEET again and
goes back to the first step of STEP A.
If another test print number is a better match for either 600DPI or
1200DPI, enter
2
(NO) to select it.
For 600DPI, enter the number of the test print that most closely
matches the 0 sample (1-8).
600DPI ADJUST
SELECT BEST #
For 1200DPI, enter the number of the test print that most closely
matches the 0 sample (1-8).
1200DPI ADJUST
SELECT BEST #
8
Install the Ink Cartridges
A. Check that the power is turned on (by plugging in the power cord).
The LCD shows:
CHECK CARTRIDGE
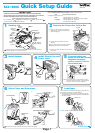
B. Open the control panel cover by pulling it toward you (1), then lift the
top cover toward the back (2). After a few seconds, the print head
will move left to its replacement position.
WARNING
If ink gets in your eyes, irrigate them with water immediately and if
irritation occurs, consult a doctor.
We recommend that you install the ink cartridges from left to right in
this order: Black, Cyan, Yellow, Magenta.
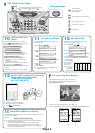
E. Open the Black ink cartridge bag and take out the ink cartridge.
F. Carefully remove the sealing tape from the bottom of the ink
cartridge. Be sure to peel the tape in the direction
away
from you.
Important
To prevent spilling ink and staining your hands and clothing, peel the
sealing tape gently and slowly. Do not touch the ink opening on the
cartridge or the removed tape.
• The bottom of the white shipping cover is wet with ink that will cause stains, so wipe it clean before you
place it down.
• Do not throw away the white shipping cover. You will need it for future transportation.
C. Remove the protective blue tape from the colored ink
cartridge covers.
D. Push the four colored ink cartridge covers one at a time so they pop up. Then remove the white shipping
cover by pulling it toward you and then lifting it up and out.
G. Each color has its own correct position. Match the colors of the covers. First, gently insert the Black ink
cartridge, and then press the cover down until it clicks.
H. Repeat Steps E-G to install each color ink cartridge.
I. After installing all ink cartridges, close the top cover and control panel cover until they click into place.
Your FAX will enter a “head cleaning” cycle for approximately four minutes.
Make sure the paper is loaded in the multi-purpose sheet feeder. The LCD shows CLEANING and
PLEASE WAIT. After the cleaning cycle is finished, the LCD shows PRESS FAX START.
J. Press
Black Fax Start and go to Step 9 “Check Color Block Quality and Alignment”.
Page 2
Go to Next Page