


4
1
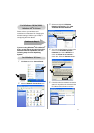
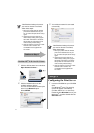
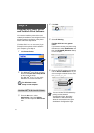
Click the AirPort status icon and select
Open Internet Connect....
2
Click the Network tab to see the
available wireless devices.
You can see the Brother wireless print
server in the Network option.
Select SETUP.
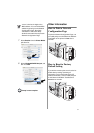
3
Your wireless network is connected
successfully.
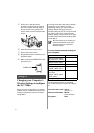
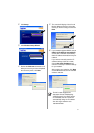
Configuring the Print Server
1
Insert the CD-ROM into your CD-ROM
drive.
(For Windows
®
users) The opening
screen will appear automatically.
(For Mac OS
®
X 10.1 to 10.3 users)
Double-click the NC7100w icon on your
Macintosh
®
, and then double-click the
Start Here icon.
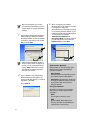
If the Brother wireless print server
you want to choose is not listed,
follow these steps:
1 Move your printer with the wireless
print server installed closer to your
PC, or reorient the print server and try
again.
2 Reset the print server back to its
default factory setting and try again.
See Other Information in this Quick
Setup Guide for information how to
reset to factory default setting.
3 Refer to Chapter 10 of the NC-7100w
Network User’s Guide on the
CD-ROM we have supplied with
NC-7100w.
Continue to Step 3
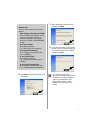
For Mac OS
®
X 10.1 to 10.3 Users
If the Brother wireless print server
you want to choose is not listed,
follow these steps:
1 Move your printer with the wireless
print server installed closer to your
PC, or reorient the print server and try
again.
2 Reset the print server back to its
default factory setting and try again.
See Other Information in this Quick
Setup Guide for information how to
reset to factory default setting.
3 Refer to Chapter 10 of the NC-7100w
Network User’s Guide on the
CD-ROM we have supplied with
NC-7100w.
Step 3