


25
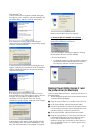
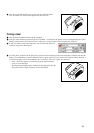
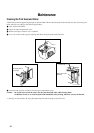
5 After the on/off button lights up in green, press the feed/cut button
once to remove any slack in the tape and cut off the excess.
Printing a label
1 Turn on the PT-9200DX and start up the computer.
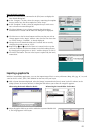
2 Start up P-touch Editor and make sure that “PT-9200DX ” is selected as the printer in the Print Setup dialog box ([Print
Setup] command in the [File] menu of the PC software) or in the Chooser (when using the Mac software).
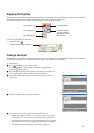
3 In the Size setting of the Page Properties, select the desired label size,
and then design your label layout.
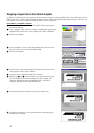
4 Click the [Print] command in the [File] menu, select the desired settings in the Print dialog box, and then click the OK
button. The on/off button on the PT-9200DX flashes in green while it is receiving the data. After the label is printed, it
is fed from the tape exit slot and automatically cut off if the “Auto Cut” option was selected.
If the
“
Half Cut
”
option was selected, press the feed/cut button
once to cut off the label.
While printing multiple copies of labels, the printing speed may be
decreased so that a high resolution can be maintained.