Creating a New Contact
20
IntroductionCreating LabelsAppendix
Creating a New Contact
This section explains how to create a new contact.
1 Click [File]-[New Contact]. Or, click .
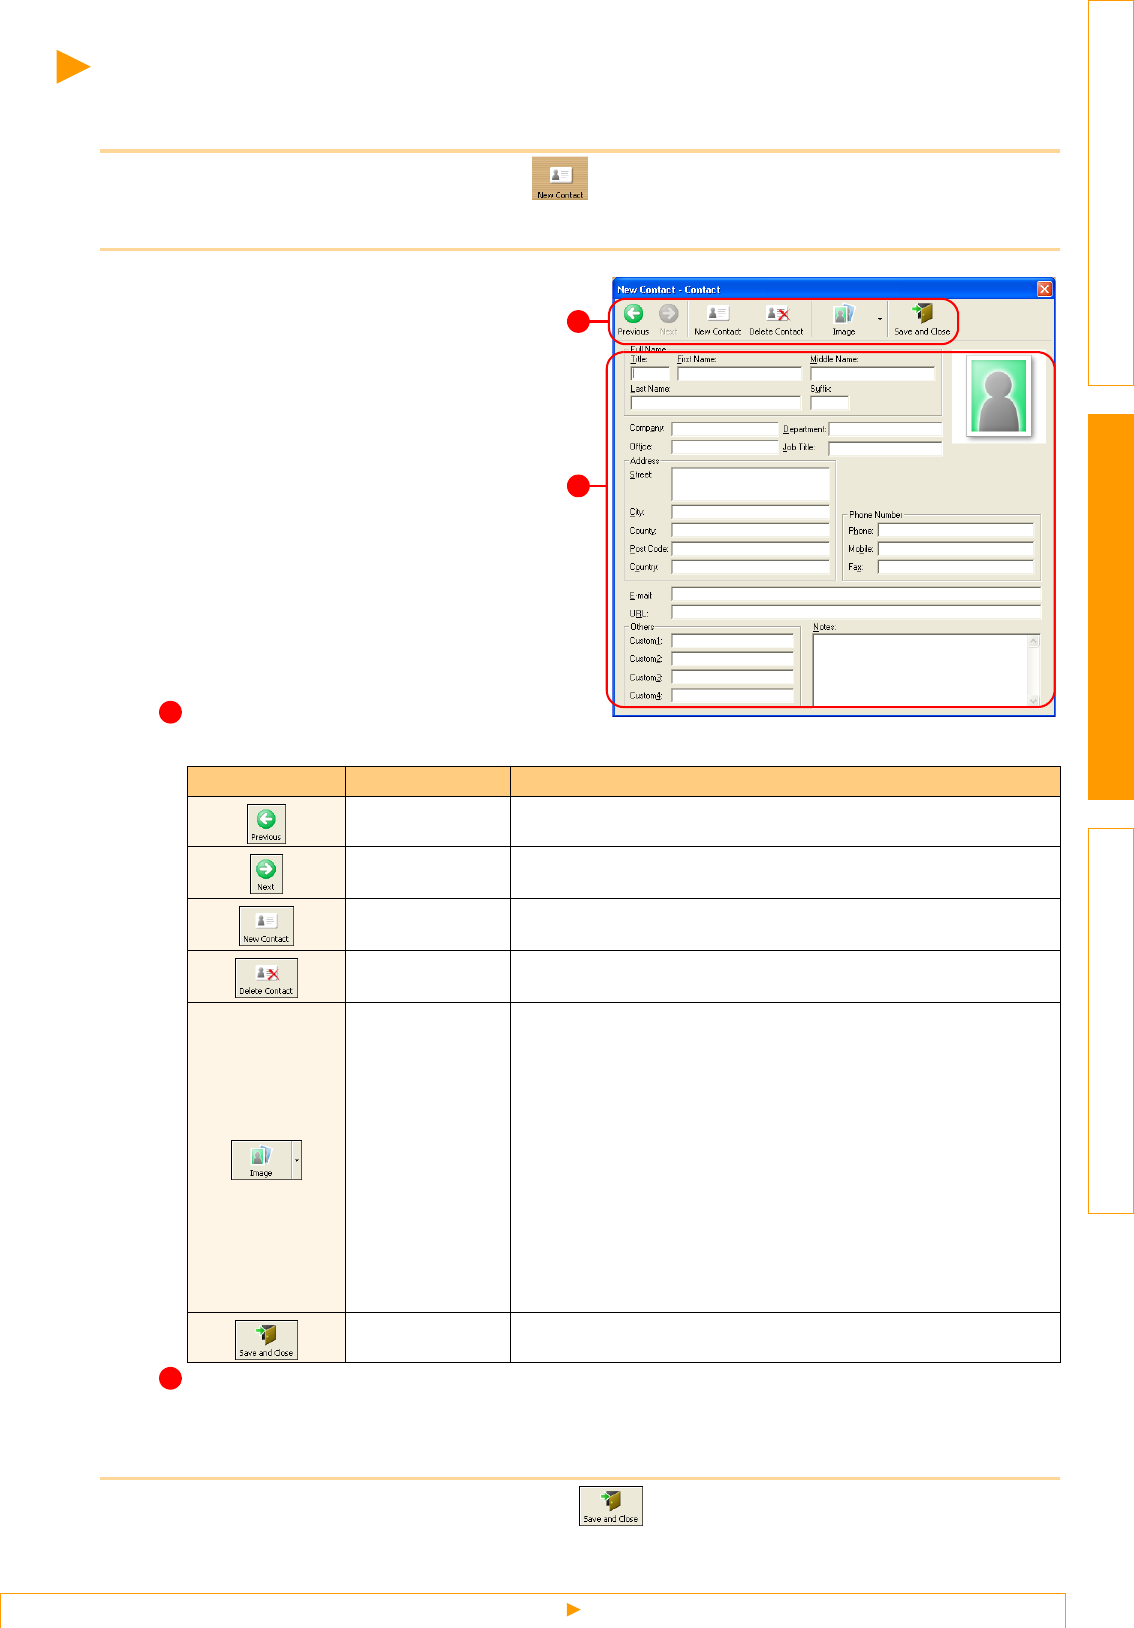
The [New Contact] dialog box appears.
2 Enter data for each item.
New Contact form toolbar
The following commands are categorized in the menu:
Contact form
Used to enter each item such as name, address, phone number, company information, and E-mail
address for the new contact.
3 When you finish entering the data, click to store.
Icon Button name Function
Previous Displays the previous contact.
Next Displays the next contact.
New Contact Displays the New Contact form window for a new contact.
Delete Contact Deletes the contact that is currently chosen.
Image
Allows you to insert an image for a contact from a file or a
camera currently connected to the computer.
The following file types are supported:
• Bitmap (*.bmp, *.dib)
• JPEG file (*.jpg, *.jpeg)
• TIFF file (uncompressed) (*.tif )
• GIF file (*.gif )
• Icon (*.ico)
•Windows
®
Meta File (*.wmf, *.emf) (*Image adjustment is
not allowed.)
• PNG file (*.png)
Save and Close Saves the contact and closes the [New Contact] dialog box.
2
1
1
2
