


7-4 Faxing with your machine —Basic operation Chapter 7
5 Use [22
22
] or [33
33
] to select the resolution.
• In black & white mode, select:
–<B&W STANDARD> for text-only documents.
–<B&W FINE> for fine-print documents.
–<B&W PHOTO> for photographs.
• In color mode select:
–<COLOR STANDARD> for normal color documents.
–<COLOR FINE> for fine color documents.
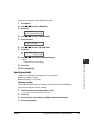
6 Press [Set].
7 Press [Exposure].
8 Use [22
22
] or [33
33
] to select the exposure.
9 Press [Set].
10 Dial the recipient’s number.
• For details on the different dialing methods, see the User’s Guide.
11 Press [Start].
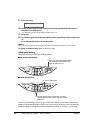
If you are using the platen glass, you will be prompted when the page has been
scanned. Load the next page (for a multipage document) and press [Start]. To start
sending, press [Set].
To cancel memory sending: Press [Stop/Reset] and follow any instructions in the LCD.
Speed dialing
You can simplify dialing of fax/telephone numbers by registering numbers under speed dialing
keys or codes.
Registering one-touch speed dialing
Before you can use one-touch speed dialing ( p. 7-6), you need to register the recipients’
numbers. Follow this procedure:
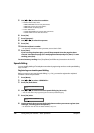
1 Press [Menu].
2 Use [22
22
] or [33
33
] to select <USER DATA>.
3 Press [Set] three times.
4 Use [22
22
] or [33
33
] to select a one-touch speed dialing key (01 to 10).
• You can also select a key by pressing the one-touch speed dialing key.
5 Press [Set] twice.
6 Use the numeric keys to enter the fax/telephone number you want to register (max.
120 digits, including spaces and pauses).
• For details on how to enter or delete numbers, see p. 7-2.
1-TOUCH SPD DIAL
01=
TELEPHONE NUMBER
TEL=