


E-10
Quick Guide
This section explains the operational flow up to the point that projection is started.
For more individual operations, see the User’s Guide (UsersGuide_English.pdf) on the CD-ROM that
comes with the projector.
1. Load batteries into the remote controller.
☞ “Loading Remote Controller Batteries” (User’s Guide)
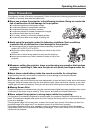
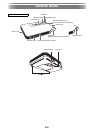
2. Place the projector onto a table, desk, or stand that is level and firm, making sure
that you allow enough room around it.
☞ “Setting Up the Projector”, “Setup Precautions” (User’s Guide)
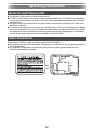
3. Referring to the illustration on page E-9, adjust the vertical angle of the projector.
1Lift up the front of the projector and press the release button. This causes the front foot to drop
from the bottom of the projector.
2While holding down the release button, raise and lower the front of the projector. When the front
foot is the height you want, release the release button. The front foot will lock at that position.
3Make fine adjustments to the horizontal tilt of the projector by rotating the rear feet.
4. Use the supplied power cord to plug the projector into a power outlet.
5. Connect the projector to an image output device and then turn on the device.
☞ “Connecting to an Image Output Device” (User’s Guide)
6. Remove the projector lens cover.
7. Press the [P] (Power) key to turn on the projector.
z The first time you turn on the projector, a “Language” window will appear in the center of the
projection screen. Select the language you want.
8. Use the [INPUT] key to select the input source.
☞ “Selecting the Input Source” (User’s Guide)
9. On the remote controller, use the [ZOOM +] and [ZOOM –] keys to adjust the
projected image size.
10.
On the remote controller, use the [FOCUS e] and [FOCUS r] keys to adjust image
focus.
11.
After you finish projecting, press the [P] (Power) key.
z This will cause a power down confirmation message to appear. Press the [P] (Power) key again
to turn off the projector.
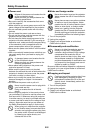
NOTE
z This product is also designed for IT power distribution system with phase-to-phase voltage 230V.
If you experience any problems while operating the projector or if you suspect that the projector is not
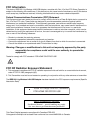
operating properly, refer to the “Troubleshooting” section in the User’s Guide (UsersGuide_English.pdf),
which is on the CD-ROM that comes with the projector.
If you run into problems...