


E-14
Starting and Stopping Projection
1. Use the bundled AC power cord to plug the projector into a power outlet.
NOTE
z This product is also designed for IT power distribution system with phase-to-phase voltage 230V.
2. Turn on the computer that is connected to the projector.
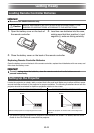
3. If the projector lens cover is covering the lens, remove it.
z To remove the lens cover, insert your fingers into its recesses and squeeze towards the middle.
4. Press the [P] (Power) key.
z The first time you turn on the projector, a “Language” window will appear in the center of the
projection screen. Select the language you want.
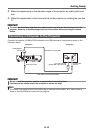
5. Select the input source
z Press the [INPUT] key to display a list of input sources. Use the [T] and [S] keys to select
“Computer” and then press the [ENTER] key.
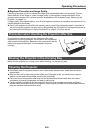
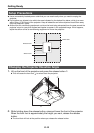
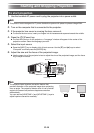
6. Adjust the size and the focus of the projected image.
z Use the zoom ring of the projector’s lens to adjust the size of the projected image, and the focus
ring to adjust the focus.
NOTE
z The projector has a keystone correction feature that
prevents distortion of the projected image when projecting
from an angle. The projector detects when it is at a vertical
angle to the screen and performs keystone correction
automatically.
You can use the [KEYSTONE +] and [KEYSTONE –] keys to
adjust keystone correction manually.
To start projection
Zoom ring
Focus ring
Smaller
Larger