EN-13
Quick Guide
If you experience any problems while operating the projector or if you suspect that the projector is not
operating properly, refer to the “Troubleshooting” section in the “User’s Guide” (UsersGuide.pdf).
To attach the cable cover
1. If the projector is on, turn it off and wait until it cools down.
2. Unplug the projector power cord from the power outlet.
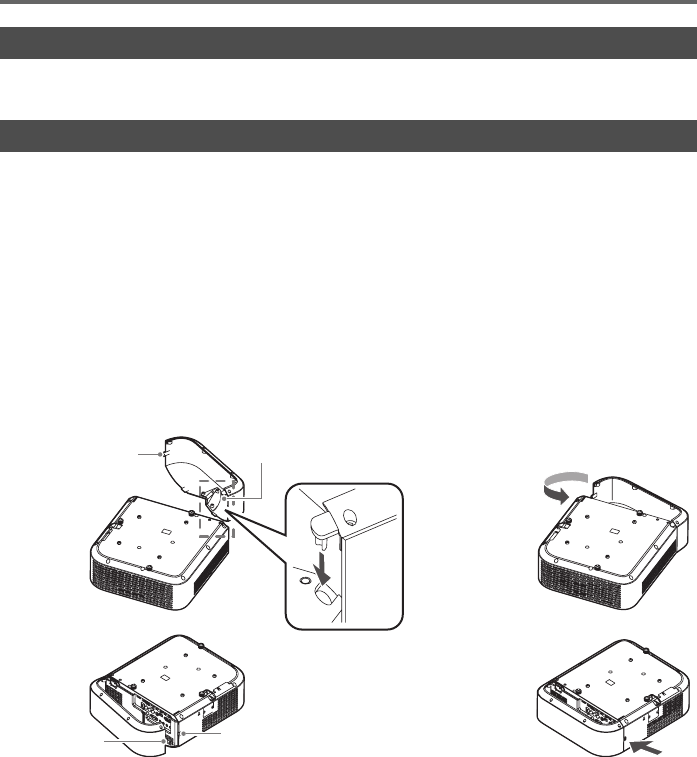
3. Turn the projector over and insert the cable cover hook into the hole provided on
the projector (Figure 1).
4. Rotate the cable cover in the direction indicated by the arrow in Figure 2 to attach it
to the projector.
z The cable cover screw should be aligned with the projector screw hole (Figure 3).
5. Use a Phillips head screwdriver to tighten the screw (Figure 4).
To remove the cable cover
1. If the projector is on, turn it off and wait until it cools down.
2. Unplug the projector power cord from the power outlet.
3. Use a Phillips head screw driver to loosen the cable cover screw until it disengages
from the projector (without detaching it from the cover).
4. Remove the screw side of the cable cover from the projector and then unhook the
cover hook from the projector.
If you run into problems...
Attaching and Removing the Cable Cover
Figure 1 Figure 2
Figure 3 Figure 4
Screw
Hook
Screw
Screw hole


