


Installation Instructions RPAA1, B1, C1
5
ASSEMBLY AND INSTALLATION
Installing Threaded Pipe and RPAA1 Outer
Sleeve
WARNING: IMPROPER INSTALLATION CAN RESULT IN
SERIOUS PERSONAL INJURY OR DAMAGE TO
EQUIPMENT! Structural members MUST be capable of
supporting five times the combined weight of all equipment
being mounted.
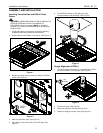
1. Install ceiling plate and extension accessories following
installation instruction provided by manufacturer.
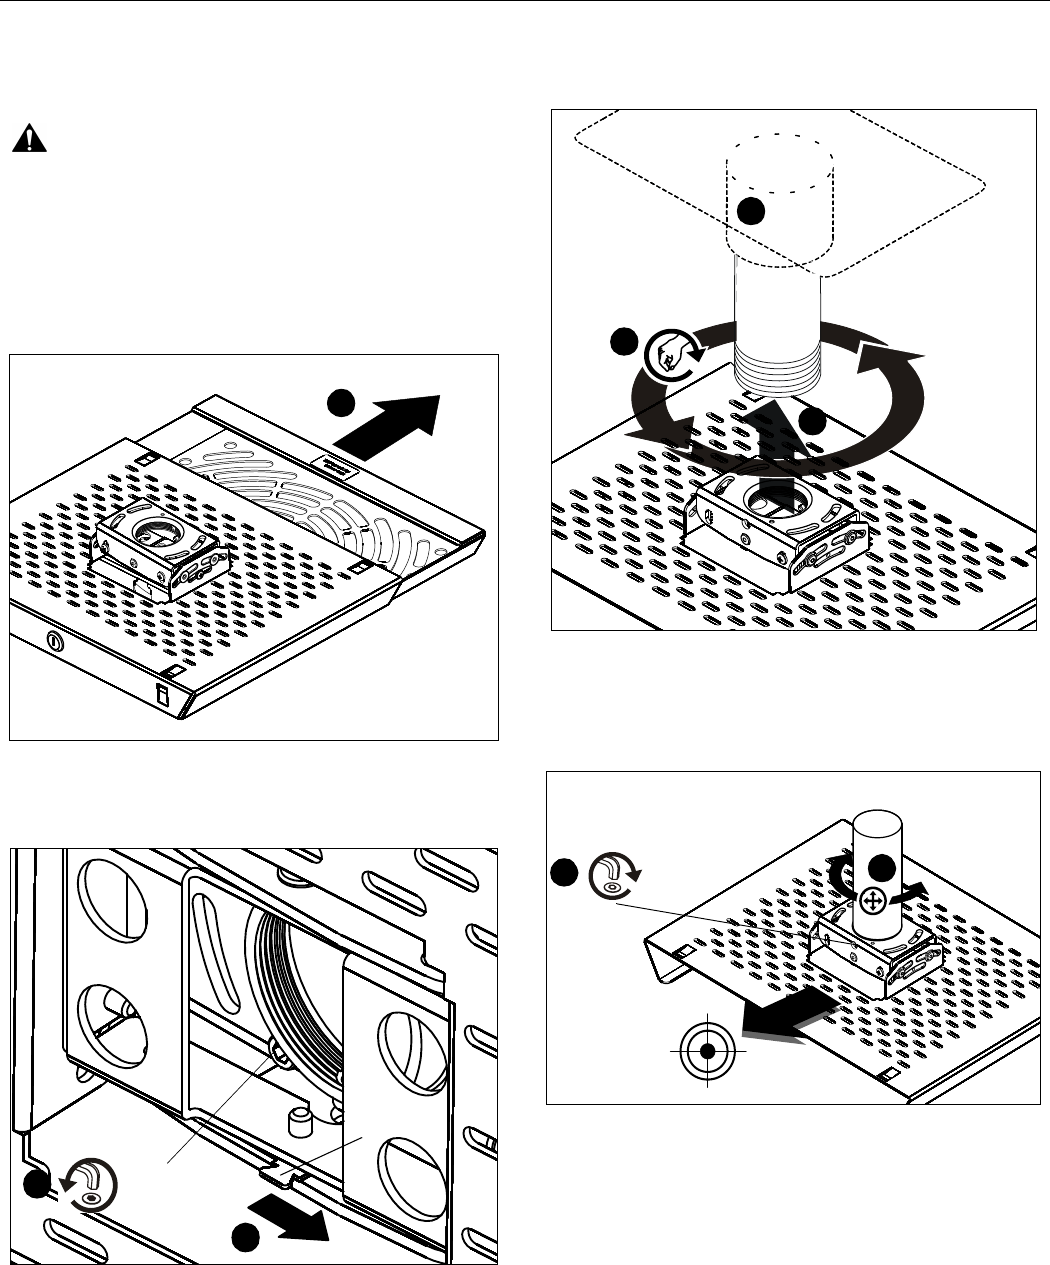
2. Remove drawer from RPAA1 outer sleeve. (See Figure 1)
Figure 1
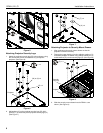
3. Remove and keep security screw from bottom of RPAA1
sleeve. (See Figure 2)
Figure 2
4. Move security tab to right. (See Figure 2)
5. Align RPAA1 outer sleeve with end of NTP pipe. (See
Figure 3)
6. Thread RPAA1 sleeve up onto pipe by turning
counterclockwise until hand tight. (See Figure 3)
Figure 3
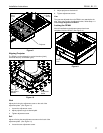
Rough Alignment of RPAA1
1. Turn RPAA1 sleeve clockwise or counterclockwise until the
front of the RPAA1 is facing target. (See Figure 4)
Figure 4
2. Tighten set screw. (See Figure 4)
3. Return security tab to left side (See Figure 5).
4. Replace and tighten security screw (See Figure 5).
2
Security
Screw
3
4
Security
Tab
1
5
6
1
2
Set
Screw