L1
L2
L3
AL1
AL2
AL3
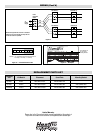
Power
Disconnect
Switch Contactor
To
Power
Supply
See
Note 2
See Notes
Pigtail
Leads
L1
L2
L3
AL1
AL2
AL3
Power
Disconnect
Switch
Contactor (1)
To
Power
Supply
Contactor (2)
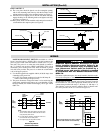
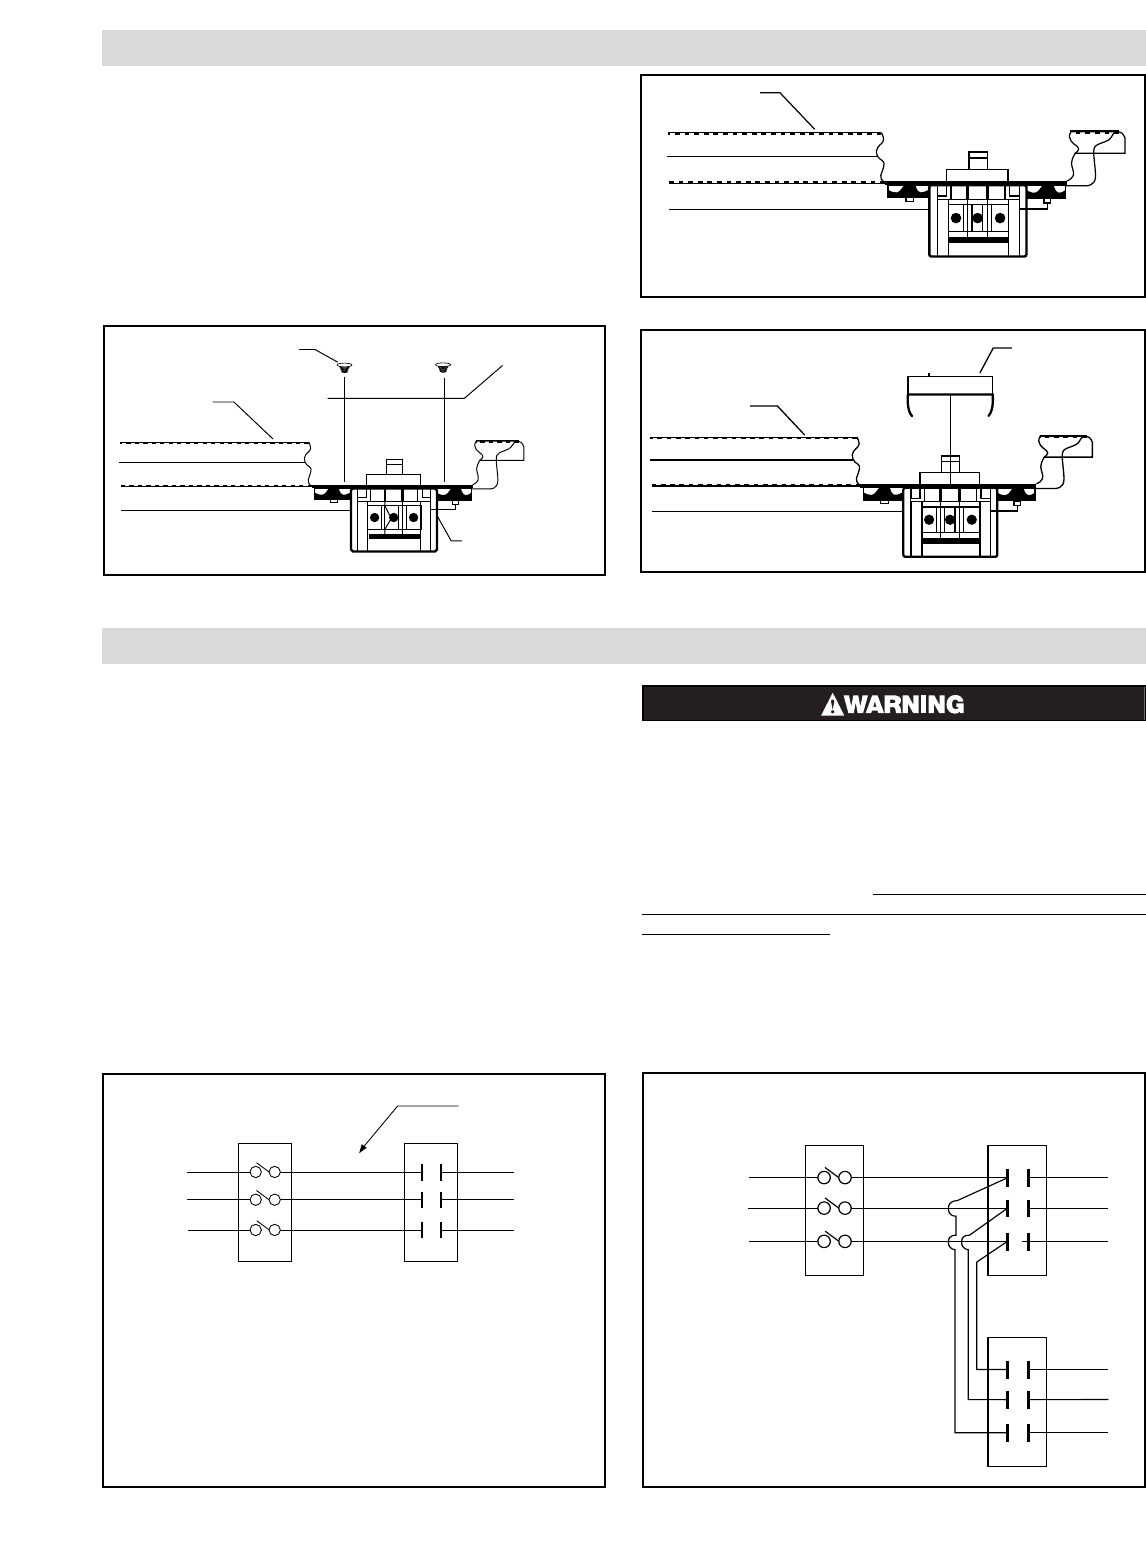
Figure 10
KUH-02 through KUH-25
Power Disconnect Switch
Figure 11
Notes:
1. This illustration shows wiring hook up for three phase
service. Remove lead wires marked L2 and AL2 when
using one phase power service.
2. For units without contactors, disconnect switch is to
be wired to lead wires on heater power.
3. Use copper supply wire only with this switch.
KUH-30 through KUH-45 units with 2 contactors
where the total load does not exceed 48 Amps.
WIRING
INSTALLATION (Cont’d)
POWER DISCONNECT SWITCH (Available as a kit or
factory installed option.) (KDS-1)This switch disconnects the
power to power leads when the handle is rotated to the “0” posi-
tion (left). The power is on when the switch handle is rotated to
the “1” position (top) position. (KDS-2 and KDS-3) This switch
disconnects power to the power leads when the handle is placed
in its full lower position. The power is on when the switch handle
is in its full upper position.
1. Use the three pigtail leads supplied with kit (40 & 80 Amp) when
connecting to the power line.
a. Use No. 4GA Copper conductor wire only for 100 Amp dis-
connect when wiring to the power line.
2. The power disconnect wiring to the heater is to be made using the
pigtail leads supplied on the heaters up to and including 25 kW.
On larger heaters, the installer should supply 105˚C type AWM
600V wire.
ELECTRIC SHOCK HAZARD. Disconnect all power
before installing disconnect switch. Failure to do
so could result in personal injury or property dam-
age. Disconnect switch must be installed by a
qualified person and must be effectively grounded
in accordance with the National Electrical Code,
NFPA 70.
For future replacement parts, the model number should be modi
-
fied on the nameplate to show that a disconnect kit has been field
installed on the heater. A label kit (see Figure 14) (P/N 170-
302788-002) has been included in the plastic envelope located in
the disconnect kit. Cut off the appropriate number for the size dis-
connect being installed (40 Amp = 1; 80 Amp = 2; 100 Amp = 3).
The label has a pressure sensitive adhesive back so that the num-
ber can be placed over the “0” as shown in Figure 14.
KDS–2 and KDS – 3
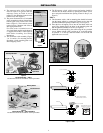
8. The cover plate should be placed over the rectangular opening
with its four mounting holes lined up with the four holes in the
cabinet and the four holes in the mounting bracket (see Figure 7).
9. Insert the four self tapping screws into the four holes until they
engage the holes in the mounting bracket and tighten until they
are secure (see Figure 8).
10. Place plastic bezel over the installed switch and push towards the
switch until the tabs snap into place (see Figure 9).
Rear Case
Cover Plate
(4) 8-32 Screws
Mount Switch Assembly
Onto Rear Case of Heater
Figure 7
Figure 8
Figure 9
Rear Case
Switch Assembly Mounted to Rear Case
Rear Case
Snap Plastic Housing
Into Place
3


