


4. Product Configuration
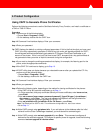
Using CAPF to Generate Phone Certificates
Perform the following procedure to use the Certificate Authority Proxy Function, and install a certificate on
a 7940 or 7960 IP Phone.
Procedure
Step 1 Perform one of the following tasks:
• Choose Start > Programs > CAPF.
• On the desktop, double-click the CAPF icon.
Step 2 A Command Line Interface displays. Enter your username.
Step 3 Enter your password.
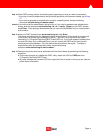
Tip CAPF displays the default or existing configured parameters. If this is the first time that you have used
CAPF, the utility automatically generates a 1024-bit key pair and a self-signed certificate for CAPF;
the self-signed certificate automatically gets added to C:\Program Files\Cisco\Certificates on all
servers in the cluster. If this is not your first time to use CAPF, be aware that a key pair/certificate is
not generated unless you enter an explicit command during the configuration.
Step 4 If you want to change the existing parameters that display, for example, the listening port for the
phone, enter the appropriate commands.
Step 5 If the CAPF CLI continues to display, go to Step 10.
Step 6 If CAPF utility does not display because you rebooted the server after you updated the CTL file,
perform one of the following tasks:
• Choose Start > Programs > CAPF.
• On the desktop, double-click the CAPF icon.
Step 7 A Command Line Interface displays. Enter your username.
Step 8 Enter your password.
Step 9 Perform the following tasks, depending on the method for issuing certificates for the phones:
• If the CAPF utility will issue the certificates, go to Step 11.
• If a Cisco-approved, third-party certificate authority will issue certificates, enter issue cert ca,
press Enter.
• Enter set ca-server [user<name> password<passwd>] [type<CA type>] <ip<address> |
dns<name>>, press Enter. The user and password are optional and the type should be
“keon”..Example set ca-server type keon ip 10.100.1.10
• Enter set jurisdiction-ID <jurisdiction ID for CA Server>, press Enter.
Note: The default port for SCEP is 446. This will become configurable in a later Cisco release.
• Go to Step 11.
Step 10 At the CAPF prompt, enter get phone-info. If you add phones to the database after the initial
retrieval from the Cisco CallManager database, you must issue this command again.
Step 11 At the CAPF prompt, enter set cert upgrade all, press Enter. This command configures all
devices for the certificate upgrade. To configure a specific phone for upgrade, issue the following
command: set cert upgrade id <device name>
Page: 3