


5
The right bracket is engraved with an EXR, and the left bracket is engraved with an EXL.
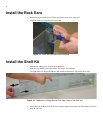
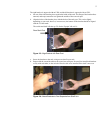
a. Set one of the wide bracket pieces against the inside of the rack. The flange of the bracket faces
outward, and wraps around to rest against the outside of the rear rack post.
b. Align the holes of the bracket piece with the holes of the rack post. This varies slightly
depending on your rack; however, in most cases, the bottom of the bracket should be aligned
with the 1U hash mark.
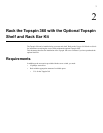
The switch and shelf will take up 5Us for the Topspin 360 or 6Us.
Figure 2-3: Align Bracket with Rear Post
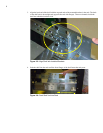
c. Screw the brackets to the rack, using screws that fit your rack.
d. Repeat with the second bracket on the second rear rack post. Be careful to install both brackets
evenly with each other, as the switch will not be able to be installed if the shelf is not even.
Figure 2-4: Attach Brackets to Post Separate from Shelf Unit
Rear Rack Post