


Chapter 3
Advanced Configuration
22
Wireless-G Broadband Router with SpeedBooster
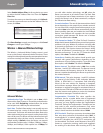
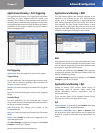
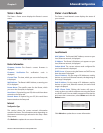
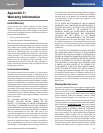
Status > Router
The Status > Router screen displays the Router’s current
status.
Status > Router
Router Information
Firmware Version The Router’s current firmware is
displayed.
Firmware Verification The verification code is
displayed.
Current Time The time, which you set on the Setup tab,
is displayed.
MAC Address The Router’s MAC Address, as seen by your
ISP, is displayed.
Router Name The specific name for the Router, which
you set on the Setup tab, is displayed.
Host Name If required by your ISP, this would have been
entered on the Setup tab.
Domain Name If required by your ISP, this would have
been entered on the Setup tab.
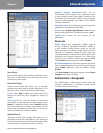
Internet
Configuration Type
This section shows the current network information
stored in the Router. The information varies depending on
the Internet connection type selected on the Setup > Basic
Setup screen.
Click Refresh to update the on-screen information.
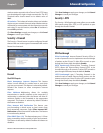
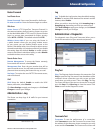
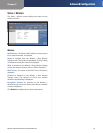
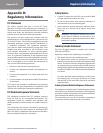
Status > Local Network
The Status > Local Network screen displays the status of
your network.
Status > Local Network
Local Network
MAC Address The Router’s MAC Address, as seen on your
local, Ethernet network, is displayed.
IP Address The Router’s IP Address, as it appears on your
local, Ethernet network, is displayed.
Subnet Mask The current subnet mask configured for
your local network is displayed.
DHCP Server If you are using the Router as a DHCP server,
then the status is displayed.
Start IP Address For the range of IP Addresses used by
devices on your local, Ethernet network, the beginning of
that range is displayed.
End IP Address For the range of IP Addresses used by
devices on your local, Ethernet network, the end of that
range is displayed.
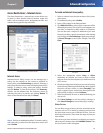
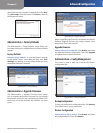
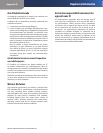
DHCP Clients Table Clicking this button will open a
screen to show you which computers are using the Router
as a DHCP server. You can delete computers from that list,
and sever their connections; select Delete and click the
Delete button.
DHCP Clients Table
Click Refresh to update the on-screen information.