


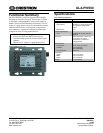
Crestron GLA-PWS50 50 Watt Cresnet Power Supply
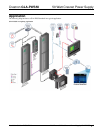
Assembly
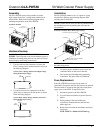
The GLA-PWS50 comes with a partition to isolate
high voltage from Class 2 wiring when installed in an
electrical box. Refer to the following diagram when
mounting the partition on the GLA-PWS50.
Install the Partition
GLA-PWS50
PARTITION
(2022663), QUAN 1
PLASTIC RIVET
(2005423)
QUAN 3
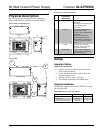
Hardware Hookup
WARNING: RISK OF SERIOUS PERSONAL
INJURY. Turn off power at the circuit breaker(s) prior to
installation. Installing with power on can result in serious
personal injury and damage to the device.
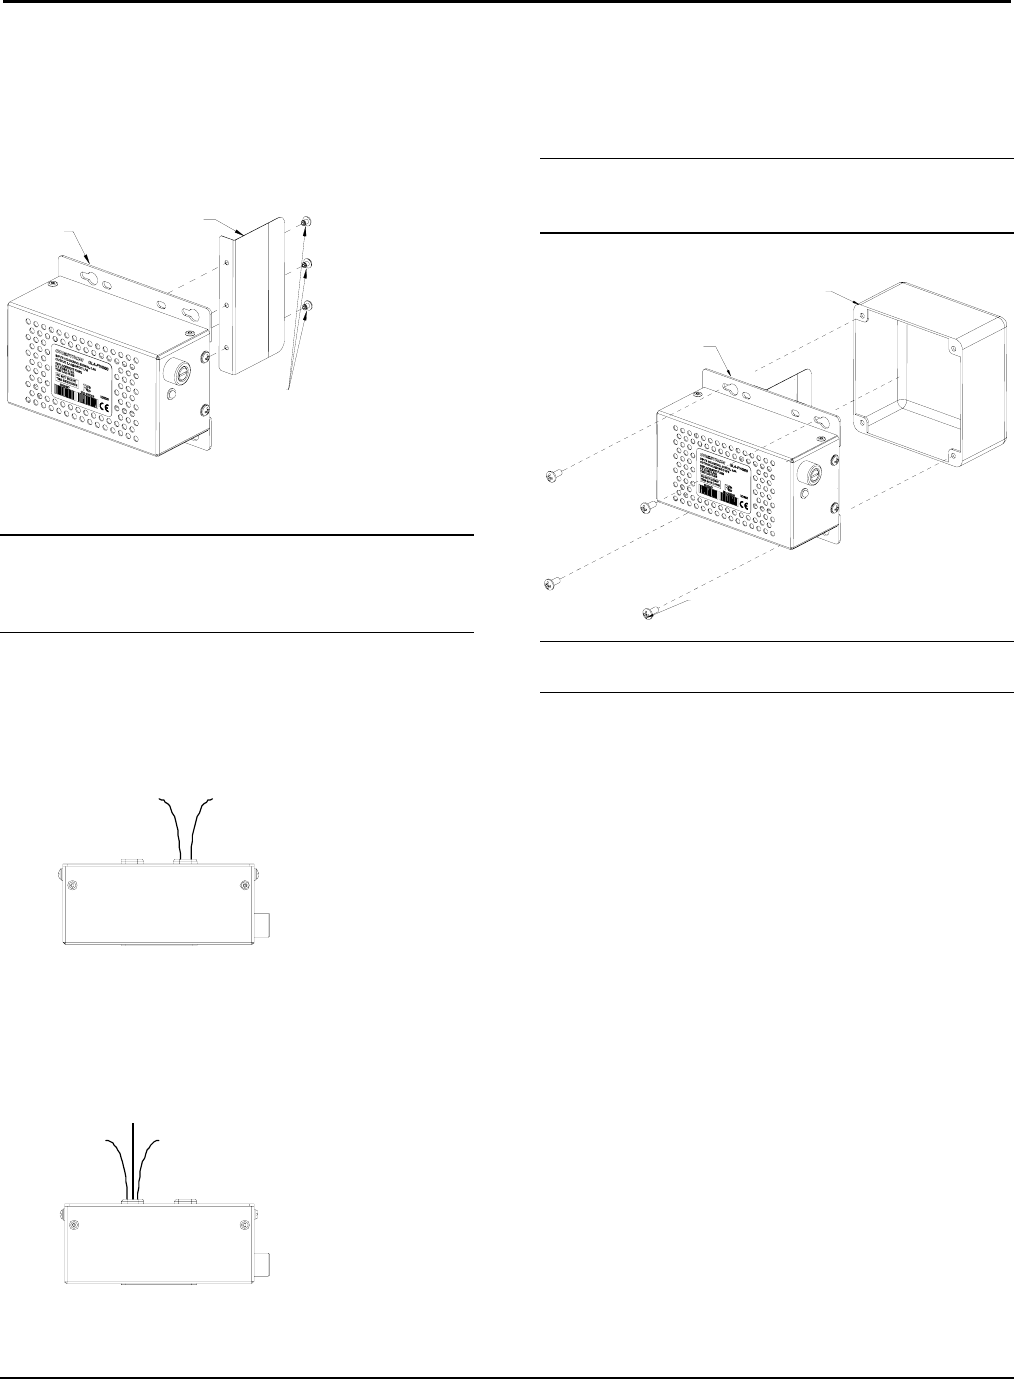
1. Use two twist-on wire connectors to secure the
Class 2 wiring to the Cresnet network as shown in
the following diagram.
Connect Class 2 Wiring (Partition and High Voltage
Wiring Removed for Clarity)
G
(BLACK)
24
(RED)
2. Use three twist-on wire connectors on the line
input wires to connect to the line power as shown
in the following diagram.
Connect High Voltage Wiring (Partition and Class 2
Wiring Removed for Clarity)
NEUTRAL
(WHITE)
GROUND
(GREEN)
HOT
(BLACK)
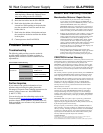
Installation
The GLA-PWS50 mounts over a 4” square or 2-gang
electrical box. Refer to the following diagram when
installing the GLA-PWS50.
NOTE: Ensure that the wires will not be pinched during
the installation process by pushing the wires into the
electrical box.
Install GLA-PWS50 (Wires Removed for Clarity)
GLA-PWS50
4X4 ELECTRICAL BOX (NOT SUPPLIED)
4X4 ELECTRICAL BOX COVER SCREWS,
(NOT SUPPLIED), QUAN 4
NOTE: The GLA-PWS50 should never be installed with
the label facing down.
• To ensure proper ventilation, do not cover the
ventilation holes on the front of the unit.
• Turn on the circuit breaker after completing
installation. The green LED will illuminate
Fuse Replacement
If the GLA-PWS50 does not power up when it is
connected to line power, the fuse may need to be replaced.
The fuse holder is located on the right side of the power
supply (next to the LED). To replace the fuse:
1. Disconnect power to the GLA-PWS50.
2. Use a flat-head screwdriver to push in the fuse
holder.
3. While pushing in the fuse holder, turn
screwdriver counterclockwise until the fuse
holder pops out.
4. Remove the fuse from the fuse holder and insert
a new fuse.
FUSE TYPE: 5 x 20mm 3.15A Time Lag
Installation Guide – DOC. 6734A Wall Mount 50 Watt Cresnet Power Supply: GLA-PWS50 • 5