Section 2
Mounting the Scanner
This section describes how to design the mounting for optimum scanner performance.
General Considerations
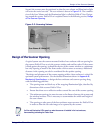
A typical system uses the scanner mounted inside a host enclosure, with an opening for
the scanning pattern to exit and read bar codes. The opening should be the size of the
scanner window at a minimum, but only exposing as much of the scanner as necessary.
Although the scanner has been designed to be impact-resistant, it is important to con-
sider the effect of the environment on the scanner. In particular, mounting should min-
imize the possibility of foreign objects coming into contact with the window's surface.
Such contact will damage the window over time and reduce the scanner's performance.
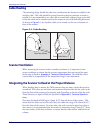
Consideration should also be given to the clearances needed for the scanner’s interface
cable (reference the following section, Cable Routing.
Mounting
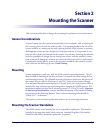
System integration is made easy with the OEM scanner's mounting features. The pri-
mary method of mounting to the host enclosure is to attach the scanner using the bot-
tom mounting features. Two threaded mounting features are located on the bottom of
the scanner for use with size M4 screws (4 mm x 0.7 pitch) of your required length.
One additional threaded mounting feature is located at the rear of the scanner which is
intended for host enclosures previously designed to integrate the VS800 scanner. The
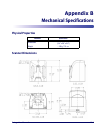
maximum installation torque for all mounting screws is 2.3 N-m [20 in-lb]. Appendix
B, Mechanical Specifications
, contains mechanical drawings of the scanner including
the position of the mounting features. Host enclosure mounting holes should be
4.3mm [0.17"] in diameter.
The scanner can be mounted upside down with no loss in scanning performance.
Mounting the Scanner Standalone
The OEM scanner is not intended for use in a standalone application. This model is
intended to be integrated inside a host enclosure. Standard Magellan 1100i models
should be used when a standalone application is required.
Integration Manual
2-1


