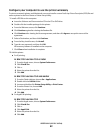
In Mac OS X version 10.4 and earlier
1 From the Finder desktop, choose Go > Applications.
2 Double-click the Utilities folder.
3 Locate and double-click Print Center or Printer Setup Utility.
4 From the Printer List, choose Add.
5 Choose the Default Browser tab.
6 Click More Printers.
7 From the first pop-up menu, choose AppleTalk.
8 From the second pop-up menu, select Local AppleTalk zone.
9 Select the printer from the list.
10 Click Add.
Installing the printer on a wired network
Use the following instructions to install the printer on a wired network. These instructions apply to Ethernet and fiber
optic network connections.
Before you install the printer on a wired network, make sure that:
• You have completed the initial setup of the printer.
• The printer is connected to your network with the appropriate type of cable.
For Windows users
1 Insert the Software and Documentation CD.
Wait for the Welcome screen to appear.
If the CD does not launch after a minute, then do the following:
a Click
, or click Start and then click Run.
b In the Start Search or Run box, type D:\setup.exe, where D is the letter of your CD or DVD drive.
2 Click Install Printer and Software.
3 Click Agree to agree to the License Agreement.
4 Select Suggested, and then click Next.
Note: To configure the printer using a static IP address, using IPv6, or to configure printers using scripts, select
Custom and follow the on-screen instructions.
5 Select Wired Network Attach, and then click Next.
6 Select the printer manufacturer from the list.
7 Select the printer model from the list, and then click Next.
8 Select the printer from the list of printers discovered on the network, and then click Finish.
Note: If your configured printer does not appear in the list of discovered printers, click Add Port and follow the
on-screen instructions.
9 Follow the on-screen instructions to complete the installation.
Additional printer setup
43


