Using Your Projector 19
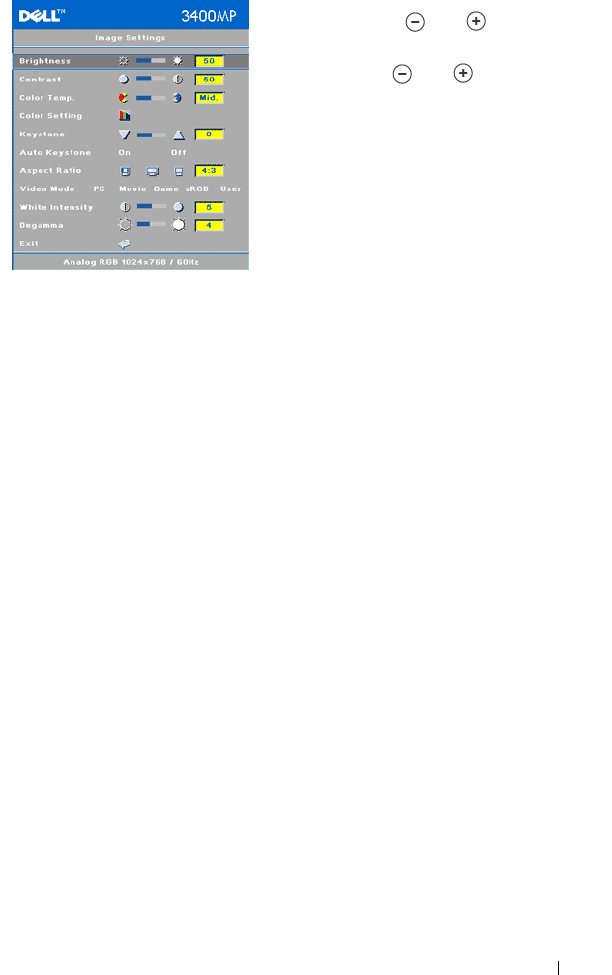
BRIGHTNESS—Use
and to
adjust the
brightness of the image.
C
ONTRAST—Use
and
to control the
degree of difference between the brightest
and darkest parts of the picture. Adjusting
the contrast changes the amount of black and
white in the image.
C
OLOR TEMP.—Adjust the color temperature.
The higher the temperature, the screen
appears more blue; the lower the
temperature, the screen appears redder. User
mode activates the values in the "color
setting" menu.
C
OLOR SETTING—Manually adjust red, green, and blue color.
K
EYSTONE—Adjust image distortion caused by tilting the projector (
±16 degrees).
AUTO KEYSTONE—Auto adjust the image distortion by tilting the projector.
A
SPECT RATIO—Select an aspect ratio to adjust how the image appears.
• 1:1 — The input source displays without scaling.
Use 1:1 aspect ratio if you are using one of the following:
– VGA cable and the computer has a resolution less than XGA (1024 x 768)
– Component cable (576p/480i/480p)
–S-Video cable
– Composite cable
• 16:9 — The input source scales to fit the width of the screen.
• 4:3 — The input source scales to fit the screen.
Use 16:9 or 4:3 if you are using one of the following:
– Computer resolution greater than XGA
– Component cable (1080i or 720p)
VIDEO MODE—Select a mode to optimize the display image based on how the
projector is being used: Movie, Game, PC, sRGB (provides more accurate color
representation), and User (set your preferred settings). If you adjust the settings
for White Intensity or Degamma, the projector automatically switches to User.
W
HITE INTENSITY—Setting 0 to maximize the color reproduction and 10 to
maximize the brightness.
D
EGAMMA—Adjust between 1 and 4 to change the color performance of the display.


