


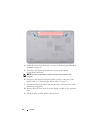

Wireless Mini-Card(s) 39
Replacing the Mini-Card(s)
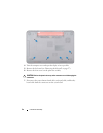
1
Follow the instructions in "Before You Begin" on page 9.
2
Remove the new Mini-Card from its packaging.
CAUTION: Use firm and even pressure to slide the card into place. If you use
excessive force, you may damage the connector.
CAUTION: The connectors are keyed to ensure correct insertion. If you feel
resistance, check the connectors on the card and on the system board, and realign
the card.
CAUTION: To avoid damage to the Mini-Card, never place cables under the card.
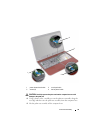
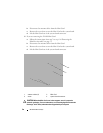
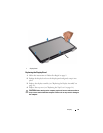
3
Insert the Mini-Card connector at a 45-degree angle into the system-board
connector.
4
Press the other end of the Mini-Card down into the slot on the system
board and replace the screw that secures the Mini-Card to the system
board.
5
Connect the appropriate antenna cables to the Mini-Card you are
installing. The following table provides the antenna cable color scheme for
the Mini-Cards supported by your computer.
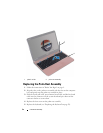
6
If you are replacing the WiMax/WWAN Mini-Card:
Replace the module cover (see "Replacing the Module Cover" on page 20).
7
If you are replacing the WLAN Mini-Card:
Connectors on the Mini-Card Antenna Cable Color Scheme
WLAN (2 antenna cables)
Main WLAN (white triangle)
Auxiliary WLAN (black triangle)
white
black
WiMax/WWAN
(2 antenna cables)
Main WiMaX/WWAN (white
triangle)
Auxillary WiMaX/WWAN (black
triangle)
white with gray stripe
black with gray stripe