


Dell
™
Latitude™ XT2 XFR Service Manual
Page 43 of 94
Version A00-01
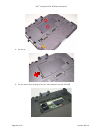
4.9 Palm Rest
WARNING: Before working inside your XT2 XFR, read the safety information that shipped with
your XT2 XFR. For additional safety best practices information, see the Regulatory Compliance
Homepage at www.dell.com/regulatory_compliance.
4.9.1 Removing the Palm Rest
1. Follow the procedures in Before Working Inside Your XT2 XFR.
2. Remove the
battery before continuing.
3. Remove the
hard drive before continuing.
4. Remove the
memory and mini-card cover before continuing.
5. Disconnect any antenna cables from the WWAN/WLAN adapters in the XT2 XFR.
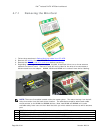
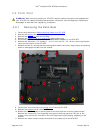
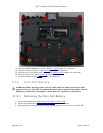
6. Remove the seventeen (17) screws (7 – 2.5 x 5-mm and 10 - 2.5 x 8-mm) securing the palm
rest from the bottom of the XT2 XFR.
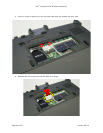
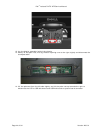
7. Release the two (2) locking tabs by pressing each toward the corner edge slightly and pushing
down to disengage the tabs from the chassis.
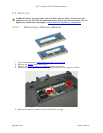
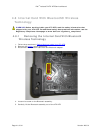
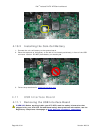
8. Flip the unit over and remove the
hinge cover from the XT2 XFR.
9. Remove the
keyboard from the XT2 XFR.
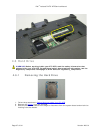
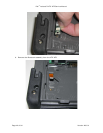
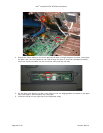
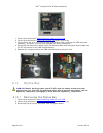
10. Rotate the LCD 90 degrees to allow access to the front and rear mounting plate screws.
Remove the 2 screws for the Hinge Cap and remove the hinge cap from the rear of the
system, then remove the 2 screws in the LCD Hinge securing the display assembly to the
chassis.
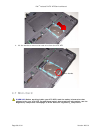
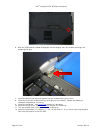
11. Remove two cable clamp to base screws and lift the clamp out of the XT2 XFR.