


Installing the Scanner 27
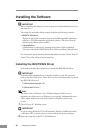
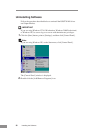
3. Select [Search for the best driver in these locations], and then clear the
[Search removable media (floppy, CD-ROM...)] check box. Select
[Include this location in the search], enter “D:\INF” (assuming that “D”
is the letter assigned to your CD-ROM drive), and then click the [Next]
button.
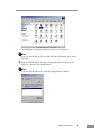
4. Although a message appears indicating that the driver “has not passed
Windows logo testing”, click the [Continue Anyway] button in the
[Hardware Installation] dialog box.
5. Click the [Finish] button on the Completing the Found New Hardware
Wizard screen.
IMPORTANT
• The DR-5010C is registered as “CANON DR-5010C SCSI” or “CANON
DR-5010C USB” in the Imaging Device directory.
• The displayed device name of the DR-5010C differs depending on the
connection, via SCSI or via USB. When having changed the connection, be
sure to let the PC recognize the scanner once again.
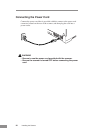
Turning the Power OFF
CAUTION
If the scanner will not be used for an extended period of time,
unplug the power cord for safety’s sake.
1.
Turn OFF the PC.
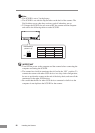
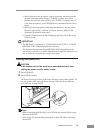
2.
Turn OFF the scanner.
The Power Switch is located on the lower left front corner of the scanner. To
turn the scanner OFF, press the Power Switch. When the Power Indicator
turns OFF, the scanner is OFF.
OFF
Note
• When connecting the DR-5010C via SCSI, turn the scanner ON first, and
then turn the PC ON.
• Wait at least 10 seconds before turning the scanner ON aftter it has been
turned OFF.