


13
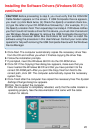
10 Click OK. If you have made any changes, you are prompted to save the
settings.
11 Click OK to save the settings and exit
12 Click OK and close the TCP/IP Control Panel (click File and scroll down
to click Close).
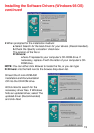
To configure TCP/IP on a Macintosh (continued):
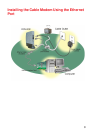
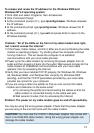
Connecting the Cable Modem
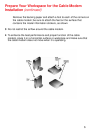
Install the cable modem according to the following procedure:
1 Power off the computer.
2 Unplug the computer from the electrical wall outlet.
3 Make these connections:
a Connect the coaxial cable to the cable modem’s CATV cable
connector. If you plan to have the cable connected to a television as
well as the cable modem, you must use a cable line splitter (not
included).
b Plug the cable modem’s power adapter into a wall outlet or surge
protector and into the cable modem’s power jack.
c Plug one end of the Ethernet cable into the cable modem’s Ethernet
port and the other end of the cable into the existing NIC.
4 Plug in the computer.
5 Power on the computer. When installation is complete, your setup should
resemble the illustration above. The modem is operating properly if the
Power, Cable, Status and ETH light emitting diodes (LEDs) are solid green
(lit and not blinking).
Troubleshooting the Ethernet Installation
The following troubleshooting procedures apply to the Ethernet installation.
Problem: “I cannot access my e-mail or Internet service.”
1 Verify that the Power, Cable, Status, and Eth light-emitting diodes (LEDs)
are lit and not blinking.
2 Check all connections:
a Make sure the coaxial cable is securely connected to the cable jack
on the back of the cable modem.
b Verify that the Ethernet cable is securely plugged into both the
cable modem and the computer.
c Make sure the power adapter is properly plugged into both the
cable modem and a wall outlet or surge protector.