


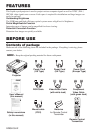

ENGLISH-9
ENGLISH
ENGLISH-9
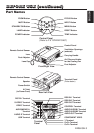
OPERATIONS
OPERATIONS
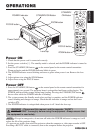
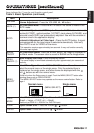
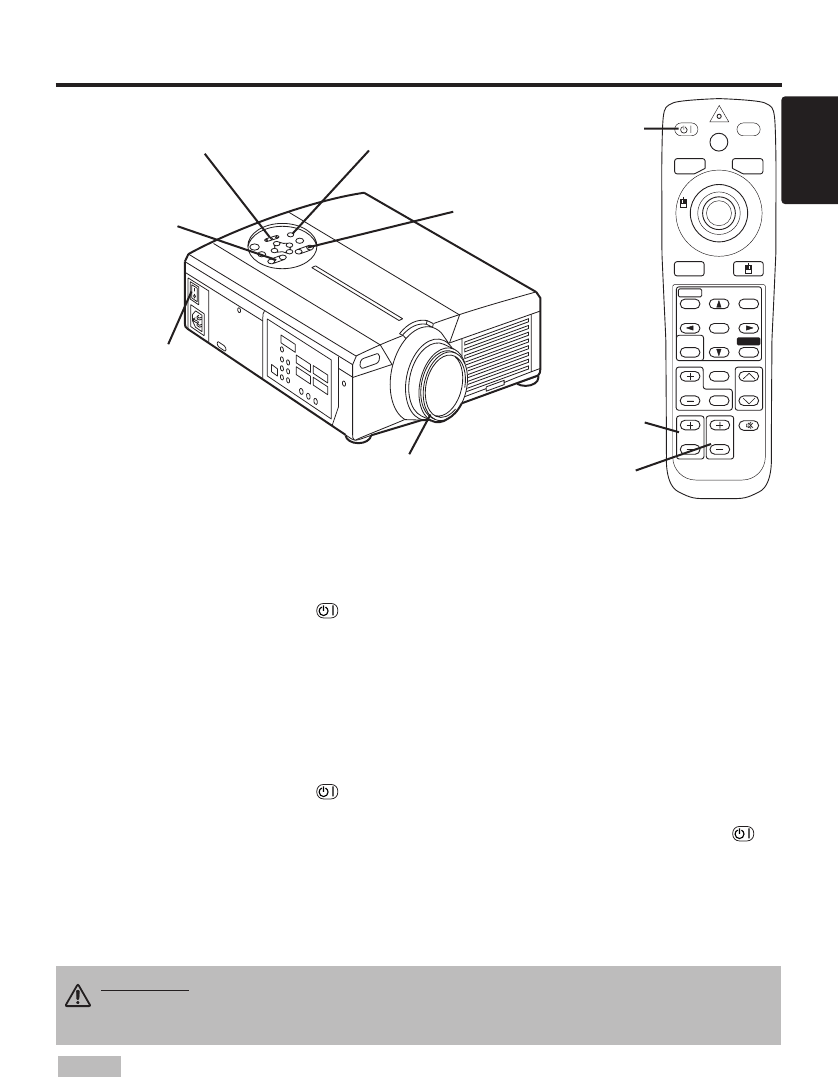
Power ON
1. Check that the power cord is connected correctly.
2. Set the power switch to [ | ]. The standby mode is selected, and the POWER indicator is turned to
orange.
3. Press the STANDBY/ON button on the control panel or the remote control transmitter.
Warm-up begins and the POWER indicator blinks in green.
4. The POWER indicator ceases blinking and turns to green when power is on. Remove the lens
cap.
5. Adjust picture size using the ZOOM button.
6. Adjust focus using the FOCUS button .
Power OFF
1. Press the STANDBY/ON button on the control panel or the remote control transmitter for
approximately two second. The projector lamp is extinguished and lamp cooling begins. The
POWER indicator blinks orange during lamp cooling. Pressing the STANDBY/ON button
has no effect while the POWER indicator is blinking.
2. The system assumes the Standby mode when cooling is complete, and the POWER indicator
ceases blinking and changes to orange. Check that the indicator is orange and set the Power
switch to [
O
].
3. The POWER indicator is extinguished when power is off. Attach the lens cap.
Power Switch
Lens cap
STANDBY/ON Button
POWER Indicator
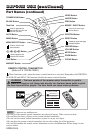
STANDBY/ON
LASER
VIDEO
BLANK
RGB
AUTO
MENU
MENU SELECT
POSITION
RESET
FREEZE
MAGNIFY
PinP
OFF
VOLUME
MUTE
ZOOMFOCUS
STANDBY/
ON Button
ZOOM button
FOCUS button
• Except in emergencies, do not turn off unless the POWER indicator is orange as it will
reduce the life of the projector lamp.
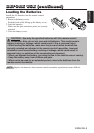
• To prevent any troble, turn on/off the projector when the computer or video tape recorder is OFF.
Providing a RS-232C cable is connected, turn on the computer before the projector.
NOTE
WARNING
• Please read this manual, and the separate “SAFETY
INSTRUCTIONS” thoroughly before using the equipment. Always ensure that
the equipment is used safely.
FOCUS button
ZOOM button