


ENGLISH-13
ENGLISH
ENGLISH-13
OO
OO
PP
PP
EE
EE
RR
RR
AA
AA
TT
TT
II
II
OO
OO
NN
NN
SS
SS
((
((
cc
cc
oo
oo
nn
nn
tt
tt
ii
ii
nn
nn
uu
uu
ee
ee
dd
dd
))
))
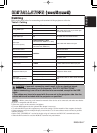
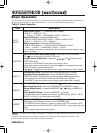
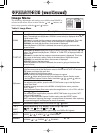
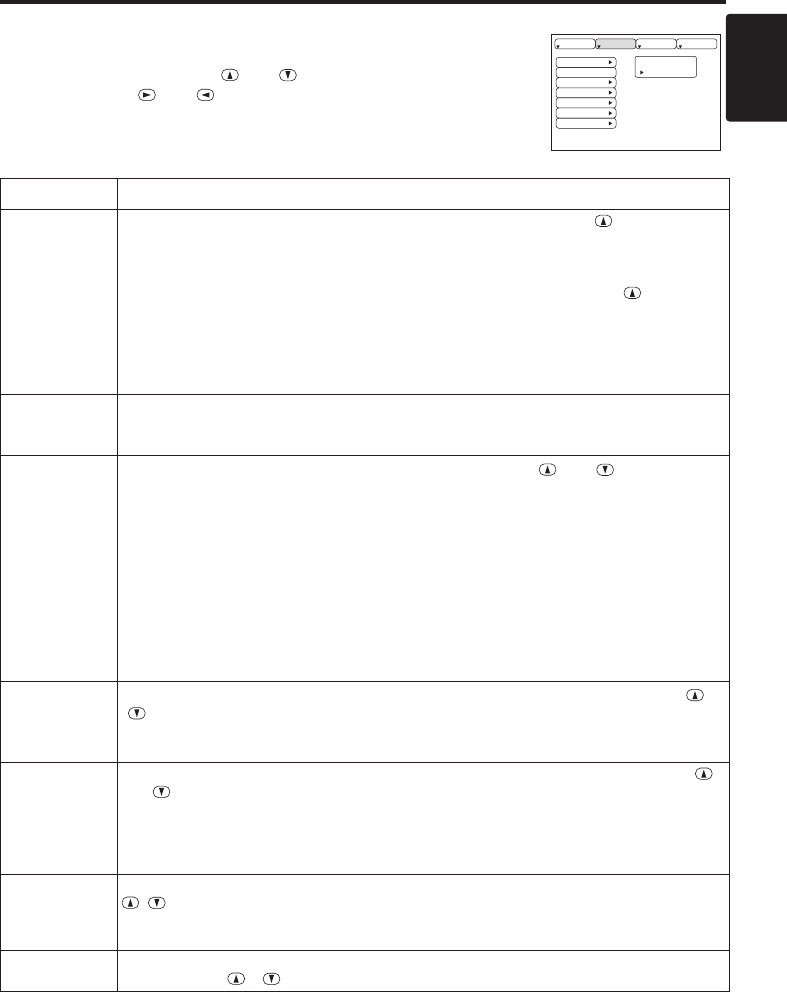
Input Menu
The following functions are available when INPUT is selected on the
menu. Select an item with the and buttons, and start or stop
operation with the and buttons. The function indicated (**) are
effective on video input mode only, not on RGB input mode, except in
the P.IN P. window on RGB input mode.
Table 5. Input Menu
EXECUTE
CANCEL
AUTO
RGB
VIDEO
VIDEO NR
Progressive
BLACK
HDTV
SETUP INPUT OPT.
IMAGE
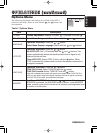
Item Description
AUTO
Automatic Adjustment at RGB Input: Select the EXECUTE with the button.
Horizontal position (H.POSIT), vertical position (V.POSIT), clock phase (H.PHASE),
and horizontal size (H.SIZE) are automatically adjusted. Use with the window at
maximum size in the application display.
Automatic Adjustment at Video Input: Select the
EXECUTE
with the button. A
signal type appropriate for the input signal is selected automatically when
EXECUTE
is selected automatically. Valid only when AUTO is set for VIDEO on the menu.
•
This operation requires approximately 10 seconds. It may not function correctly with
some input signals. Pressing the AUTO button in this case may correct this problem.
• This function is the same as for the AUTO function in Basic operation.
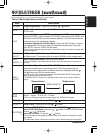
RGB
Displays RGB Input Frequency: Displays the horizontal and vertical sync signal
frequencies for RGB input.
• Valid only at RGB input.
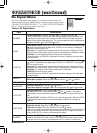
VIDEO (**)
Select Video Signal Type: Select the signal type with the and buttons.
Select NTSC, PAL, SECAM, NTSC4.43, M-PAL, or N-PAL as appropriate for the
input signal. The selection of AUTO enables and executes the function AUTO
(Automatic Adjustment at Video Input), except for the N-PAL input.
• Use this function when the image becomes unstable (eg. the image becomes
irregular, or lacks color) at VIDEO/S-VIDEO input.
• Automatic Adjustment requires approximately 10 seconds. It may not function
correctly with some input signals. Pressing the AUTO button in this case may correct
this problem except for the N-PAL input.
• For the COMPONENT VIDEO input, this function is not effective and the signal type
is distinguished automatically. Refer to the item HDTV of the OPT. Menu for the
signal of HDTV.
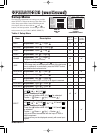
VIDEO NR
(**)
Set/Clear Noise Reduction Mode: Select the TURN ON / TURN OFF with the
/ button. When the TURN ON is selected, the NR mode is active and the noise on
screen of the video input will be reduced.
• Valid except for the HDTV.
Progressive
(**)
Select Progressive Mode: Select the mode suitable for the input signal with the
and buttons. The TV mode and the FILM mode convert the interlaced video signal
into the progressive signal. The FILM mode is adptable 2-3 Pull-Down system to the
conversion.
• Use this function to raise resolution, at the interlaced video input except HDTV
signal.
BLACK(**)
Set/Clear Black Enhancement Mode: Select the TURN ON / TURN OFF with the
/ button. When the TURN ON is selected, the black enhancement mode is
active and the contrast ratio of the screen for the video input will be raised by making
black level darker.
HDTV (**)
Select HDTV mode: Select the 1035i mode or 1080i mode suitable for the input
signal with the / button.