


Focusing Directions
The focusing ring, located on the camera head, is similar to that of a 35MM
SLR camera. Turn the focusing ring until you have obtained a clear image.
Note: The lens is permanently attached and may NOT be removed. Use
care when reaching the optimal focal distance and avoid forcing the focus
ring to extreme in either direction.
Lighting
The iris of the camera will automatically adjust the light for optimum
viewing conditions, depending upon the available room light. (If ambient
light is too dim, any auxiliary light shone on subject will work).
Never point your Dukane Camera 105 at direct sunlight as it will discolor
the filter over the camera chip and create an adverse picture.
Connecting the Microscope Eyepiece Adapter
The Dukane Camera 105 includes (1) 28 mm microscope eyepiece adapter
that allows your camera to be coupled with microscopes or other
instruments with eyepieces. This 28 mm adapter will fit most standard
microscopes.
1. Gently rotate the lens counter-clock-wise until it is
extended out for maximum magnification.
2. Slide the microscope adapter over the eyepiece of the
microscope.
3. Carefully slide the camera head onto the eyepiece
adapter, aligning the opening of the Dukane Camera 105
lens opening with the lip of the eyepiece adapter.
Warranty
To activate the one year limited warranty on your new Dukane 105 camera,
simply complete the warranty card enclosed and return it to us. The war-
ranty will not apply if your serial number has been removed or if the prod-
uct has been tampered with, disassembled or damaged by misuse,
accident, modification or unauthorized repair.
Thank you for purchasing the Dukane 105 camera
Introduction
The Dukane 105 Camera is a uniquely designed high resolution camera
with a pre-attached USB 2.0 cable. The camera receives its power directly
from your computer’s USB port. This high resolution digital camera
displays a sharp, clear image with 1280 x 940 resolution.
Your Dukane 105 Camera comes standard with the following:
• 28mm Microscope Adapter (the 34.5mm eyepiece adapter
is the actual diameter of the C-mount camera lens – fitting
most dissecting microscopes)
• Pre-attached 4 foot (122 cm) USB Cable
• Dukane 105 Camera Instruction Manual
• Applied Vision™ Disc
• Dukane Applied Vision Software™ Manual
Software Installation
Using the enclosed Applied Vision™ Software disc, install the software on
your computer. Please refer to the Dukane Applied Vision™ Software
Manual for more details and answering any questions that may arise
during installation. (NOTE: the CD must be kept in the CD-ROM for the
initial installation to be completed. Once the drivers are installed, you will
no longer need the CD for future use of the camera on that computer.) For
more details using the software, see the software instruction manual
included with the CD.
Connecting Camera
After installing the software, connect the USB cable of the Dukane
Camera 105 to the USB port in your computer.
Important Note: If it is necessary to use a remote USB hub, it must be a
power adapted hub, to ensure that the camera receives enough voltage.
Thank you for your purchase of a Dukane Camera 105!
IT’S READY TO GO!
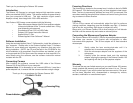
Focusing Ring
Power Indicator