


4
DX-E102
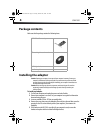
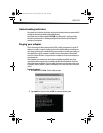
Package contents
Make sure that the package contains the following items:
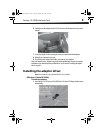
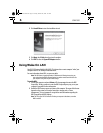
Installing the adapter
Caution: Opening your computer’s case may void your computer’s warranty. Contact your
computer‘s manufacturer before opening the case to make sure that you do not void the
warranty.You may need to have the adapter installed by your computer’s manufacturer or
an authorized computer technician.
Caution: Before touching any electronic components, make sure that you first touch an
unpainted, grounded metal object to discharge any static electricity stored on your
clothing or body.
To install your adapter:
1 Turn off your computer and unplug the power cord and all cables.
2 Remove your computer’s case cover. See your computer’s user guide for information
about removing the cover.
3 Locate an available PCI slot. PCI slots are usually white.
4 Remove the screw that secures the backplate (the small piece of metal that covers the
opening for the PCI card on the back panel of your computer), then remove the
backplate.
5 If the bracket on the DX-E102 is too tall to fit your computer’s cased, remove the
bracket and replace with the included half-height bracket.
DX-E102 Fast Ethernet adapter
CD containing drivers and manuals
Half-height bracket
Installation guide
DX-E102-ENG.fm Page 4 Tuesday, October 20, 2009 7:43 PM