


2
Important safety instructions
DX-WLOM2 Wireless Optical
Mouse
Important safety instructions
• Batteries may explode or leak if they are improperly recharged,
inserted, disposed of in fire, or mixed with used or different
battery types.
• There is a risk of explosion if a battery is replaced by an incorrect
battery type.
• Dispose of used batteries according to local regulations.
Contents of the package
The following items are in this package:
•Wireless optical mouse
•Radio Frequency: 27MHz
• Channels: 2
• Changeable Ids: 256
• USB receiver
•User guide
• 2 AA batteries
•Mouse driver CD
Setting up the mouse
This mouse uses a Smart Link. After you have finished linking the mouse
and receiver, you won't need to re-link the mouse, even if you change the
batteries or restart your computer.
Installing the hardware
Notes:
• Radio Frequency: 27MHz, 2 channel, 256 changeable IDs
• The mouse and receiver should be located no further than 3 feet
(1 meter) apart.
• After you press the receiver's Link button, you must complete the
mouse link process within fifteen seconds.
To install the receiver:
1 Turn on the computer.
2 Plug the USB cable into your computer’s USB port.
To select the mouse channel and install the batteries:
1 Find the two-channel switch located either at the back of the
wireless mouse or inside the battery compartment.
2 Select either channel 1 or 2.
3 Install the batteries into the battery compartment.
To link the mouse with the receiver:
1 Press the ID Link button on the receiver. You have fifteen seconds
to complete the mouse link process.
2 Press the ID Link button on the mouse. The mouse is linked with
the receiver, and the receiver’s LED indicator turns off.
3 If the mouse does not link with the receiver, repeat Steps 1-2.
Each channel has 256 changeable IDs. If you discover that the channel or
ID you selected is interfered by other nearby wireless mouse users,
change the Link ID by changing the channel and re-linking the mouse.
Installing the software
To install the driver:
1 Insert the enclosed CD into your computer’s disc drive.
2 Follow the on-screen instructions to install the driver.
3 Restart the computer. A Mouse Setting icon appears on the
Windows task bar after you successfully finish the installation.
To uninstall the driver:
1 Click the Add/Remove Programs icon in the Control Panel.
2 Click the mouse driver.
3 Click Remove.
Using the mouse
Using the Universal Scroll Wheel
The Universal Scroll Wheel is designed for four-way navigation. You can
view whole documents by turning the scroll wheel up, down, left, and
right.
Saving power
You can turn off the optical sensor to extend your battery life.
To turn off the optical sensor:
1 Press and hold middle of the scroll wheel, then press the
Connect/Link button on the bottom of the mouse. The optical
sensor turns off.
2 To turn the sensor back on again, perform the same actions.
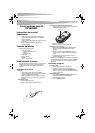
Channel switch
DX-WLOM2_FINAL2.fm Page 2 Thursday, May 11, 2006 3:30 PM