


110, 230, and 450 Series Steering Control Units
8
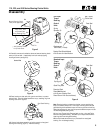
spring slots of spool and sleeve. Position centering springs on bench
so that extended edge is down and arched center section is together
(figure 15). Next, with spring notches facing sleeve, insert one end of
entire spring set into spring installation tool.
8 Compress extended end of centering spring set and push into
spool and sleeve assembly. Keep pressure on spring ends while
withdrawing installation tool and pushing forward on springs at same
time.
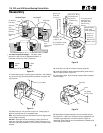
9 Center spring set in spring slots. Seat springs down evenly and
flush with upper surface of spool and sleeve.
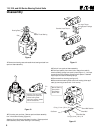
10 Insert pin through spool and sleeve assembly until pin is flush at
both sides of sleeve.
11 Position spool and sleeve assembly so that splined end of spool
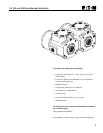
enters 14 hole end of housing first (figure 17).
Attention: While inserting spool and sleeve assembly into housing,
make sure parts do not tilt out of position. Push assembly gently into
place with slight rotating action, keeping pin nearly horizontal.
Bring spool assembly entirely within housing bore until parts are flush
atl 4 hole end of housing. To prevent cross pin from dropping into
discharge groove of housing, do not pull spool assembly beyond this
point. With spool assembly in this flush position, check for free
rotation within housing by turning assembly with fingertip force at
splined end.
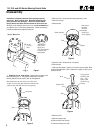
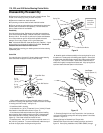
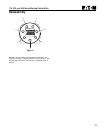
12 Place housing on clean lint free colth. Install 47,2 mm [1.86 in.] ID
seal in housing (figure 18).
13 Install two bearing races and needle thrust bearing as shown in
figure 18.
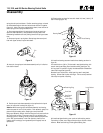
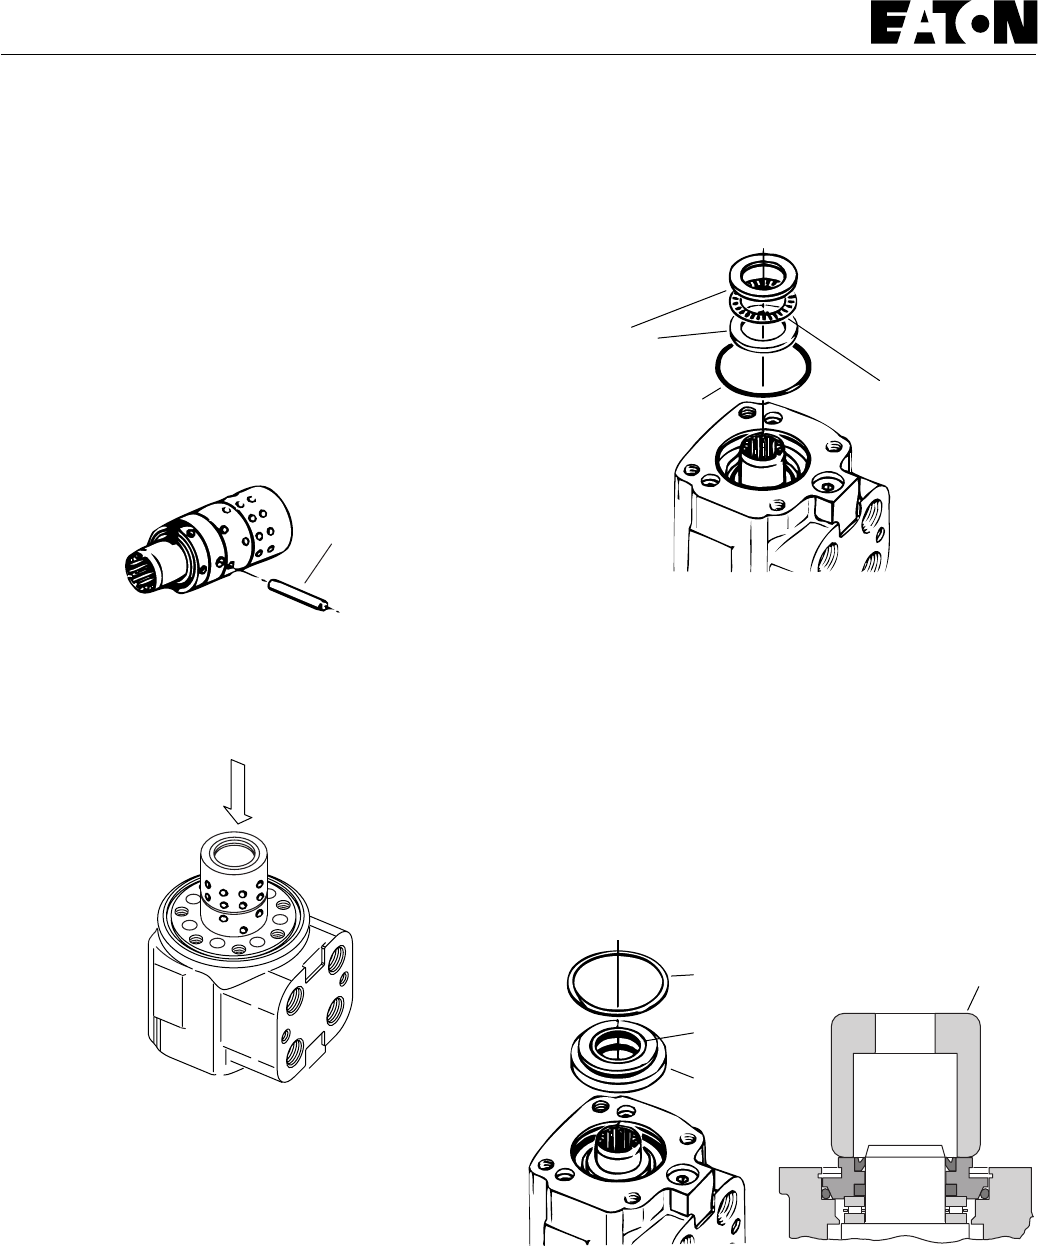
14 Install 24,9 mm [.98 in.] lD dust seal in seal gland bushing, with
smooth side of seal facing down towards bushing (see figure 19).
15 Low Input Torque Units: Lightly Iubricate seal before installation.
Install Teflon seal (see figure 20).
Standard Input Torque Units:
Install quad ring seal in seal gland
bushing. Smooth seal in place with finger. Do not use any seal that
falls freely into pocket of bushing.
Pin
Bearing Race
Seal
Needle Thrust Bearing
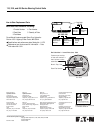
16 Install seal gland bushing over spool end with twisting motion.
Tap bushing in place, use a large socket (see figure 19)and a rubber
hammer. Make sure bushing is flush against bearing race.
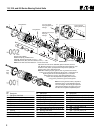
Disassembly
Figure 16
Figure 17
Figure 18
Figure 19
Retaining Ring Large Socket
Dust Seal
Seal Gland
Bushing
(with seals)