


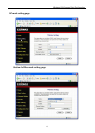

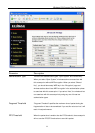

Wireless LAN Access Point Configuration
Channel 1-14 (Japan)
Channel 1-13 (Europe)
There are 14 channels available.
You should assign Channel Number in “AP mode”, “Station-Ad Hoc
mode”, “AP Bridge-Point to Point mode”, “AP Bridge-Point to Multi-Point
mode” and “AP Bridge-WDS mode”, “Universal Repeater mode”.
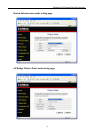
MAC Address If you want to bridge more than one wired Ethernet networks together
with wireless LAN, you have to set this access point to “AP Bridge-Point
to Point mode”, “AP Bridge-Point to Multi-Point mode” or “AP Bridge-
WDS mode”. You have to enter the MAC addresses of other access
points that join the bridging work.
WLAN MAC In “Station-Ad Hoc mode”, “Station-Infrastructure mode” and “Universal
Repeater mode”, this device need a WLAN MAC address to act as a
station to connect to other peer or access point. You also can click
“Clone MAC” button to let this device copy the MAC address of the PC
you are using to configure this device.
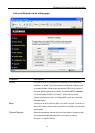
Root AP SSID In “Universal Repeater mode”, this device can act as a station to connect
to a Root AP. You should assign the SSID of the Root AP here.
Set Security In “AP Bridge-Point to Point mode”, ““AP Bridge-Point to Multi-Point
mode” and “AP Bridge-WDS mode”, you can click “Set Security” to add
encryption for the communication between the bridged access points.
This can protect your wireless network.
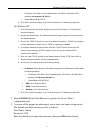
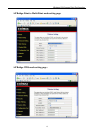
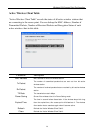
Associated Clients Click “Show Active Clients” button, then an “Active Wireless Client Table”
will pop up. You can see the status of all active wireless stations that are
connecting to the access point.
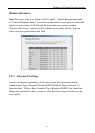
Wireless Site Survey When you use this access point as a wireless station for wired network
device to have wireless capability, you have to associate it will an
working access point. Click “Select Site Survey” button, then a “Wireless
Site Survey Table” will pop up. It will list all available access points near
by. You can select one access point in the table and it will join wireless
LAN through this access point.
Click Apply button at the bottom of the screen to save the above configurations. You can now configure
other advance sections or start using the Access Point.
17