3
X5470 Photo Matte Paper / Normal
Canon
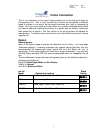
This manufacturer’s range of printers will typically give you the blackest artwork by
changing the settings to:
Paper to ‘Other Speciality Papers’
Quality to ‘Best’
and Ink to ‘Black and White’.
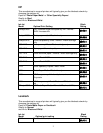
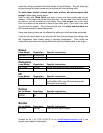
Ink Jet Black
Model Optimal print setting Rating
Smartbase
MP3605
Set to Paper and normal. Do not print on
transparency.
Pixma 1200 Set to Paper to transparency. In Printing
Preferences set Colour/Intensity to Manual and
increase intensity to maximum.
Common problems
Artwork has white flecks in it:
If you have white flecks in the black the light will get through and you will not get
enough depth to your stamp. White flecks are either because you didn’t enhance
the Brightness and Contrast on a scanned or downloaded image or because your
printer has been told to print on the wrong media (say paper instead of
transparency).
Artwork has white dotted lines through it:
One of your ink jet heads is blocked. Go into the properties and clean your heads.
Artwork has a red or blue hue to it:
Your artwork may have been printed using the colour or Cyan/Magenta/Yellow
cartridge. Although this may look black it will not work. You can see your black
artwork will have a blue or red hue when examined against the light.
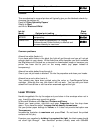
Laser Printers
Handle imageblack film by the edges only and store in the envelope when not in
use. Insert film either way round into printer.
In Microsoft Windows click Start and Printers and Faxes.
Select your laser printer, right-click and open Properties from the drop down
menu. If you have the option, increase the ink density to maximum.
Set your printer paper settings to Vellum, or if it does not provide that option use
Transparency.
Increase the resolution to maximum and press Print. Do not touch the printed
surface until fully dry.
Examine your negative by holding it up against the light, the black areas should
not allow light through. Low resolution printers (mostly ones with 600x600


