


4
1
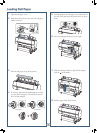
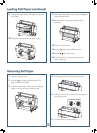
Remove any roll paper from the paper path. Make
sure the printer is turned on and the roll paper cover
is closed.
2
Press the Paper source button until the Sheet
icon appears on the LCD.
3
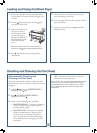
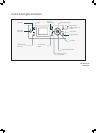
Feed the sheet down into
the paper slot until it
meets resistance. Make
sure the right edge of
the paper is straight and
aligned with the vertical
line on the roll paper
cover.
Note: If the sheet is more than 19 mil thick, you
need to use the Paper release (ePlaten) button.
4
Press . The sheet feeds into printing position
automatically.
5
Check the printer’s control panel and select the
correct media type, if necessary.
6
Print your page. After it has been printed, the sheet
stays in the printer.
7
To remove your print, press the button while
holding the sheet.
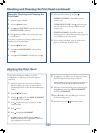
Loading and Using Cut Sheet Paper
Checking and Cleaning the Print Head
Automatically Checking and
Cleaning the Print Head
The printer automatically checks the nozzles and cleans
them if necessary. You can specify how often you want this
to happen.
1 Press the Menu button. PRINTER SETUP is
highlighted. Press again.
2 Press until AUTO NOZZLE CHECK is
highlighted, then press .
3 Select one of the following, then press OK:
• ON: PERIODICALLY—The printer periodically
checks its nozzles and runs a cleaning cycle if
necessary (default setting).
• ON: EVERY JOB—The printer automatically
checks its nozzles and runs a cleaning cycle if
necessary before each print job. This process
uses a very small amount of ink (and no paper)
and is useful if you are running large print jobs
unattended.
• OFF—The printer will not perform automatic
nozzle checks and cleaning cycles.
Note: You can also run nozzle checks and head cleaning
cycles from your computer using the Epson Printer
Utility3 (Macintosh
®
) or the Utility tab in your printer
driver (Windows). See your Printer Guide for more
information.