


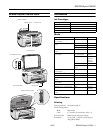
EPSON Stylus CX5200
8 - EPSON Stylus CX5200 10/02
7. Open the
File menu and click Select Scanner. You see this
window:
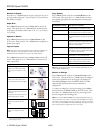
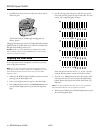
8. Select
EPSON TWAIN 5 and click Select. (You need to
perform steps 6 and 7 only the first time you run EPSON
Scan to File.)
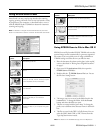
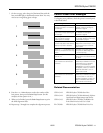
9. Click
Next on the File Save Settings screen. After a
moment, you see this screen:
10. EPSON TWAIN begins scanning your image in Full Auto
Mode. Wait for scanning to finish.
To stop the scan and select settings in manual mode, click
Cancel. Then click the Manual mode button on the next
screen. You see the EPSON TWAIN settings dialog box.
Note: For detailed information on EPSON TWAIN settings, click the
Help button.
11. When scanning finishes, EPSON Scan to File saves your file
to the location you selected. It’s ready to open in a
compatible image editing program, print, e-mail, or use as
you like.
Cleaning the Print Head
If your printouts are unexpectedly light, or dots or lines are
missing, you may need to clean the print head. This unclogs
the nozzles so they can deliver ink properly. Print head
cleaning uses ink, so clean it only if quality declines.
Note: You can also use a printer software utility to clean the print
head right from your computer. Select the
? or Help button on your
printer settings window for instructions on running the print head
cleaning utility.
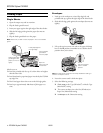
1. Make sure the EPSON Stylus CX5200 is turned on but not
printing, and the
Error light is off. (If the Error light is
flashing or on, you may need to replace an ink cartridge; see
page 8)
2. Press a
Menu button until you see Head Cleaning on the
LCD screen.
3. Press the
Color Copy button.
Cleaning takes about 30 seconds, during which the EPSON
Stylus CX5200 makes some noise and the On light flashes
briefly.
Caution: Never turn off the EPSON Stylus CX5200 while the On
light is flashing, unless the Stylus CX5200 hasn’t moved or made
noise for more than 5 minutes.
4. When the On light stops flashing, run a nozzle check to
confirm the print head nozzles are clean.
Make sure plain paper is loaded, press a
Menu button until
you see
Nozzle Check on the LCD screen, and press the
Color Copy button. The nozzle check pattern prints.
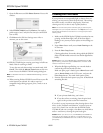
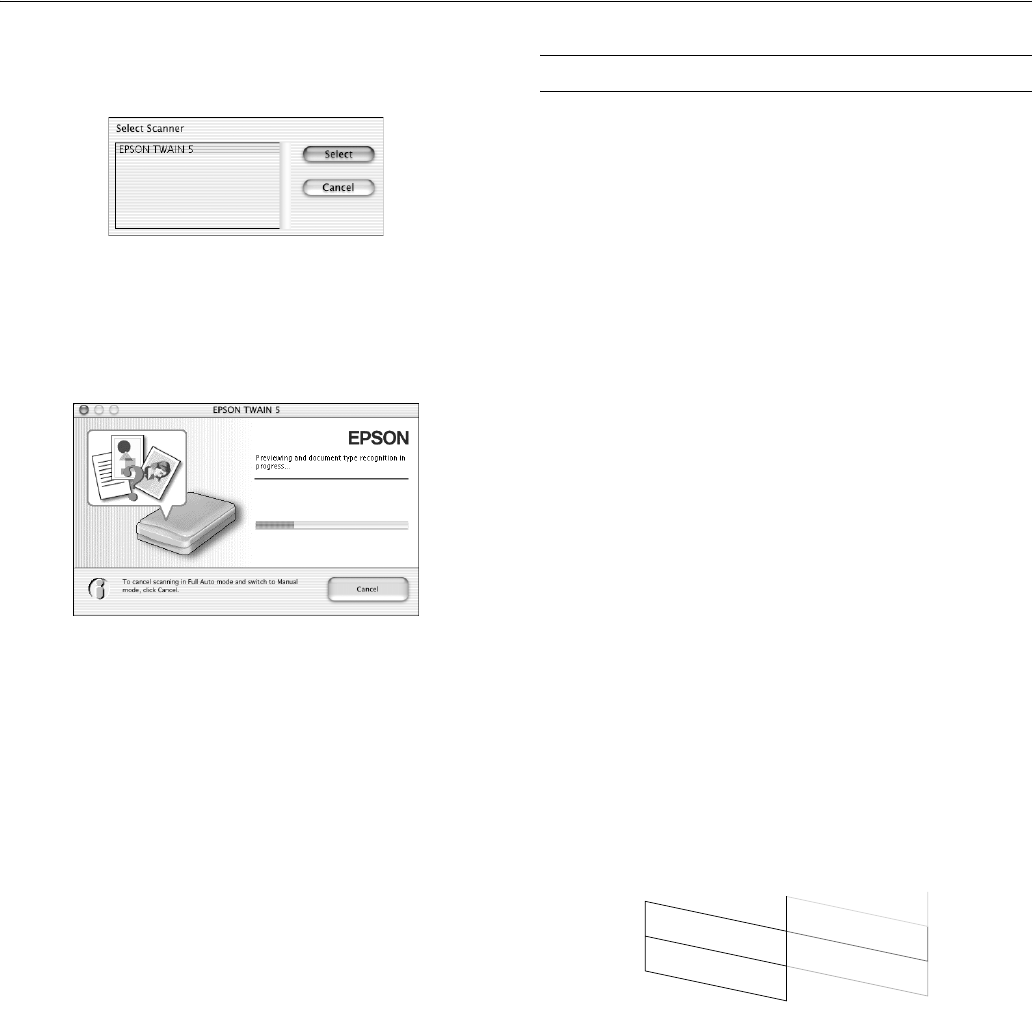
5. Examine the nozzle check pattern you print. It should look
something like this:
❏ If your printout looks okay, you’re done.
❏ If any dots or lines are missing, clean the print head
again; see the previous section for instructions.
If you don’t see any improvement after cleaning three or four
times, see the “Problems and Solutions” section of your on-
screen User’s Guide. You can also turn the EPSON Stylus
CX5200 off and wait overnight—this allows any dried ink to
soften—and then try cleaning the print head again.
Caution: When you don’t turn on your EPSON Stylus CX5200 for a
long time, the print quality can decline. It’s a good idea to turn on
your EPSON Stylus CX5200 at least once a month to maintain good
print quality.