


Creating an index tab label
1. Press .
2. Press or to select a size, then press .
3. Press or to select a value or enter
a number for the label length, then press .
(Maximum length is 5.0 inches (12.5 cm).)
4. Enter text.
The same text entered in step 4 is automatically entered
in the next line.
Creating labels for cables
Flag labels
1. Press .
2. Press or to select a flag type (Flag:
Hori., Flag:Vert. or Flag:Edge), then press .
3. Press or to select the length, then
press . (Maximum length is 5.0 inches (12.5 cm).)
4. Enter text.
Note: If you want to print more than one line of text, repeat
step 4 for each line (up to 4). When you are ready to print the
label, press .
Wrapped labels
1. Press .
2. Press or to select Wrap, then
press .
3. Press or to select a value or enter
a number for the label length, then press .
(Maximum length is 5.0 inches (12.5 cm).)
4. Enter text.
Note: If you want to print more than one line of text, repeat
step 4 for each line (up to 4). When you are ready to print the
label, press .
Creating a barcode label
1. Press + .
2. Press or to select a barcode format,
then press .
3. Make any necessary settings (width, ratio, etc.), then
enter the code.
Supported barcode formats: CODE39, CODE128, ITF,
CODABAR, UPC-A, UPC-E, EAN-8, EAN-13
Enter barcodes according to their standards.
Check the created labels with your barcode reader to
make sure they can be read correctly.
Printing labels
Previewing a label
Press .
Entered text scrolls across the display.
Note: Only the text and the length of the label can be
previewed. The actual print image will not show on the
display.
Printing a label
1. Press .
The length of the label and the number of copies
shows on the display while the label prints.
2. When printing stops, press the Cut button.
Warning: Do not press the Cut button until the tape
stops moving or the tape cartridge may be damaged.
Printing multiple copies
1. Press .
2. At the next screen, press the number keys or the
or buttons to enter the number of
copies (2-9).
3. Press . The length of the label and the number of
copies shows on the display while the label prints.
4. When printing stops, press the Cut button to cut
the tape. A cut mark will be printed between each
copy. Using scissors, cut along the marks to separate
each label.
•
•
•
Adjusting print density
1. When the power is off, press + .
2. Press .
3. Use the or buttons to adjust the print
density, then press .
Note: The default value (0) is recommended.
Attaching labels
1. Peel off the backing paper.
2. Place the label on the desired surface and press it
down firmly.
Cleaning
Exterior
Use a dry, soft cloth or, for stubborn stains, a moist cloth
that has been wrung dry.
Caution: Never use chemicals or solvents such as benzine,
thinner, or alcohol, or use a chemical duster. This could
damage your product.
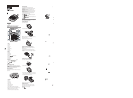
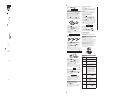
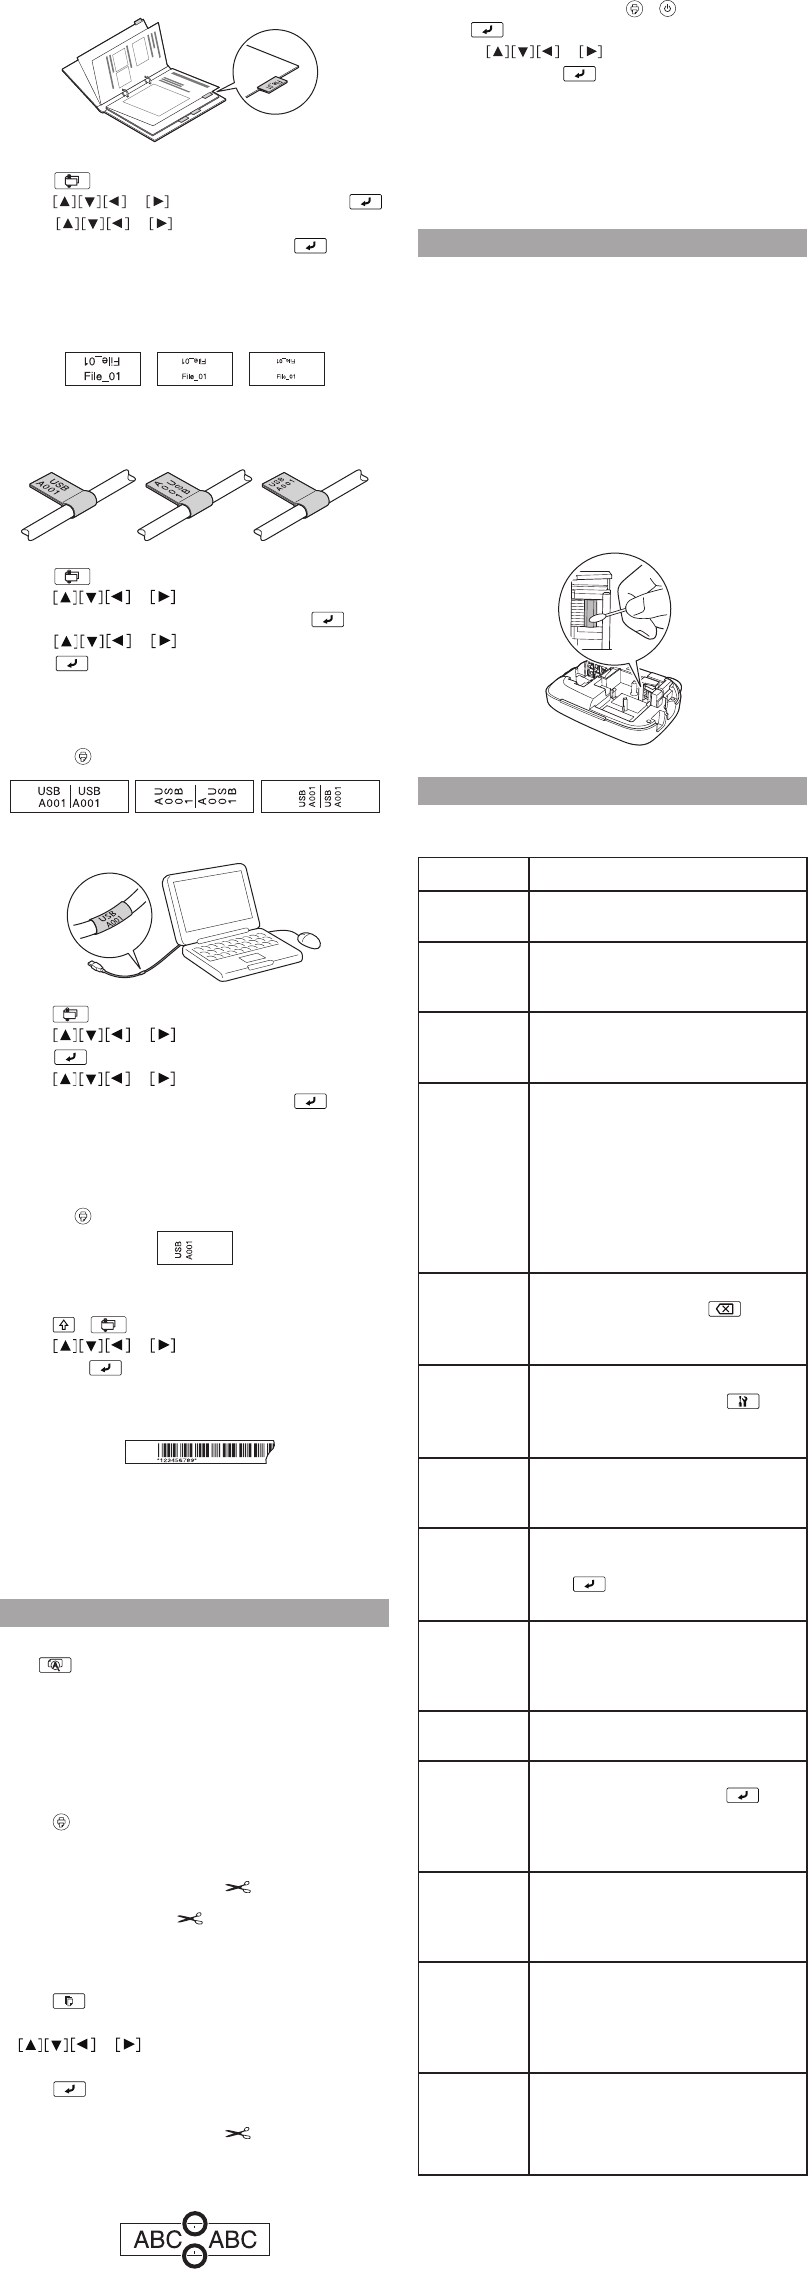
Cleaning the print head
If the print becomes faint or distorted, the print head may
need cleaning.
Remove the tape cartridge and clean the print head
using a cotton swab moistened with rubbing alcohol, as
shown.
Troubleshooting
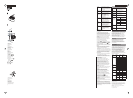
Messages
Message Problem and solution
Insert tape No tape cartridge is installed. Turn the
power off and install a tape cartridge.
Check tape! An incompatible tape cartridge
has been installed. Check the tape
cartridge.
Check tape
cartridge
An incompatible tape cartridge
has been installed. Check the tape
cartridge.
Check battery The batteries may be running out, the
batteries may be installed incorrectly,
non-alkaline batteries are being used
with alkaline batteries, or old and new
batteries are being used together. Turn
the power off and replace batteries
with new ones, or use the optional AC
adapter. Make sure new batteries are
installed correctly.
Too many
lines
You have exceeded the maximum
number of lines (4). Press to
delete the lines. (See “Breaking lines” in
“Editing text”.)
Text too long Entered text is too long for the
specified label length. Press and
adjust the Label length or make text
shorter.
Seq. num.
only 1
Sequence numbers have already been
set. You can only enter one sequence
number per label.
Text will be
deleted. OK?
When creating a label with a special
format, the current text will be deleted.
Press to delete the text and show
the special format.
Fill every digit Entered values for barcodes are
incorrect. Make sure the barcode
format is supported and that the
correct number of values is entered.
Load wider
tape
Unable to print on the current tape.
Use a wider tape.
Txt is too long
Continue?
Entered text is too long for the
specified label length. Press
to confirm and continue printing.
The label length will be adjusted
automatically.
Overheated! The print head is too hot. Turn the
power off and remove the tape
cartridge. Allow the print head to cool
for a while before trying to print again.
Cover open!
powering off
If you open the rear cover while the
power is on, this message displays
and the power turns off automatically.
Always turn the power off before
opening the rear cover.
Motor error! An error occurred in the motor
operation. Turn the power off, then
turn it back on. If the same message
appears, turn the power off and
contact Epson.