


2 - 8
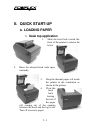
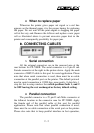
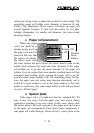
5. Power connection
The power connector is a 3 pin jack between the peripheral
connector and the parallel connector for PP-7000II and is at the
rightmost for PP-7000IIUSB. Either a Posiflex supplied power
adaptor or a printer power cable from a Posiflex POS system can
be connected to this connector to supply power for this printer.
During insertion of the power plug, be sure to hear the click to
obtain a firm contact.
CAUTION: Before doing the insertion or extraction of the
power plug, be sure to pull the outer sleeve of the
plug backward to release the internal latch.
Failure to do this could damage the power plug.
Such damage is considered as an artificial
destruction and is not covered by the warranty.
6. Power on
When all the above cable connections are made correctly,
you may connect your power adaptor to the wall outlet. Make
sure that the type of power cord and the voltage requirement of
the power adaptor meet the local power conditions. Now the
printer is ready for power on.
7. Self test
Press and hold down the feed button while turning the on /
off switch on. The printer will then perform a self test. A sample
slip of self test result is printed as in below sample. Please note
that both serial and parallel interfaces are indicated. That means
the printer is working on an autosensing and autoselect algorithm.