


- 4 -
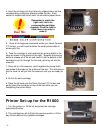
Before you Begin
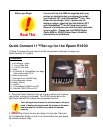
Quick Connect II™ Set-up for the Epson R1800
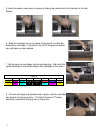
1.Check to ensure that you have all of the components necessary to setup your
Quick Connect II™ system.
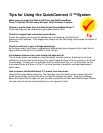
2. Place the Quick Connect II box on a level surface next to where
your printer is going to be placed. The R1800 should be on the
right hand side with the clamps facing towards the front.
Your ink bags should never be elevated above the print
head. Keeping the bags beside the printer at the same
level assures the ink delivery system will operate
properly.
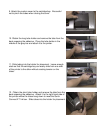
3. Remove the lid from the box and place it to the side. Place the
Ink Configuration Sticker on the Front of the bottom box just above
the white connector clips.
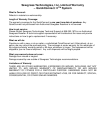
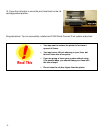
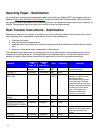
Components
1. Ink Cartridge + tubes
2. 1 x Long Tube Grip
3. 1 x Short Tube Grip
4. Chips
5. 8x SubliJet & ChromaBlast Ink Bags
(Not included with QC II)
6. Small primer bottle
7. Cartridge Cover (R1800 Only)
8. Ink configuration sticker
9. Rubber Gloves
10. Ink Box
11. ChromaBlast R1800 Driver CD
12. SubliJet R1800 IQ Driver CD
It is crucial that the OEM ink supplied with your
printer is installed before you attempt to install
your SubliJet IQ™ and ChromaBlast
TM
inks. This
allows for two things: First, it primes the ink
delivery system, ensuring that the SubliJet IQ™
and ChromaBlast
TM
inks will load more easily.
Second, it familiarizes you with the basic operation
of your printer. Please see the EPSON Stylus
Photo R800 or R1800 Printer User’s Guide for
instructions on installation.