


Epson STYLUS NX100/NX105/SX100/SX105/TX100/TX101/TX102/TX103/TX105/TX106/TX109/ME 300 Revision A
TROUBLESHOOTING Error Indications and Fault Occurrence Causes 30
Confidential
3.2.1 Troubleshooting by Error Message
The following tables provide troubleshooting procedures. Confirm the error message indicated on the LED or the STM3 screen on the PC’s display, and verify it in
the following list and the figures at the end of this chapter for the corresponding troubleshooting remedy. If some parts need to be replaced or repaired, make sure to
follow the procedure given in Chapter 4 “Disassembly / Assembly”.
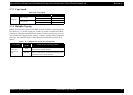
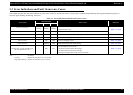
Table 3-2. Check point for Fatal error according to each phenomenon
Occurrence timing
CR position
Detailed phenomenon
Defective
unit/part name
Check point Remedy
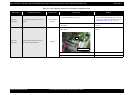
• Power on
• Anywhere
The Scanner Unit does not initialize when
the power is turned on.
Scanner Motor
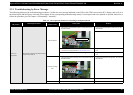
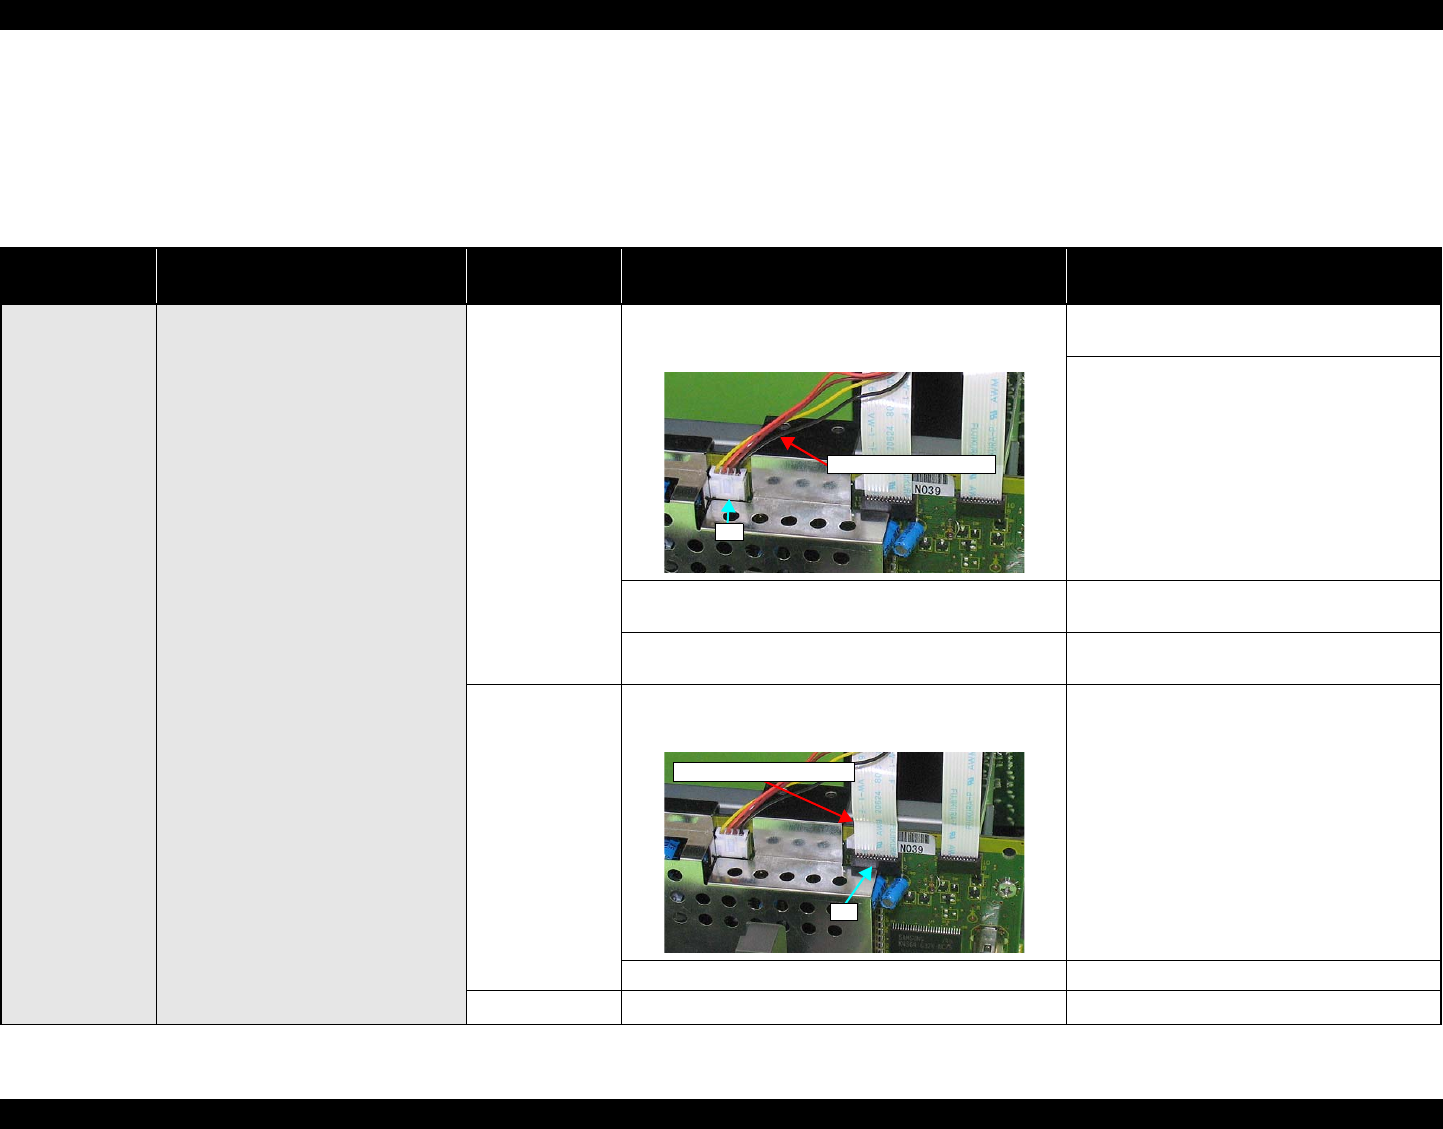
1. Check if the Scanner Motor cable is connected to J5 on
the Main Board.
1. Connect the Scanner Motor cable to J5 on the
Main Board.
2. Replace the Scanner Motor with a new one.
2. Check if the coil resistance of the Scanner Motor is
TBD Ω or by using the tester (refer to Table 3-13).
3. Replace the Scanner Motor Unit with a new
one.
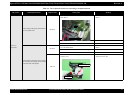
3. Check if the Scanner Motor Cable is damaged. 1. Replace the Scanner Motor Unit with a new
one.
Scanner Carriage
FFC
1. Check if the Scanner Carriage FFC is connected to J4 on
the Main Board.
1. Connect the Scanner Carriage FFC to J4 on the
Main Board.
2. Check if the Scanner Carriage FFC is damaged. 2. Replace the Scanner unit with a new one.
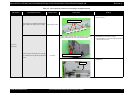
CIS Unit 1. Check if the CIS Unit is damaged. 1. Replace the CIS Unit with a new one.
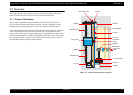
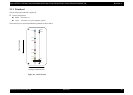
J5
Scanner Motor cable
J4
Scanner Carriage FFC