


Switching Between Image
Sources
Press the Search button (remote
control), one of the
Source buttons
(remote control), or the
Source
Search button (projector).
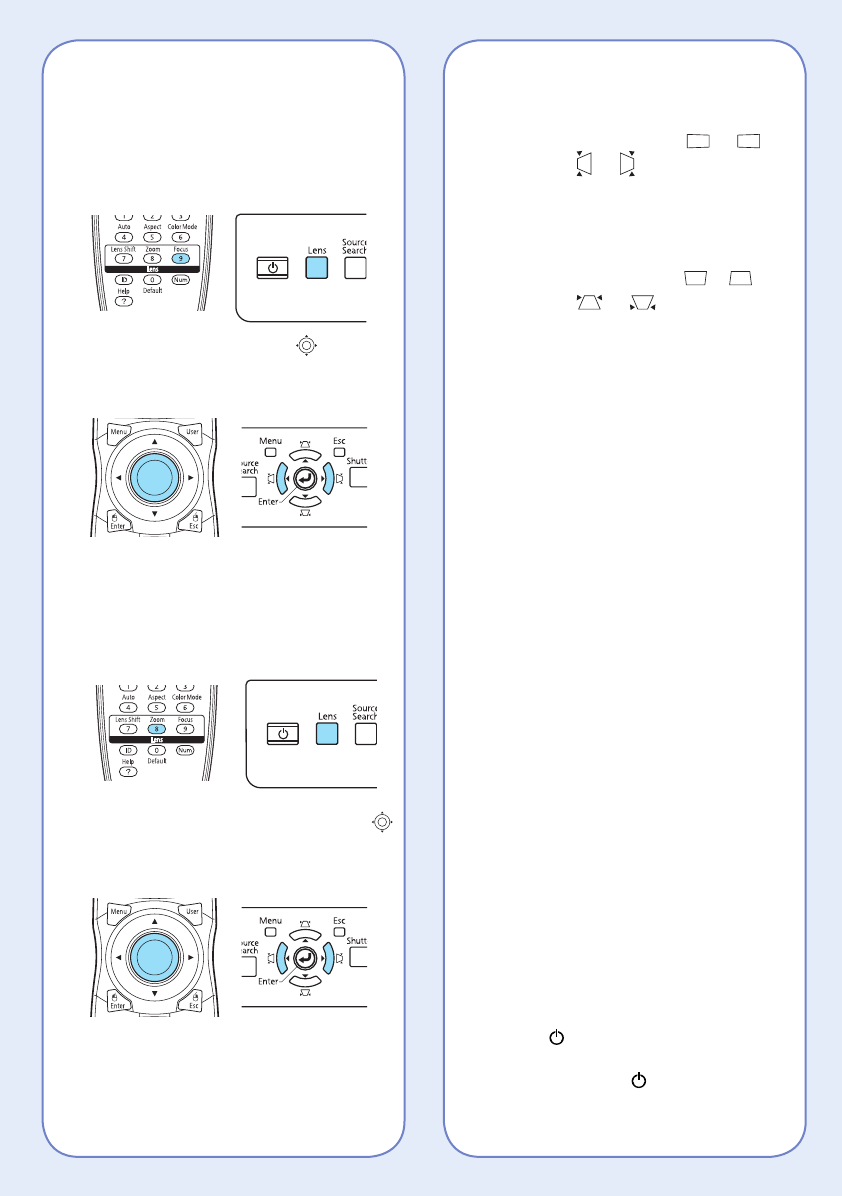
Adjusting Image Position
Press the Lens Shift button (remote
control) or Lens button (projector)
until Adjust Lens Shift is displayed
on the screen.
To adjust the position, use the
button (remote control) or the arrow
buttons (projector).
Press the button repeatedly to make
fine adjustments. Press and hold the
button to make larger adjustments.
If the projector is on a table, you can
level the image by turning any of the
projector’s adjustable feet.
Correcting Image Shape
• If your image looks like or ,
press the or button on the
projector to correct it. You can also
use the remote control to correct
the image shape. See the online
User’s Guide.
• If your image looks like or ,
press the
or button on the
projector to correct it. You can also
use the remote control to correct
the image shape. See the online
User’s Guide.
• If your image is uneven on all
sides, you can use Quick Corner
®
to adjust the shape. See the online
User’s Guide.
Changing the Aspect Ratio
Press the Aspect button on the remote
control to change the aspect ratio.
For images input through the
Computer port, select
Normal to
automatically resize the image.
Making Other Image
Adjustments
For help on using the projector’s
features (such as Color Mode and
Super-resolution) to improve the
image quality, see the online projector
manuals. You can also view information
on how to adjust the image color,
position, and edges (Edge Blending)
when projecting from multiple
projectors to create one seamless
widescreen image.
Turning the Projector Off
Press the power button to turn
the projector off. At the confirmation
message, press the
power button
again.
Turning the Projector On
1. Turn on your computer or image
source.
2. Remove the lens cover.
3. Press the
power button. After
the power light stays green, the
projector is ready.
Note: If the Direct Power On function is
enabled, you can turn the projector on
without pressing the power button;
just plug it in or flip the switch controlling
the outlet to which the projector is
connected. To turn on this feature, see
the online User’s Guide.
4. If your image does not appear, see
“Switching Between Image Sources”
or “Troubleshooting.”
Changing the Language of
the Projector Menus
The default language of the projector’s
menu system is English, but you can
change it as necessary.
1. Press the
Menu button to acess the
projector’s menu system.
2. Select Extended and press Enter.
3. Select Language and press Enter.
4. Select your language and press
Enter.
5. When you’re done, press Menu
to exit.
Where to Get Help
Manuals
For more information about using
the projector, click the icons on your
desktop to access the online manuals
(requires an Internet connection). If
you don’t have icons to the manuals,
you can install them from the projector
CD or go to the Epson
®
website, as
described below.
Internet support
Visit epson.com/support (U.S.) or
www.epson.ca/support
(Canada)
where you can download utilities
and documentation, get FAQs and
troubleshooting advice, or e-mail
Epson.
Speak to a support representative
To use the EPSON
®
PrivateLine
®
Support service, call (800) 637-7661
and enter the PIN on the EPSON
PrivateLine Support card included with
your projector. This service is available
for the duration of your warranty
period. You may also speak with a
projector support specialist by dialing
(562) 276-4394 (U.S.) or (905) 709-
3839 (Canada).
Support hours are 6 AM to 8 PM, Pacific
Time, Monday through Friday and 7
AM
to 4
PM, Pacific Time, Saturday.
Days and hours of support are subject
to change without notice. Toll or long
distance charges may apply.
Purchase supplies and accessories
You can purchase screens and other
accessories from an Epson authorized
reseller. To find the nearest reseller,
call 800-GO-EPSON (800-463-7766).
Or you can purchase online at
www.epsonstore.com (U.S. sales) or
www.epson.ca (Canadian sales).
4122921 Rev.0 4122921 Rev.0 4122921 Rev.0 4122921 Rev.0
1-B C 1-B M 1-B Y 1-B K
Focusing the Image
Press the Focus button (remote control)
or
Lens button (projector) until Adjust
Focus is displayed on the screen.
To adjust the focus, use the button
(remote control) or the left and right
arrow buttons (projector).
Zooming the Image
Press the Zoom button (remote control)
or Lens button (projector) until Adjust
Zoom is displayed on the screen.
To reduce/enlarge the image, use the
button (remote control) or the left and
right arrow buttons (projector).
Note: If the Direct Power On function
is enabled, you can unplug the projector
or flip the switch controlling the outlet to
which the projector is connected instead.
To turn on this feature, see the online
User’s Guide.
With Epson’s Instant Off
®
technology,
you don’t have to wait for the
projector to cool down; just turn it off
or unplug it when you’re done.
Troubleshooting
If you see a blank screen or the
message No signal
• Make sure the power light on
the projector is green and not
flashing, and the lens cover is
removed.
• Make sure the cables are
connected correctly. See the
online User’s Guide.
• You may need to change the
image source. See “Switching
Between Image Sources.” (Also
make sure the source device is
turned on.)
If the projector and the notebook
don’t display the same image
Windows
Press the function key on your
keyboard that lets you display on an
external monitor. It may be labeled
CRT/LCD or have an icon such as
. You may have to hold down the
Fn key while pressing it (such as Fn +
F7). Wait a moment for the display to
appear.
Mac OS
®
X
Open
System Preferences and select
Displays. Select the VGA Display or
Color LCD option if necessary, then
click the Arrange or Arrangement
tab, and select the Mirror Displays
checkbox.