Escient
6640 Intech Blvd., Indianapolis, Indiana 46278
Phone: 800-372-4368 Press "3” For Support
Hours: Monday - Friday 9:00am - 7pm EST
Fax: 317-616-6790
www.escient.com
Email: support@escient.com
Document Number: M51002-02A1
November 2006
ZP-1
Network Music Player
Quick Setup
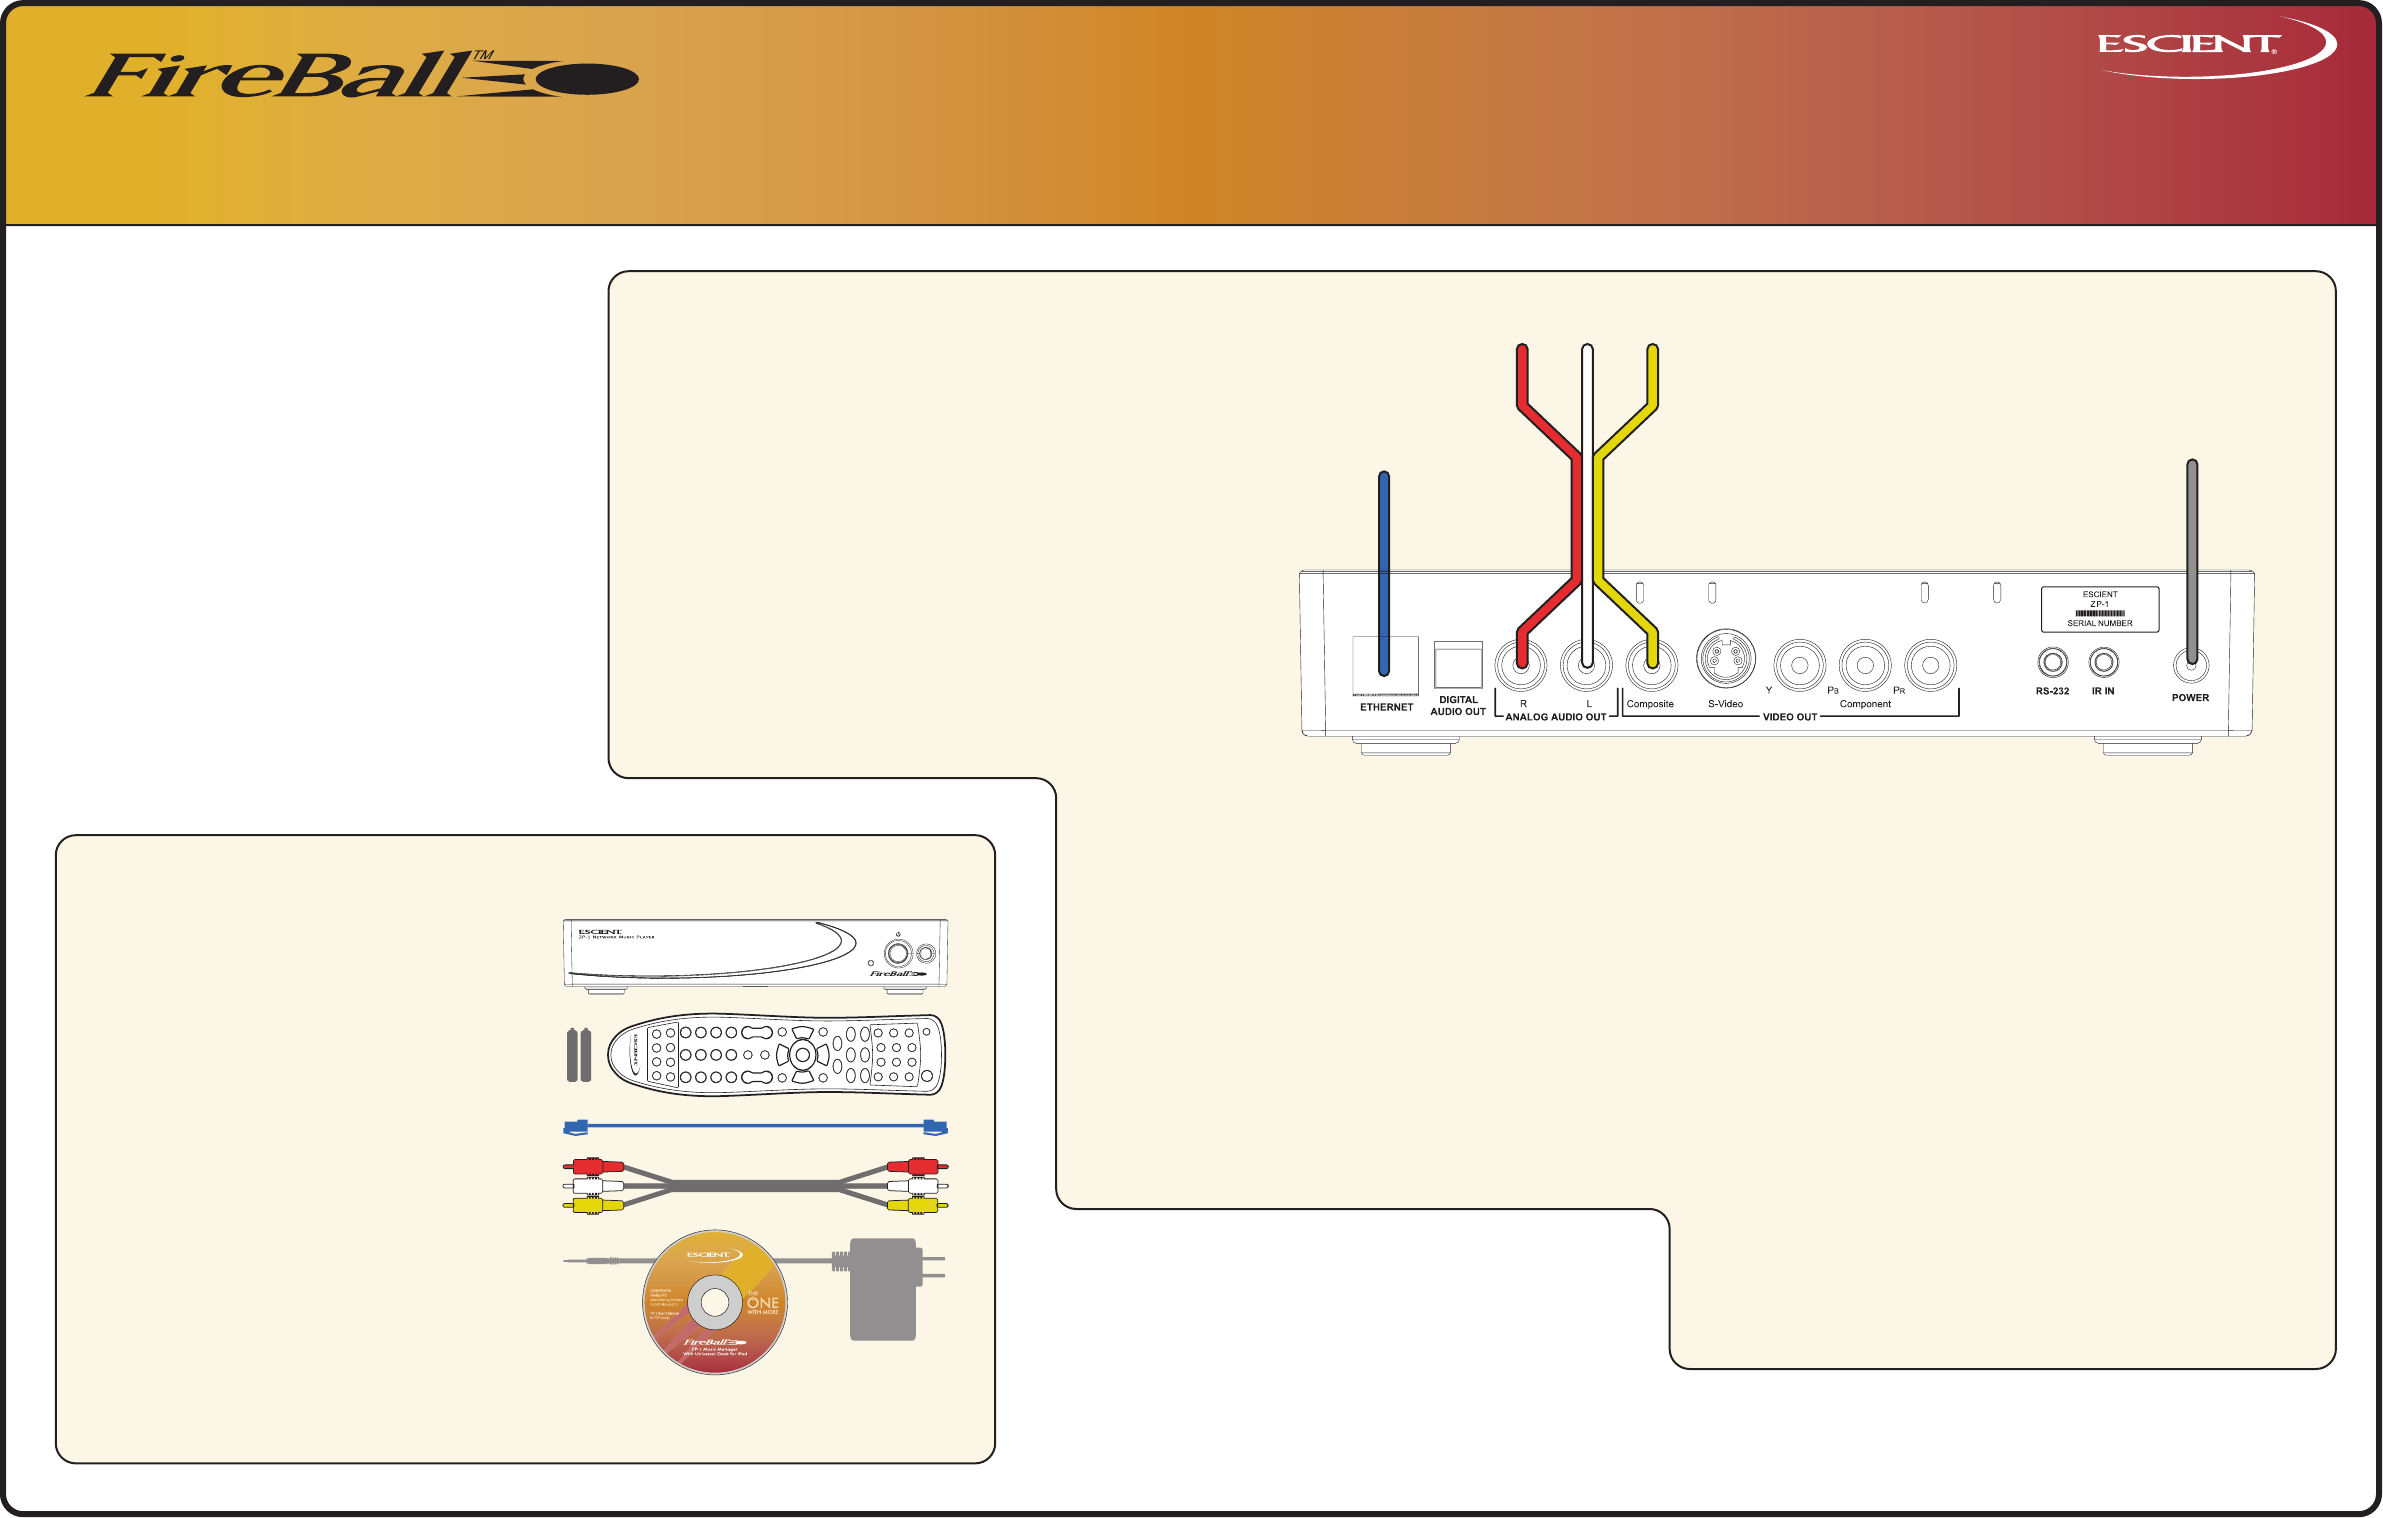
2 Connect the FireBall ZP-1 to your TV or A/V Receiver
A) Locate the included three wire composite video (yellow) and analog
audio (white and red) cable.
B) Connect the LEFT and RIGHT audio connectors (white and red) to the
ANALOG AUDIO OUT jacks on the back of the ZP-1. Connect the
video connector (yellow) to the Composite VIDEO OUT jack on the
back of the ZP-1.
C) Connect the other end of the cable to an available set of ANALOG
AUDIO IN
and COMPOSITE VIDEO IN jacks on the back of your TV
or A/V Receiver.
Note: You may use optional s-video or component video cables and optical
digital audio cables for the best picture and sound quality. Contact your
Escient dealer for more information.
AUDIO VIDEO INPUTS on A/V RECEIVER OR TV
HOME NETWORK (LAN)
POWER ADAPTER
1 Unpack Your New FireBall ZP-1
• FireBall ZP-1
• Handheld Remote
• Two AAA batteries
• Ethernet Cable
• 3 Wire Audio/Video Cable
• Power Adapter
• Escient Software and User’s Manual CD-Rom
• This Quick Setup Guide
A) Install the two AAA batteries into the remote
B) Make note of the serial number
(located on the back)
SERIAL NUMBER:______________________________
3 Connect the FireBall ZP-1 to Your Home Network
Note: The ZP-1 requires a home network and Internet connection to
browse and play music from a FireBall server, to play Internet radio
stations, and for general system maintenace.
A) Connect the included ethernet cable from FireBall's
ethernet jack to an open port on your Ethernet router.
Note: If you want to connect your FireBall ZP-1 to a wireless network
you will need to purchase an optional Ethernet to Wireless Bridge.
Please contact your Escient dealer for more information.
4 Power Up the ZP-1
A) Connect the included Power Adapter to the ZP-1.
B) Connect the Power Adapter to an AC outlet.
Action: The Standby LED on the front of the FireBall will begin to
flash RED during the power on cycle. When the LED turns solid RED,
the FireBall is ready for use. Press the power button on the front panel
or on the remote control. The LED will turn solid GREEN and video
will be displayed on the TV when the unit is on.
Note: You may have to press the "FB1" button on the remote to
configure it to control FireBall. Also be sure the TV or A/V receiver are
turned on and set to the correct input.
5 QuickStart and Product Registration
A) Use the remote control and follow the on-screen instructions.
MORE SETUP
GETTING STARTED
SYSTEM REQUIREMENTS:
A) Home ethernet network
B) Broadband Internet access for product updates and
product registration.
C) One of the following FireBall Servers installed on the
same ethernet network:
- FireBall FP-1 (with iPod docked)
- FireBall AVX or MX
- FirBall E or E2
- FireBall DVDM-300 or DVDM-552
- FireBall SE-80
D) TV or A/V receiver with video display


