Hardware Installation
This section will guide you through the installation of the motherboard.
The topics covered in this section are:
Preparing the motherboard
Installing the motherboard
Connecting cables
Preparing the Motherboard
Installing the CPU
Be very careful when handling the CPU. Hold the processor only by
the edges and do not touch the contacts on the motherboard or CPU.
Any physical damage to the motherboard pins will void the
warranty.
Use the following procedure to install the CPU onto the motherboard:
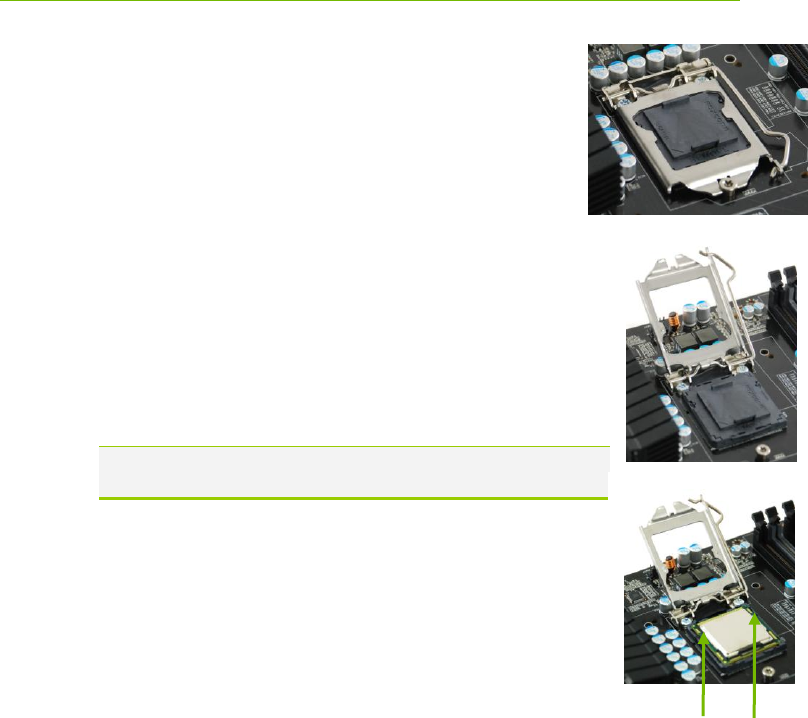
1. Unhook the socket lever by pushing
down
and
away
from the socket.
2. Pull the socket lever back and the load plate will automatically lift.
There is a protective socket cover within the CPU socket to protect
the socket when there is no CPU installed.
3. Remove the protective socket cover from the CPU Socket in a straight
up motion.
Note: You must save the protective cover so that whenever you
remove the CPU the pins will not be protected.
4. Align the notches in the processor with the notches on the socket.
5. Lower the processor straight down into the socket without tilting or
sliding it into the socket
6. Lower the load plate so it is resting on the CPU.
7. Pull back the socket lever again to ensure the load plate tip engages
under the shoulder screw cap.
8. Carefully close and latch the lever.
Align notches with notches
on the CPU


