


DAV101CM, DAS101CM • Installation and Operation
2-3
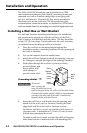
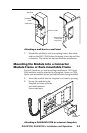
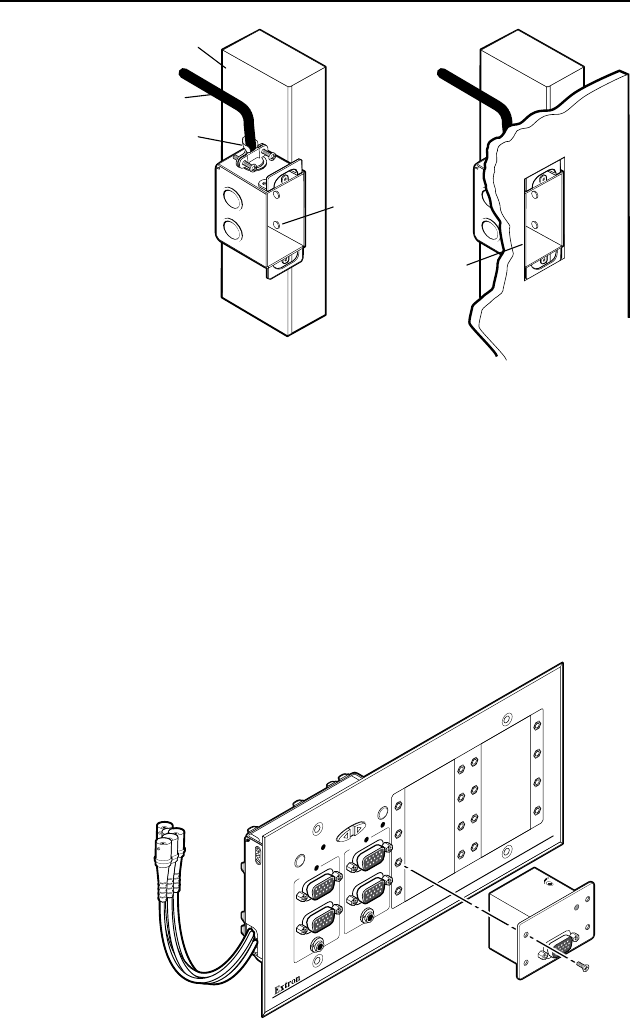
1-gang wall box.eps
Wall opening
is flush with
edge of box.
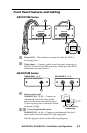
Installation
Cable
Cable Clamp
Screws or Nails
Wall Stud
Attaching a wall box to a wall stud
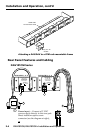
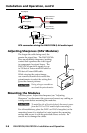
7. Mount the module(s) onto a mounting frame, then cable
and test the DAV/DAS before fastening it into the wall box
or bracket. The cables are inaccessible after installation.
Mounting the Module Into a Connector
Module Frame or Rack-mountable Frame
For wall, furniture, or rack mounting installations. DAV and
DAS modules must be attached to a faceplate, frame, or CPM
Series rack-mountable frame and cabled before being installed.
1. Insert the module into the faceplate's or frame’s opening.
2. Secure the module to the
faceplate or frame with the
provided machine
screws and nuts.
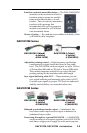
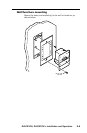
Attaching a DAS/DAV101CM to a device’s faceplate
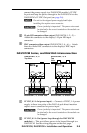
INPUT
SELECT
POWER
HORIZONTAL
POSITION
CIA112 COMPUTER INTERFACE
MONITOR
EMULATION
INPUT 1
LOCAL MONITOR OUTPUT
COMPUTER VIDEO INPUT
AUDIO INPUT
AUDIO INPUT
COMPUTER VIDEO INPUT
LOCAL MONITOR OUTPUT
INPUT 2
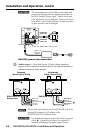
DAV101CM
VGA LINE DRIVER
VIDEO INPUT
POWER
PEAKING
(4) #4 - 40
Screws