


1 IPL M PDP-ES • Quick Start IPL M PDP-ES • Quick Start 32IPL M PDP-ES • Quick Start
Quick Start Guide — IPL M PDP-ES Quick Start Guide — IPL M PDP-ES, cont’d
Quick Start Guide — IPL M PDP-ES, cont’d
This Quick Start will briefly walk you through the installation
and initial operation of the IPL M PDP-ES card in conjunction
with your Pioneer plasma. For more detailed instructions, please
refer to the IPL M PDP-ES User’s Manual.
Installation of the IPL M PDP-ES
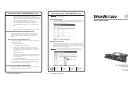
Removing the Pioneer communication ES card
Before installing the Extron IPL M PDP-ES interface card, the
Pioneer communication ES card shipped within the plasma must
be removed. The communication ES card is found in the
communication ES card slot of the connection panel, as shown in
the plasma below.
Pioneer Plasma Display
Pioneer ES Card Slot (communication)
Connection Panel
Figure 1 — Pioneer ES Card Slots
To remove the Pioneer communication ES card, do the following:
1. Ensure that the Pioneer plasma is turned off and
disconnected from the power source.
2. If the plasma display is laid with its screen side facing
down, ensure that it is on a flat surface with a blanket or
other soft material underneath.
CAUTION
Never rest the plasma in such a way that weight or pressure
is placed on the screen surface.
3. If the plasma display stand obscures the communication ES
card slot, remove or slide the stand away from the working
area.
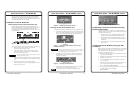
4. Remove the two side screws keeping the Pioneer
communication ES card in place, and gently pull the center
knob to remove the card.
Figure 2 — Removing the Pioneer ES card
Installing the Extron IPL M PDP-ES card
To install the Extron IPL M PDP-ES interface card, do the following:
1. Insert the IPL M PDP-ES gently and evenly in alignment with
the two rails visible inside the ES card slot. Press on the center
of the card faceplate to push the card securely into the slot.
Figure 3 — Inserting the IPL M PDP-ES card into the
communication slot
CAUTION
Be very careful when inserting the card. Do not use excessive
force, and push the card in as straight as possible; a crooked
entry could damage the card or the plasma.
2. When the card is seated securely in the slot, use the spring
loaded thumb screws on either end of the card faceplate to
secure the card in place.
Figure 4 — Securing the IPL M PDP-ES
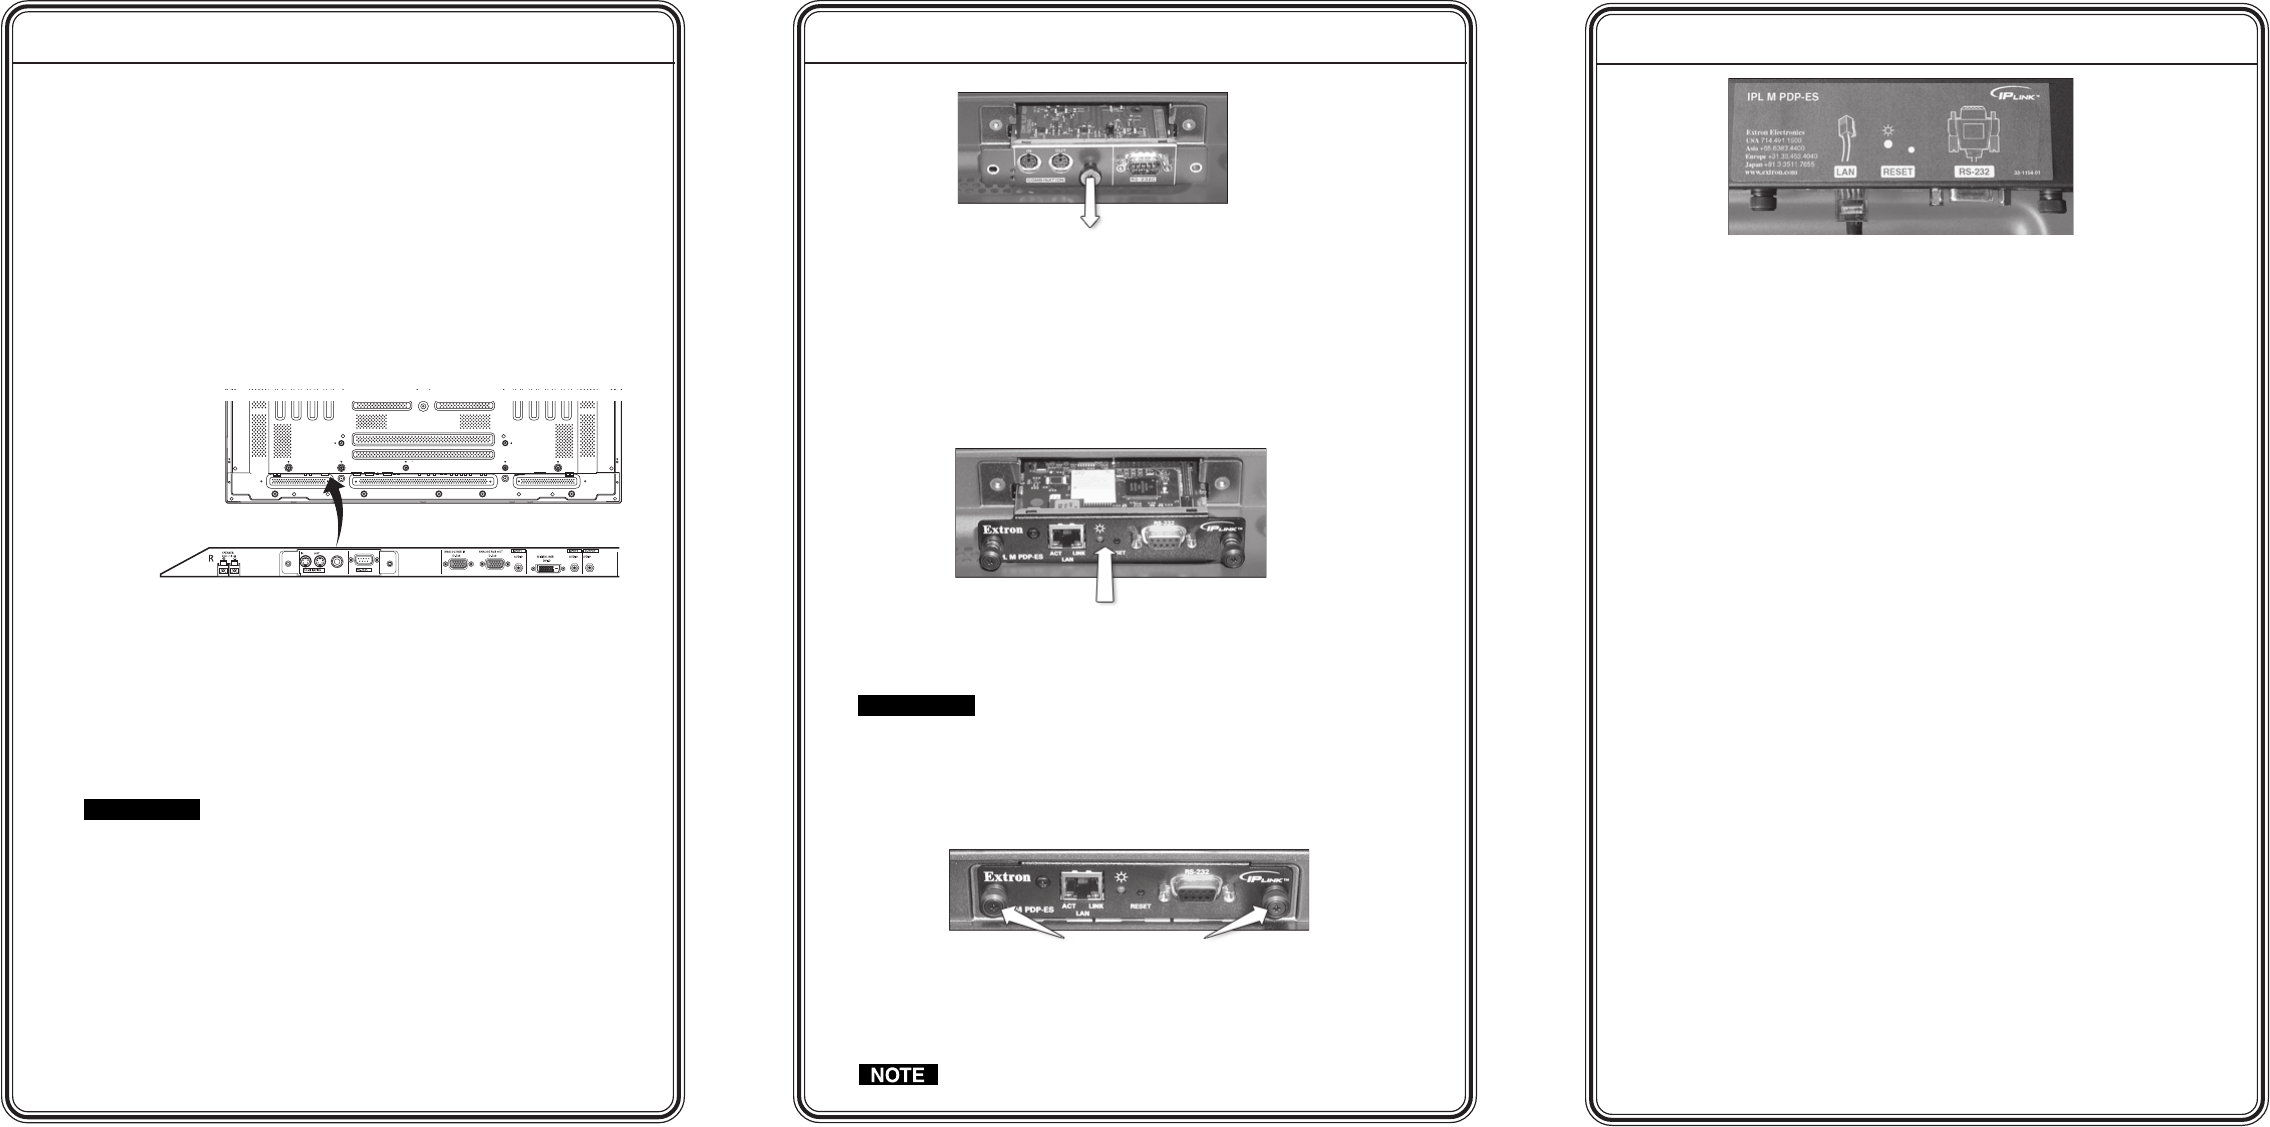
3. Affix the Extron IPL M PDP-ES sticker label over the existing
Pioneer label, as shown on the following page.
Insure that the sticker is placed flush over the Pioneer label.
Gently pull the center knob
Push gently
Thumb screws
Figure 5 — The IPL M PDP-ES sticker label
Establishing a Hardware Connection Through
the Ethernet/LAN Port
This type of connection is used to connect the IPL M PDP-ES
interface card to a LAN for remote control of the Pioneer plasma
and other connected devices.
1. Plug one end of a Cat 5, straight-through Ethernet cable
into the LAN port of the IPL M PDP-ES interface card.
2. Plug the other end of the Ethernet cable into a network
switch, hub, or router connected to an Ethernet LAN or to
the Internet.
3. Ensure that your PC is connected to the network switch,
hub, or router.
Configuring the IPL M PDP-ES Using the ARP
Command
Both your computer and the IPL M PDP-ES interface card must be
connected to the same LAN. Also, ensure that your PC is on the
same subnet mask as the IPL M PDP-ES card. Use ARP to
configure the IP address as follows:
1. Obtain a valid IP address for your IPL M PDP-ES card from
your network administrator.
2. Obtain the IPL M PDP-ES card’s MAC address (UID #) from
the label on its face panel.
3. Access the MS-DOS command prompt, then execute the
‘arp –s’ command.
Enter the desired new IP address and the MAC address (on
the face panel) for the interface card. For example:
arp –s 10.13.170.15 00-05-A6-00-0A-90
4. Execute a ‘ping’ command by typing your new IP address at
the command prompt. For example:
ping 10.13.170.15